Lab 14: Reports and Forms
Key Words:
queries, forms, form properties,
fields, identifier, primary key, foreign key, Record Source, Control Source, Row
Source, form wizard, navigation bar, button wizard, action, combo
boxes
See Wikipedia (http://www.wikipedia.org/) for a detailed
description of the key words.
Preparation
You must have completed Lab
13 before you start with this lab.
Objectives
-
Create a report for your database
- Create simple forms for artist names and musical styles.
- Create a more complex form.
- Add CDs to your database.
For this lab, you will use your CD database from Lab 13. You will write more
queries and build a graphical user interface to make it easier to view and enter
new data into your database.
Create a Report for your Database
- Create a
lab14 directory on dante. Copy
everything from your lab13 directory into your lab14
directory. In the new directory,
rename your lab13.mdb to lab14.mdb.
- Copy your
lab14.mdb to your local computer and open it with MS
Access (ignore any security warnings).
- We've got some information in our database, but we'd like a nicer way to
view it all, instead of just in the database tables. To do so we will
create a report.
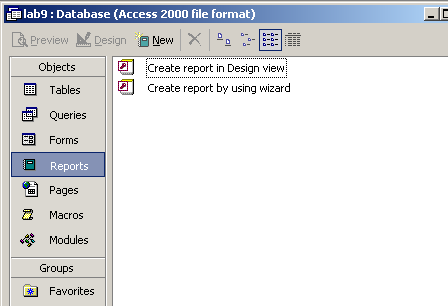
- Select Reports on the left side of
the database window and double click on Create
report by using wizard. The wizard will basically show you how to
create a table:
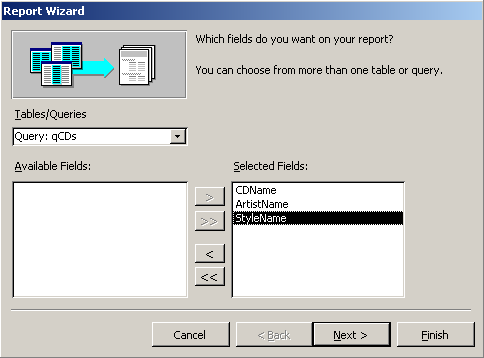
- Select the qCDs query and select all the fields, then hit Next.
- We'll view our data by
tCDs. You can experiment with different options later, if you
like.
- Don't add any grouping levels; just go to Next.
- Sort by ArtistName in Ascending order.
- Do a tabular layout and portrait orientation. Feel free to
experiment with different options later, if you like. Make sure the
checkbox to adjust field widths so all fields are on a page is checked.
- Select whatever report style you would like.
- Title your report CDs Report, and
select the option to Preview the
report.
- Voila! Admire your pretty report. If you feel like adjusting your
report later, right-click on it in the database window, and select Design View and change whatever you'd like
(for instance, you might want to change the ArtistName label to Artists and the CDName label to Album Titles.
Create Simple Forms for Artist Names and Musical Styles
- In this section you will create two forms that simplify the manipulation
of your artists and musical styles. When you deal with forms, you should keep
the following in mind:
- You can create a form using the design view or with the help of a Form
Wizard. You can modify the design in the design view and open a form to
view/enter data. It may be a good idea to first create the form with a
wizard and then adjust it in the design view.
- In the design view, you can right click on an item (or on the
background) and select Properties... to view and edit the properties
of that item or, if you click on the background, the properties of the
entire form. In the properties window that pops up, you should see
information about the item you right clicked on. If not, you can change the
item that is shown by using the drop down list at the top of the property
window.
- A form is normally based on a single table or a query. The table/query
the form is based on is called the form's Record Source and is an
important property of the Form. You can display the data in any field from
the Record Source in the form. Or the data from the Record Source can be
used to look up data in other tables. This is often used for drop down menus
and selection lists in the form.
- Each item in a form has many properties. Some of the more important are:
the Control Source (usually a field from the Record Source), the
Row Source (usually a table or query other than the Record Source),
the Visible indication (usually set to
Yes, but can be
No for primary and foreign keys that normally make no sense to
show), the Tab Stop and Tab Index (whose settings decide
if and when the item should be skipped or stopped at when a person press the
Tab key). In addition to these properties you have ones that
control the style of the item, such as its position, size and color.
Feel free to experiment and change the properties of your form and the
items in the form. If the form becomes messy, you can easily start over with a
new form. To start over normally takes less time than to fix a messed up form!
- Select Forms on the left side of the database window and double
click on Create form using wizard. The form wizard will guide you
through the process of creating a form:
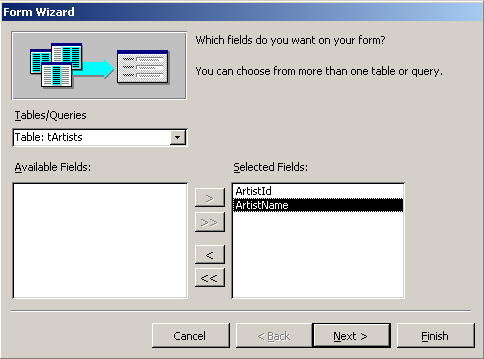
- Select the tArtists table. This is the Record Source of your form.
Select both the ArtistId and the ArtistName fields.
- Pick the
Columnar layout. This works for most forms.
- You can pick the standard form style, or whatever style you like.
- Give your form the title
fArtists for now. (The f is for
form.)
- Have the wizard open the form to view or enter information when it is
done so you can see how the form looks. The form can display one artist at a
time.
Your form should look similar to the following (your data may
vary depending on what information you have in your database.
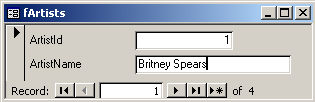
Note the navigation bar
at the bottom. With this you can go back and forth between your artists. The
 button can be used to enter a new artist into the table.
- With the form, it is easy to add a new artist and to change existing
artists. But what if you accidentally changed an artists name or really want
to remove an artist? Solve this by adding two buttons: one to undo changes and
one for removing an artist.
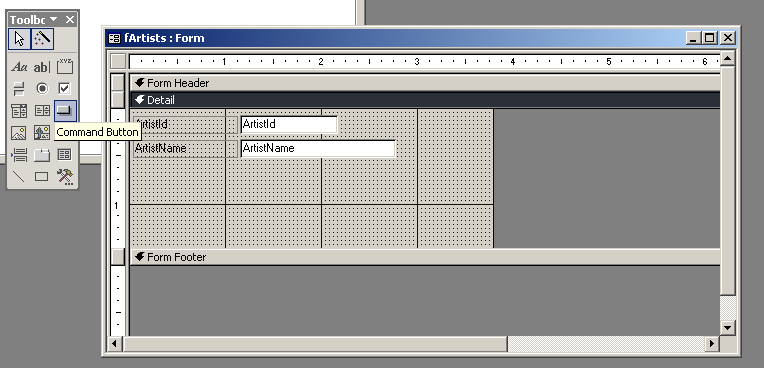
Open your form in Design Mode (right-click on title bar
of your form, select Design Mode) and resize the form to make
sure it has room for two buttons. Add a command button by selecting the button
icon in the list on the left (in the main Access window).
Then click somewhere in the form where you would like the Undo button
to be placed. This will cause a button wizard to pop up.
- Pick the category Record Operations and the action Undo
Record.
- Pick an image that you like to represent the undo action.
- Give your button a descriptive name, such as
Undo.
(Hey, I said "descriptive" not "creative.")
- Adjust the position and size of the button until it looks OK.
When you are done with the undo button, add another button to
represent the Delete Record action. After you are done, save your work
and close the design view. Test out your new form by changing an artist
name followed by clicking on the undo button. Then create a new artist and
then removing it with the remove button.
- What happens if you try to remove an artist whose ID is used in the CD
table? Try it out.
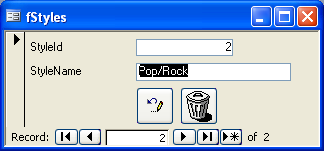
- You have now successfully created a form to simplify manipulation of
artists! On your own, do the same thing for the musical styles. That is,
create a form called
fStyles in the same way you created your
fArtists form. Make sure both forms behave similarily.
Below is an example of how fStyles could look like.
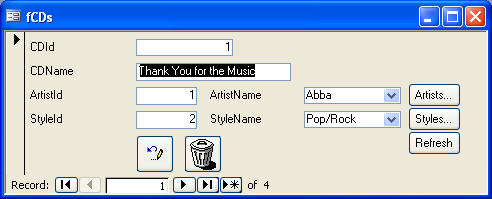
You will now create a more complex form for manipulating the CDs.
It's more complex because information will be collected from three tables
instead of only one.
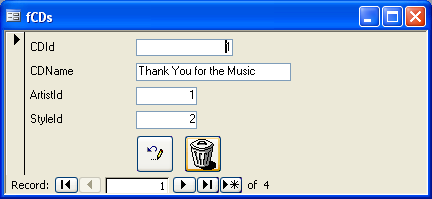
- Create a form using the form wizard. The Record Source should be the CD
table and all its fields. Give your form the title
fCDs. For
everything else you can use the values suggested by the wizard. Also add undo
and delete buttons! The result should have the following components (yours may
be positioned differently):
- One problem with the current form is that we see the IDs of artists and
musical styles instead of the names. A solution to this problem is to add a
component called "Combo Box" for the artists and one for the musical styles. A
combo box is a drop down list with values based on a query or table. The value
shown in the combo box depends on the Control Source of the combo box.
Place a combo box (from the Toolbox window/bar) beside the artist
identifier box. A wizard will guide you through some important settings for
the combo box. Select an appropiate answer based on the following:
- The combo box should display the names in the artist table. So, select
the option for looking up the values in a table or query.
- Select the tArtists table.
- You need both the primary key
ArtistId and the artist's
name in the combo box but you only want the name to be displayed. Therefore,
you should add both fields from your artist table.
- Adjust the artist name column to a desired width. Since you do not want
the primary key column (
ArtistId) to be visible, you should
hide it.
- Name the combo box Combo_ArtistNames.
- Use the settings recommended by the wizard for everything else.
If your wizard did not pop up, never fear, we can still add a
drop-box, and then appropriately set it by right-clicking on it and selecting
Properties.
- In the Other tab, Name should be Combo_ArtistNames.
- In the Data tab, Row Source Type should be Table/Query.
- For Row Source, click on the
ellipses button (the "...") to the side of the entry box. It will pop
open the query window. Create a query (you know how to do this because
you did Lab 13) that shows ArtistId
and ArtistName from the table
tArtists. Close the
query. If it asks you whether you want to change the query statement,
say Yes.
- Make sure Limit to List is set to
Yes.
- Go to the Format tab and set
Caption to "Artist Name" (without the quotes).
- Set Text Align to Left. (Obviously, if you want to align your
text to the right, or center it, or whatever, feel free to do so).
- Also in the Format tab, make sure
just the artist name is displayed by setting Column Count to 2 and setting your Column Widths to 0";1" (This is if your query displayed
ArtistId first and then ArtistName. What you're doing is saying, hey,
so I've got two columns of data, the id and the name, but don't show me the
first one, only show me the second, by setting the width of the first column
to 0 inches, and the width of the second column to 1 inch).
Move the
combo box to the position of your choice. Switch to form view and try out your
form. You should see the combo box and be able to select an artist name, but
there is currently no connection between the artist displayed in the combo box
and the ArtistId in the form.
- Open your form in design view. View the properties of the newly added
combo box and change the Control Source property to be
ArtistId.
- Switch to form view so that you can enter data. The artist name in the
combo box should now be linked with the
ArtistId. To test if your
link works or not, try changing the artist for one of your CDs. You should see
the ArtistId change numbers when you select a different artist
from the drop down list. Undo your changes by clicking on the undo button.
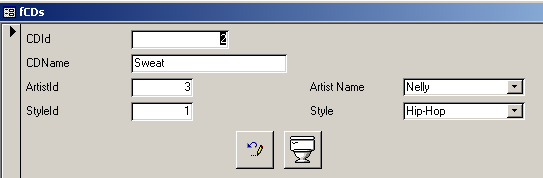
- On your own, add another combo box for the style of music. Verify that
your form still functions properly. Below is an example of the form:
- Your form is taking form! It is quite easy to add CDs but there is one
slight problem. You can not add artists or musical styles by using the combo
boxes. The solution is to add a button beside each combo box that opens a form
to manipulate the data for artists or musical styles. Add a button next to
your ArtistName drop-box using the button wizard. The purpose of this button
is to open your fArtists form.
- Select the action Open Form in the category Form
Operations.
- Select the appropriate form (fArtists).
- The default settings in the wizard should be fine, but put text on the
button saying "Artists..." (or
whatever name you think appropriate).
- Name the button Button_OpenArtistForm.
If your wizard didn't pop up, you can create the button by setting
its Properties (right-click as usual to
get the Properties window). This time, instead of clicking on separate
tabs, we're just going to change everything in the All tab. You could have done that before too,
with the combo boxes. It just depends on how you like to do things.
- Make sure you are in the All tab.
- Set the Name to Button_OpenArtistForm.
- Set your Caption to something
descriptive for your button. I just put "Artists..." but you
can probably do better.
- Finally, we need it to do something when it clicks. Go to the
On Click property, and use the macro builder. In the first row of
the Action column, type in OpenForm. Then at the bottom of the
window where it says Form Name type
in fArtists.
Your
result should look like this:
- Now you can follow those instructions to create a button to open your
Style form.
- Even though you can add new artists and musical styles very easily, there is
still one problem. After adding a new artist or musical style and returning to
your CD form, the combo box is not updated! This can be solved by adding a
refresh button to your CD form. Add the button. The action should be
Refresh Form Data in the category Form Operations.
If your button wizard didn't pop up, create its setting using the
Properties menu, and set the On Click property using the macro builder. Create two Requery actions, one for the artist names
combox box, and one for the style names combo box. Where it says Control Name for the query, set each Requery action to a name of the combo box you
want to refresh (e.g. Combo_ArtistNames).
Below is an
example of the CD form that has the new buttons.
Add More CDs to Your Database
Now you can start to use your database! Add more CDs! If you do not know what
CDs to add, search for music stores on the web and pick CDs from there.
- Add at least 5 more of your own CDs.
- Some of the CDs you add should be for the same artist.
- Add CDs from several different musical styles, e.g., Classical,
Latin, etc. But make sure you have more CDs than styles of music!
Before you close your database or Access, select Tools>Database
Utilities>Compact and Repair Database... and accept to open
lab14.mdb. This will remove unneeded space in your database file,
which otherwise can become very large!
Close all of your database windows and close Access. Copy your
lab14.mdb to your lab14 directory on dante
(replace the old file).
Select Tools>Database Utilities>Compact and Repair
Database... before you close your database, after you have worked with the
database for a while. This will decrease the size of your database file. Also
close your database file and Access before copying your
database file to your dante account, otherwise you may end up with an empty
file!
Check List
|
|
I know how to create a report using the report
wizard. |
|
|
I know how to create a form using the form wizard. |
|
|
I know how to modify a form using the form design view.
|
Submit the Lab
Instead of
the usual Word Document, just turn in the modified Access database. Because this file
isn't a Web page, there's no need to link it. Just upload it in Collect It.