How to make a yacht with Polygons
This tutorial was created to teach the basics of modeling with Polygons inside Maya.
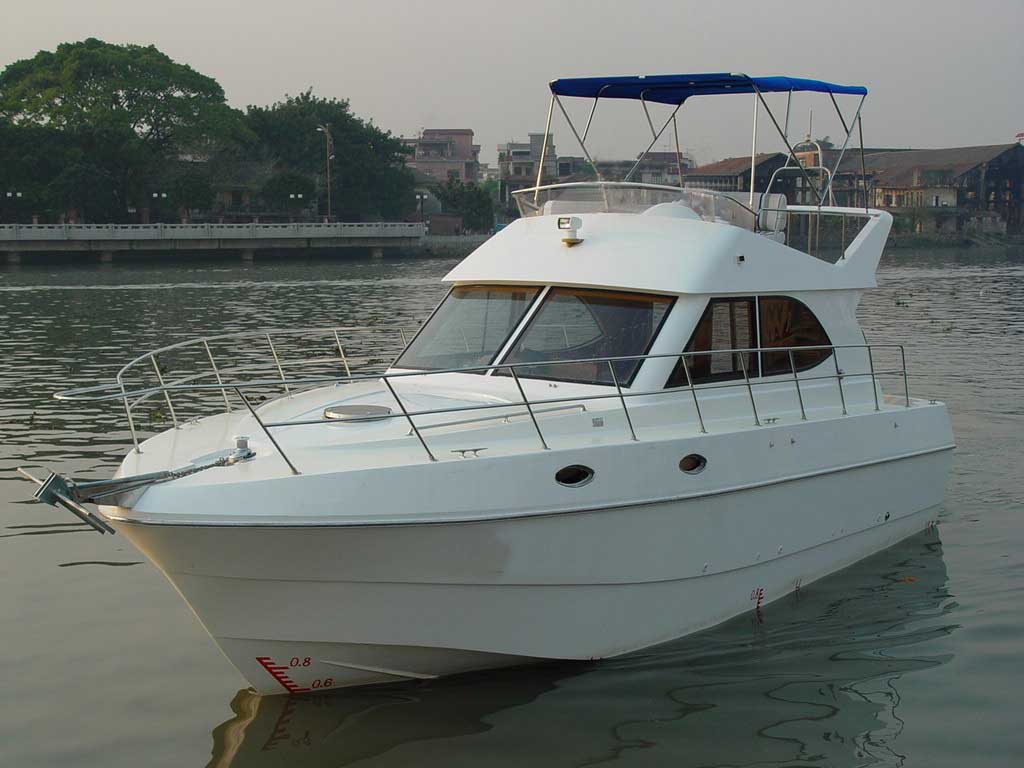
This is the yacht reference
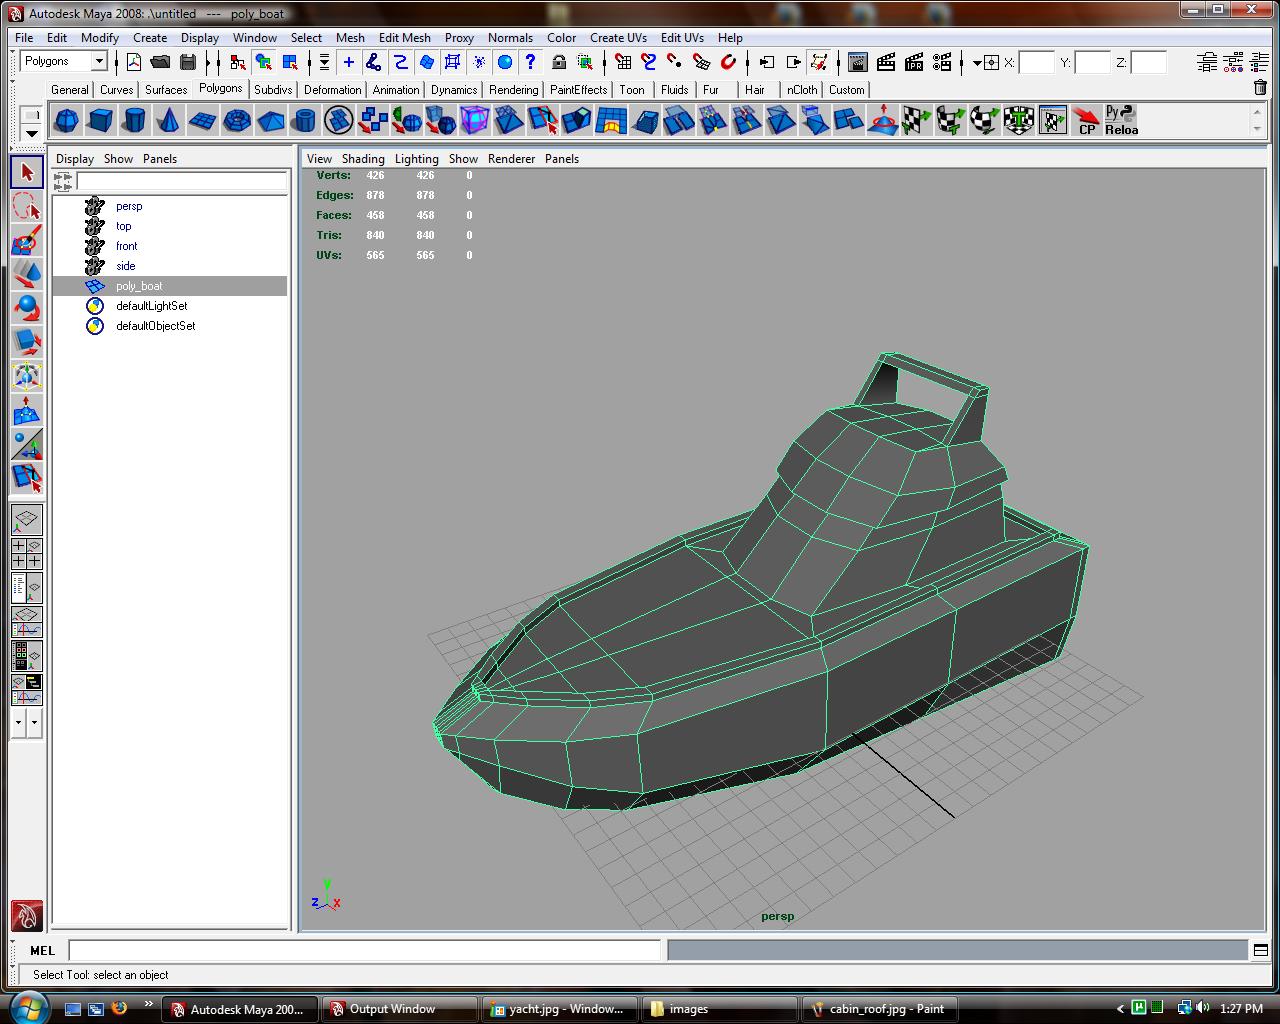
This is what the tutorial creates
This tutorial was created to teach the basics of modeling with Polygons inside Maya.
This is the yacht reference
This is what the tutorial creates
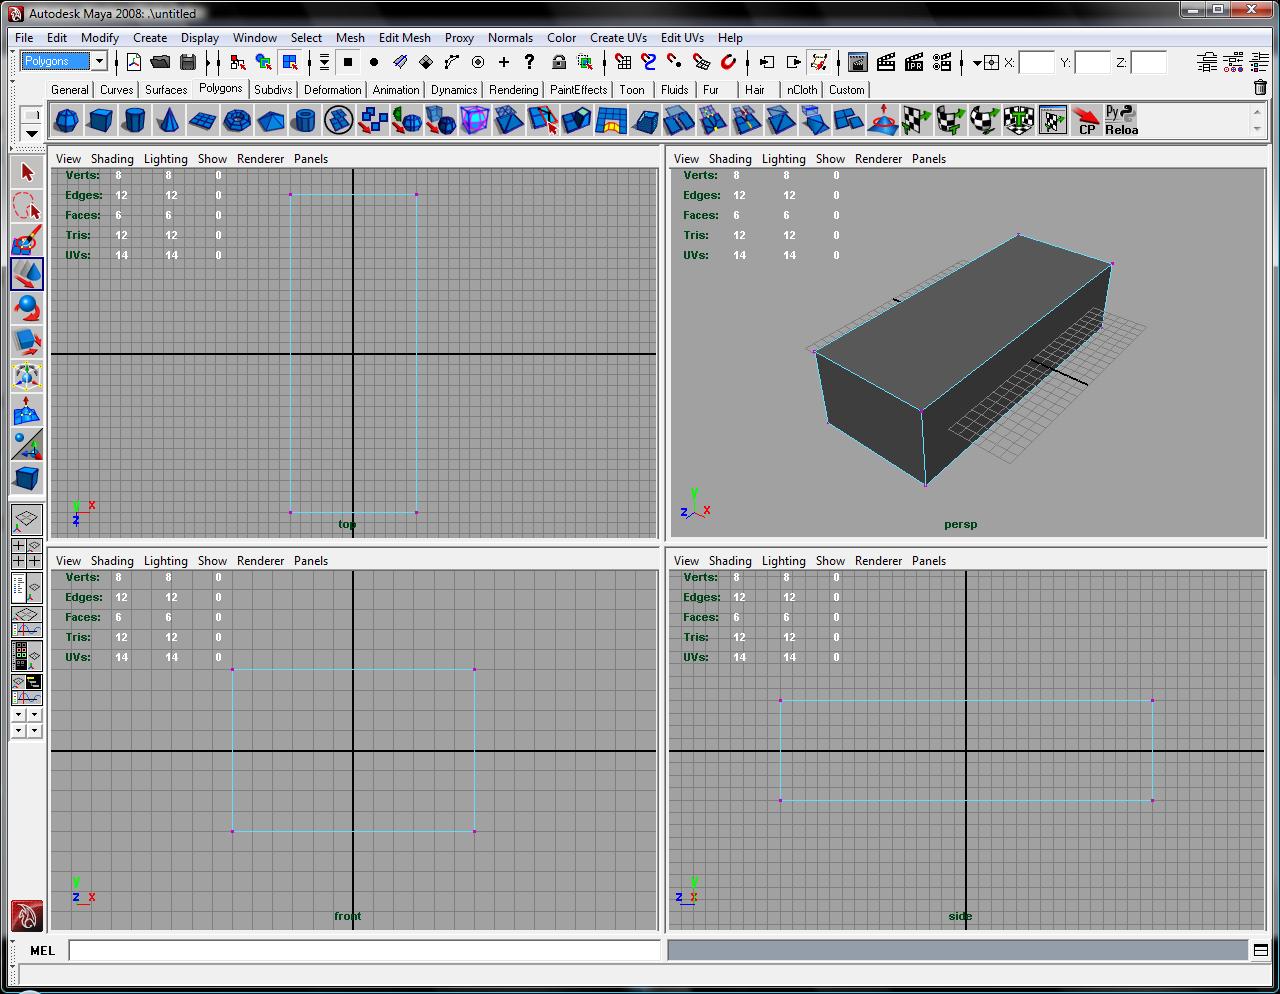
Have a four view setup. This can be achieved by hitting the "four panes" icon, or clicking "window -> view Arrangement -> four panes"
have the polygon menu set open. In the top left corner of Maya you should see a drop down menu. Make sure that "Polygons" is selected. The menus in the menu bar should change based on the menu set.
Make sure they have Edit Mesh -> Keep Faces Together checked. You can only see "Edit Mesh" menu if you are in the polygon menu set.
Open the Maya UI cheat sheet, if needed to understand the Maya UI.
Create a cube. click the cube icon in the polygon menu shelf or "create -> polygon primitives -> cube".
SAVE, you should save constantly and in iterations. You never know when Maya is going to crash or you need to revert to an older copy.
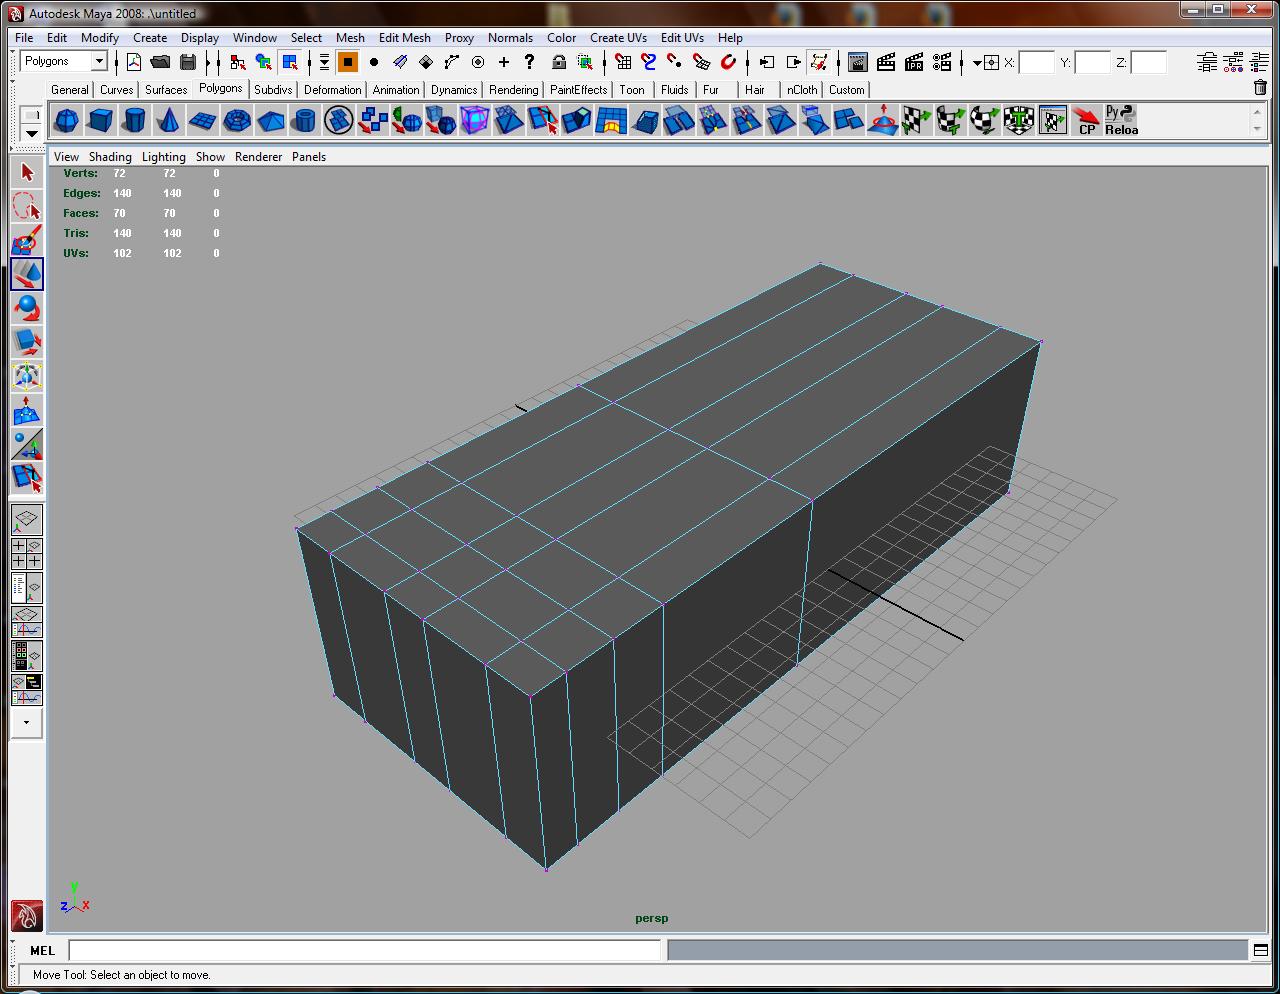
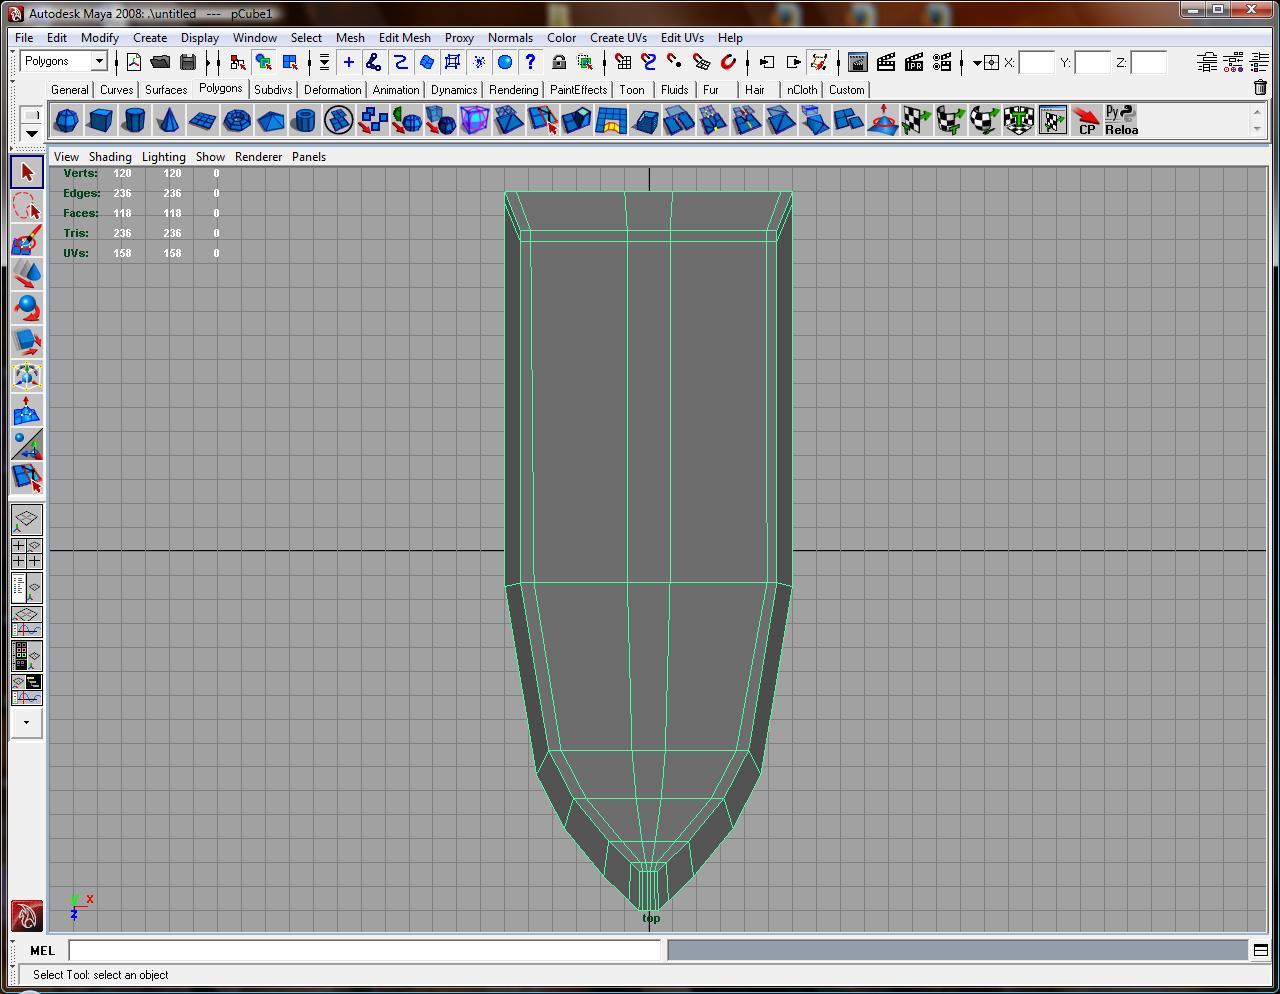
Add edge loops around what will be the hull of the boat. "edit mesh -> add edge loop tool" then select the edge which is in the loop.
When modeling polygons, it is very important to model with quads. This help smoothing, using tools and much more
Go to the top view in your view setup. This can happen by pressing the space bar to toggle full screen for the pane under the mouse
Select each row of vertices and scale it inward in each row using the hot key "r".
To change the between vertices, edges, faces. simply right click and hold, then release over the wanted component.
there are hot keys switching between them as well. F8 - object, F9 - vertices, F10 - edges, F11 - faces.
The transform Hot keys are "q" for selection tool, "w" to move an obj, "e" to rotate, "r" for scale. You can always change your hot keys by going to "window -> settings/preferences -> hotkey editor"
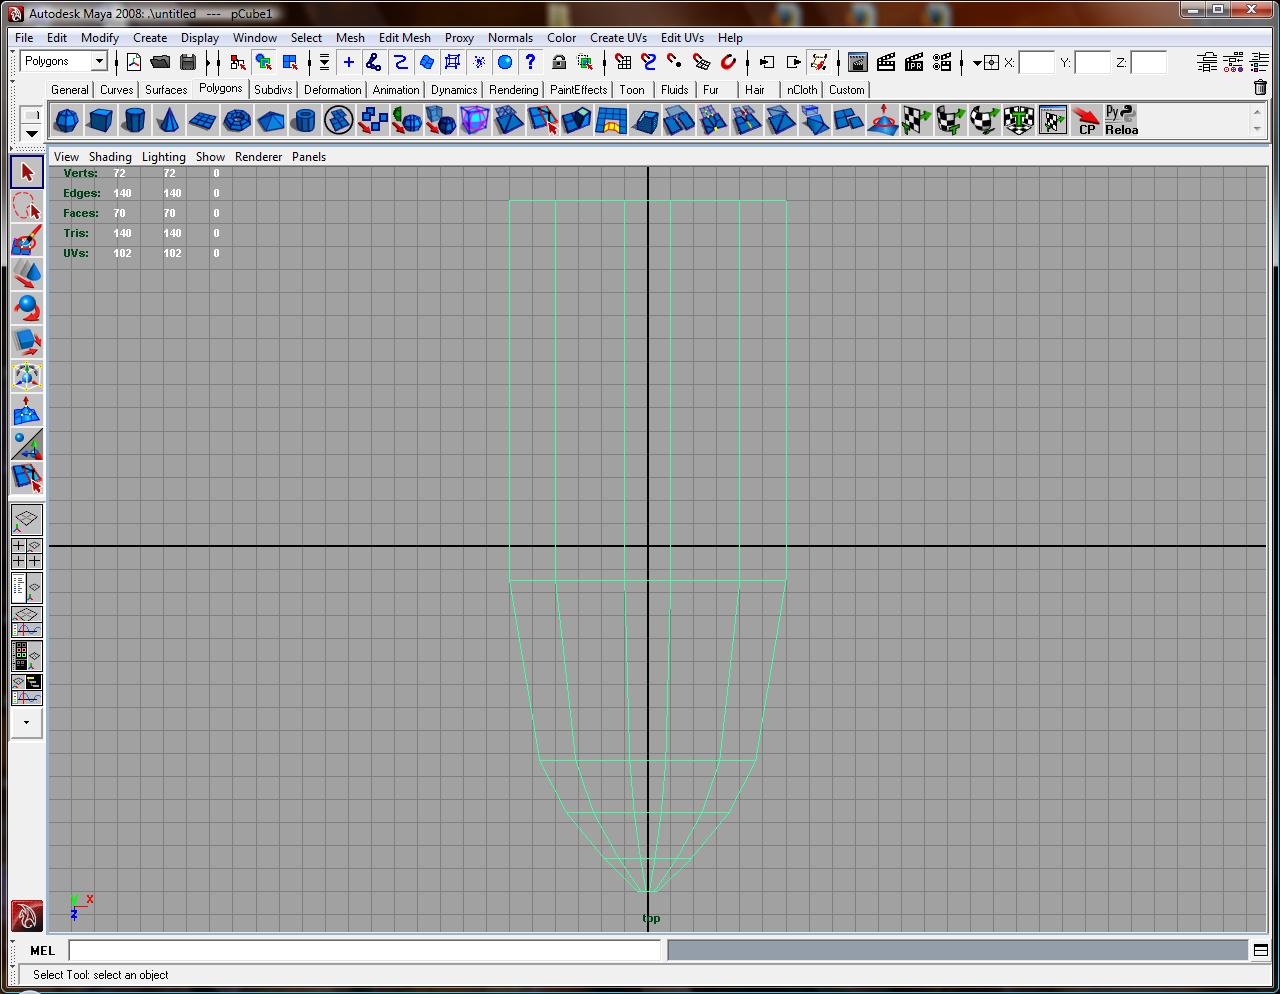
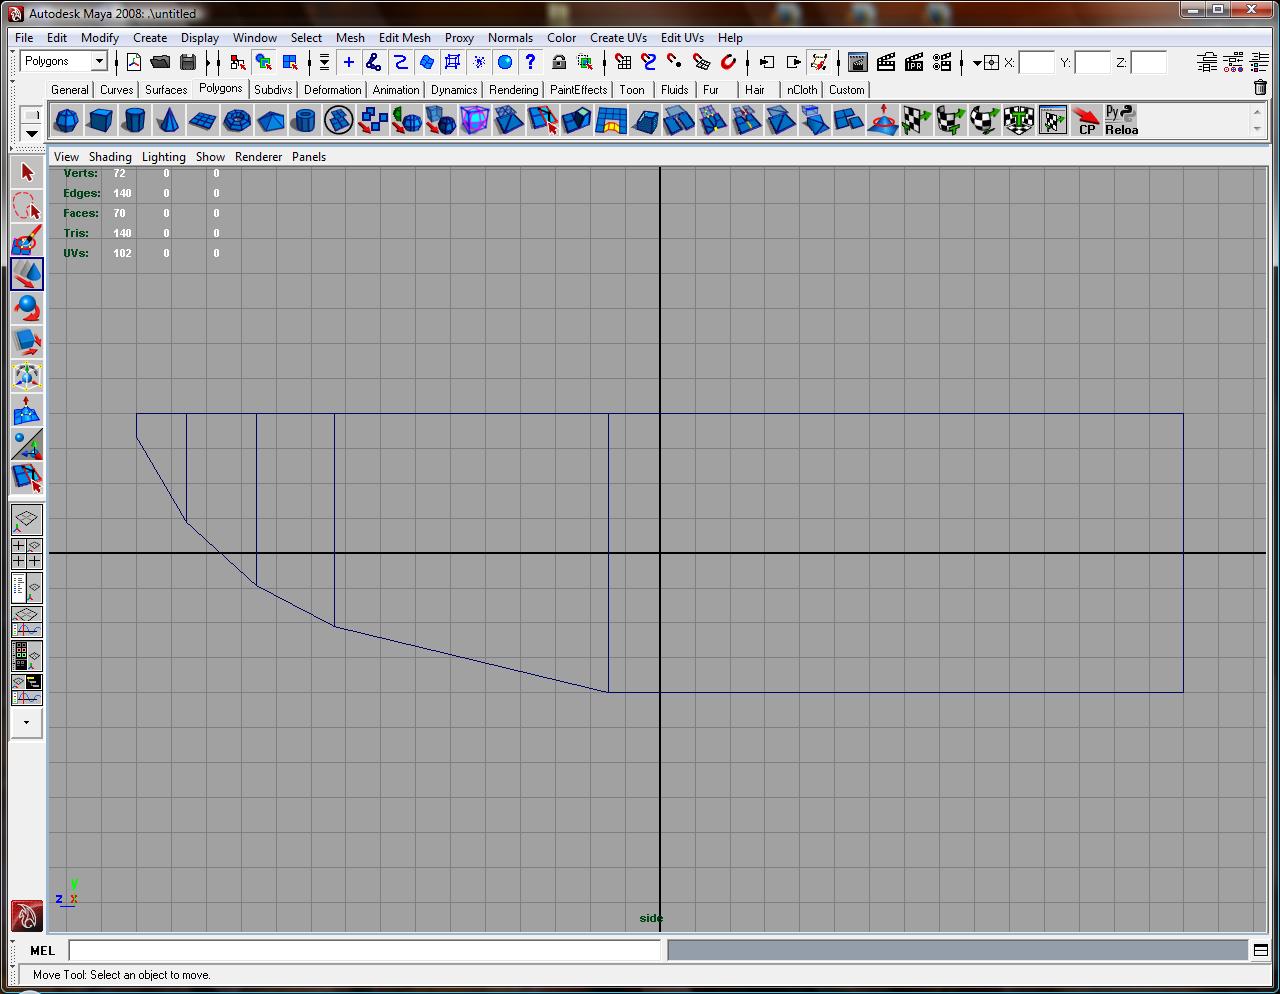
Go to the side view select the bottom vertices and move them up.
Using the a combination of the perspective and front views select the edges and move the edge loops up to create a curved hull.
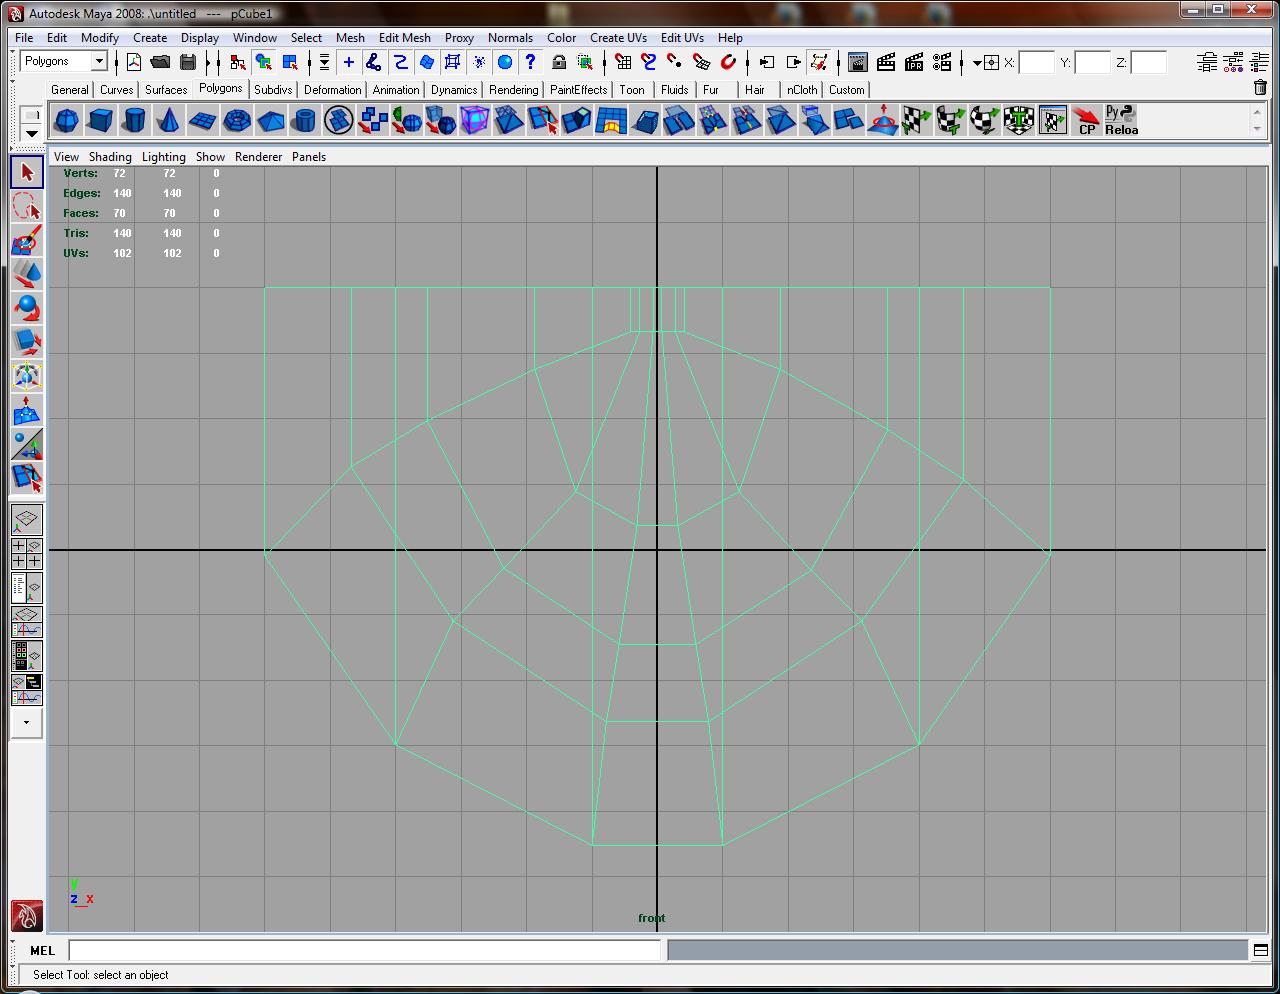
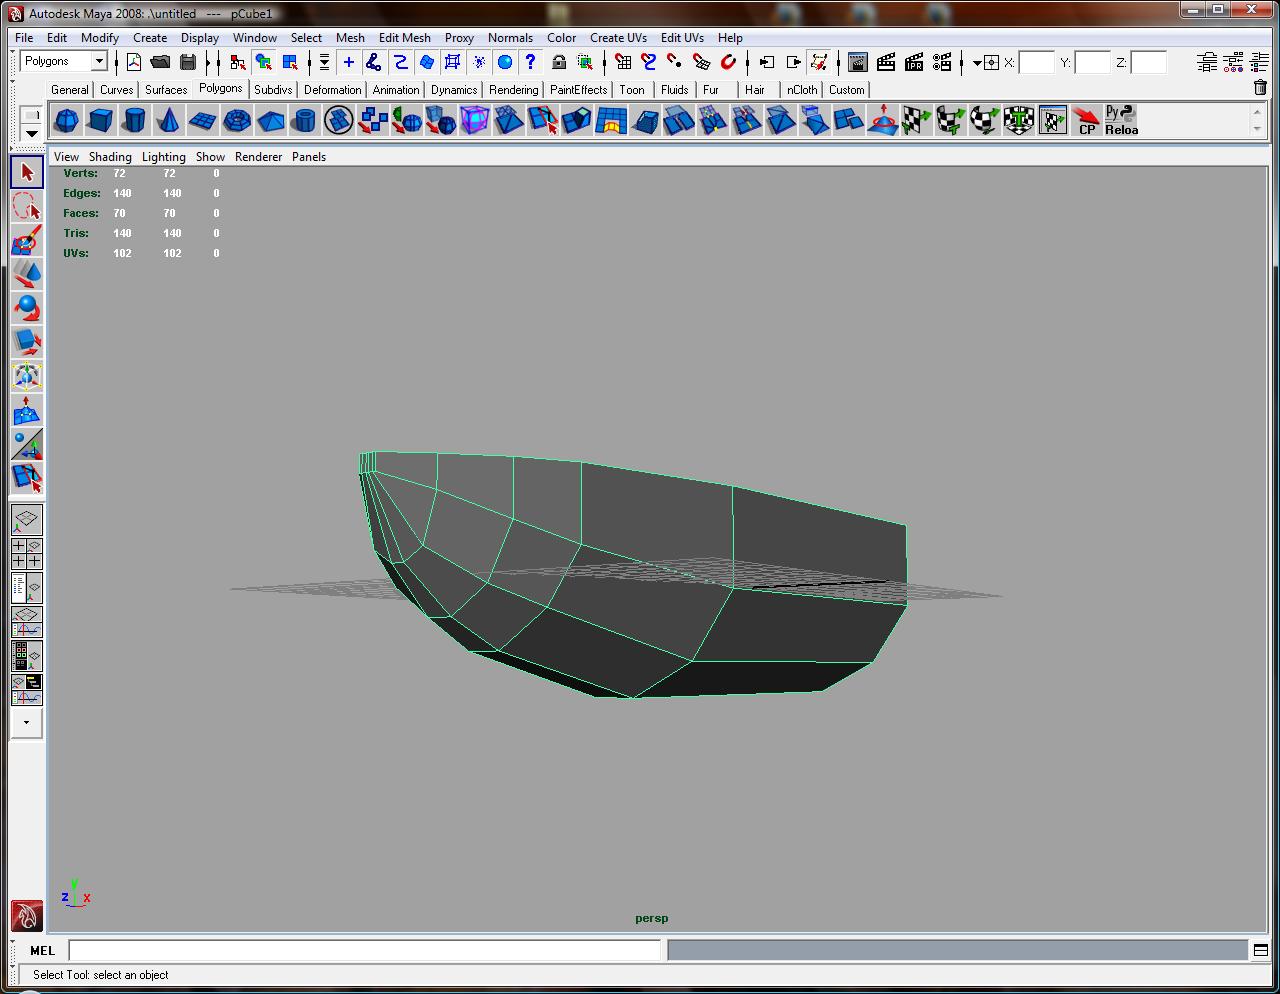
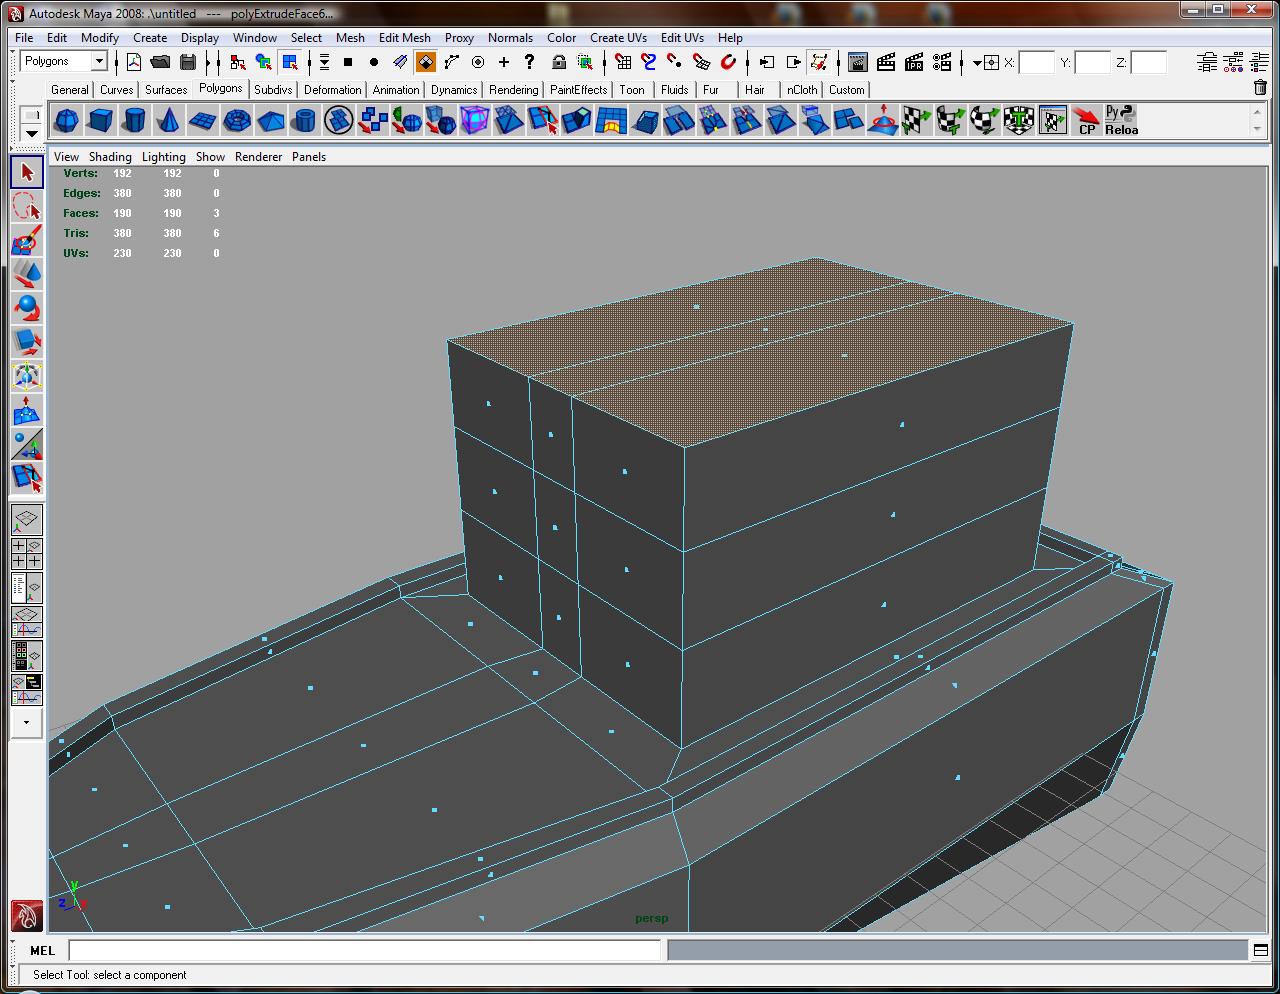
Select all of the top faces and extrude them upward. Extrude by pressing the icon on the polygons shelf, or "edit mesh -> extrude"
Immediately after extruding, use the scale tool to shrink them inward
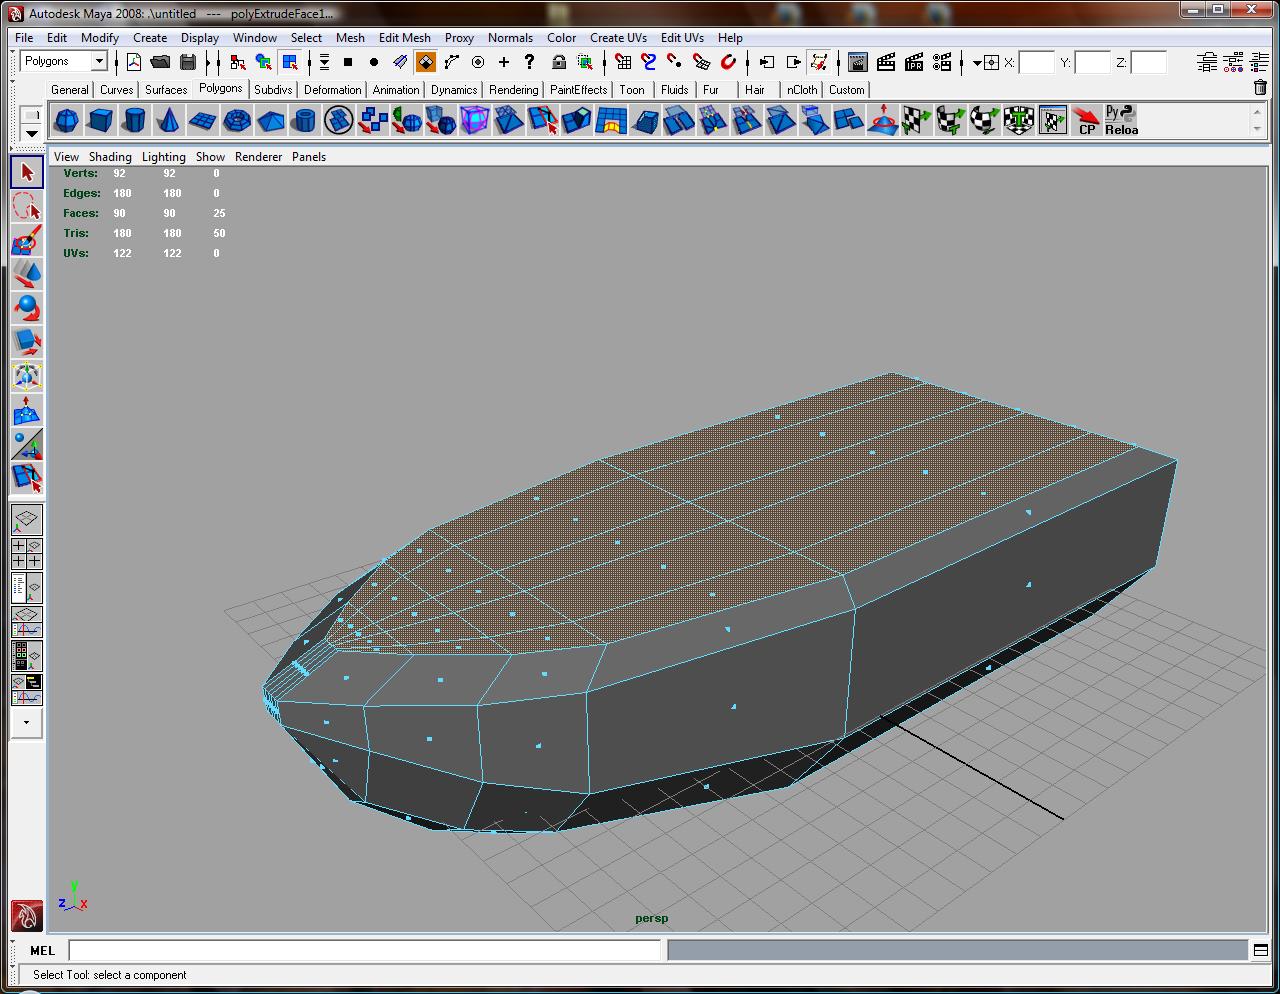
Add an edge loop on the front and back of boat
In the top view move the edge loops outward so they create a uniform border to the boat.
to make life a little easier you can use the "g" hotkey (repeat last action) and "y" hotkey (repeat last tool)
Select all the faces in the border and extrude them up slightly.
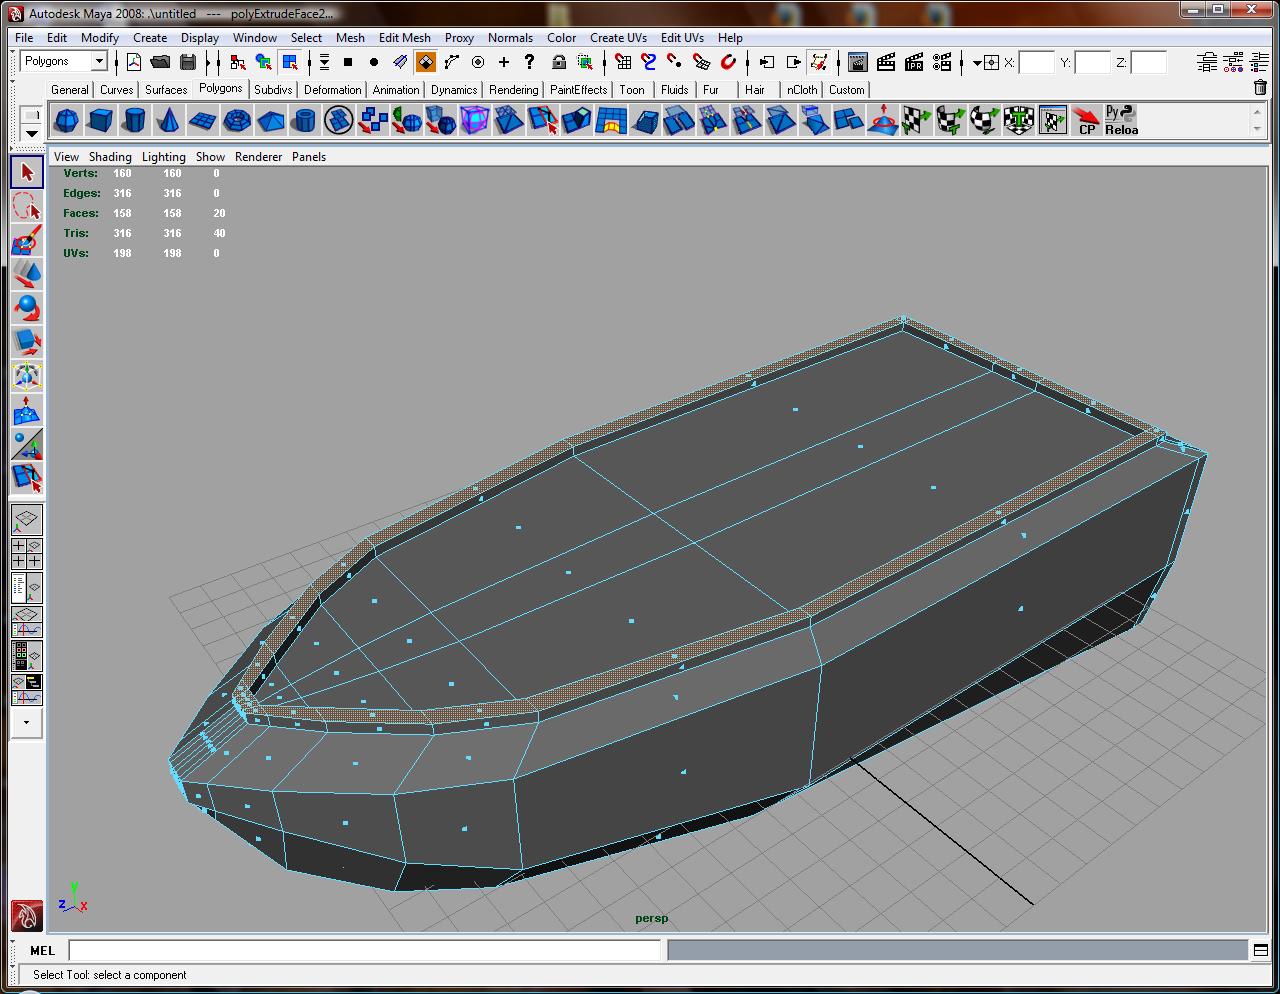
Select the faces toward the back of the boat, extrude them, immediately go the scale tool and scale them inward.
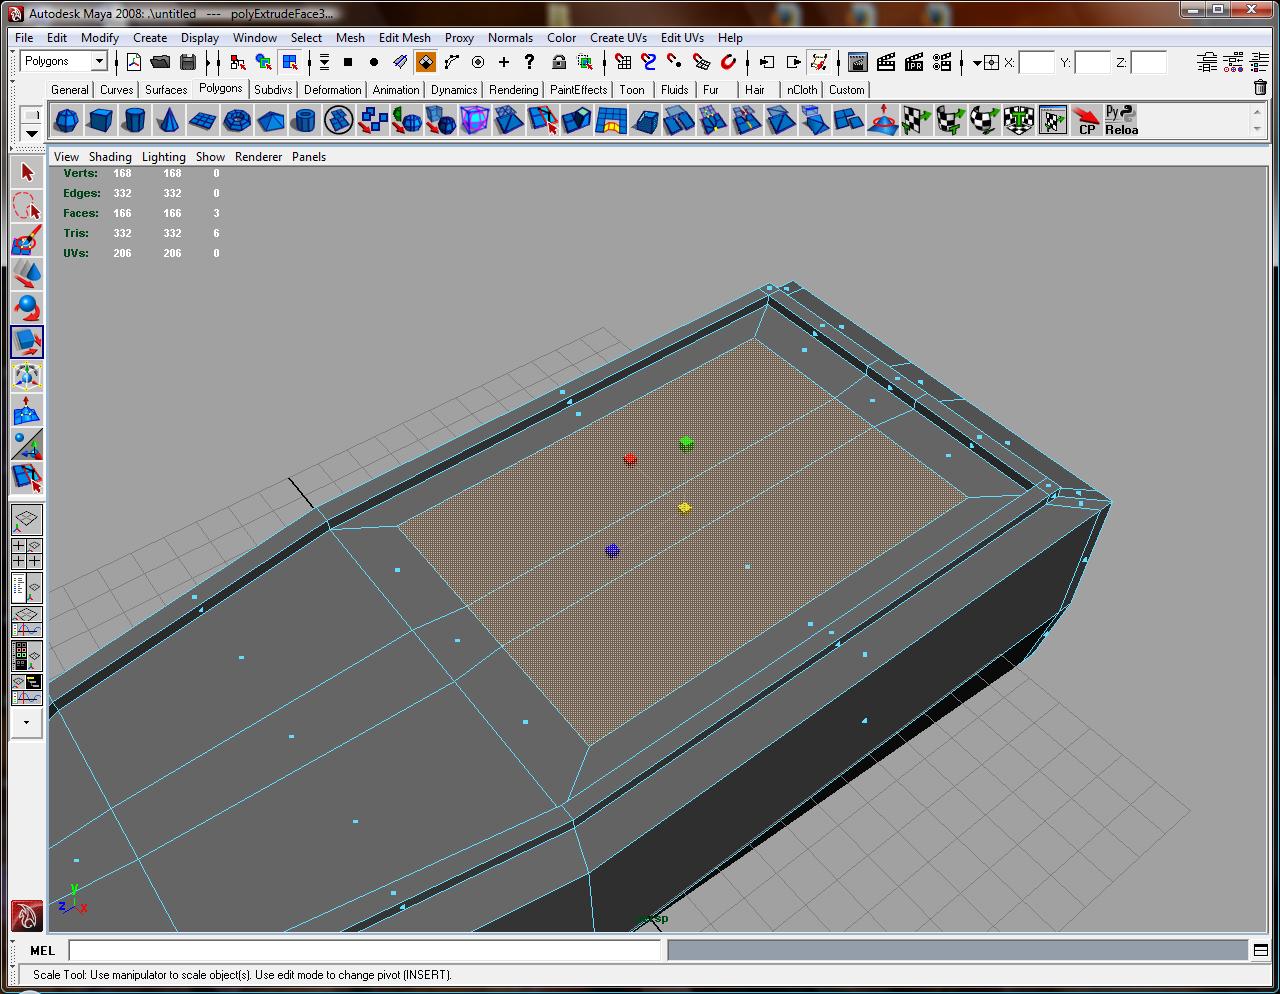
With the same faces selected extrude them upward three times.
Add the edge loops shown in the picture
Using a combination of the scale and move tool adjust the vertices to give the cabin a sleeker look.
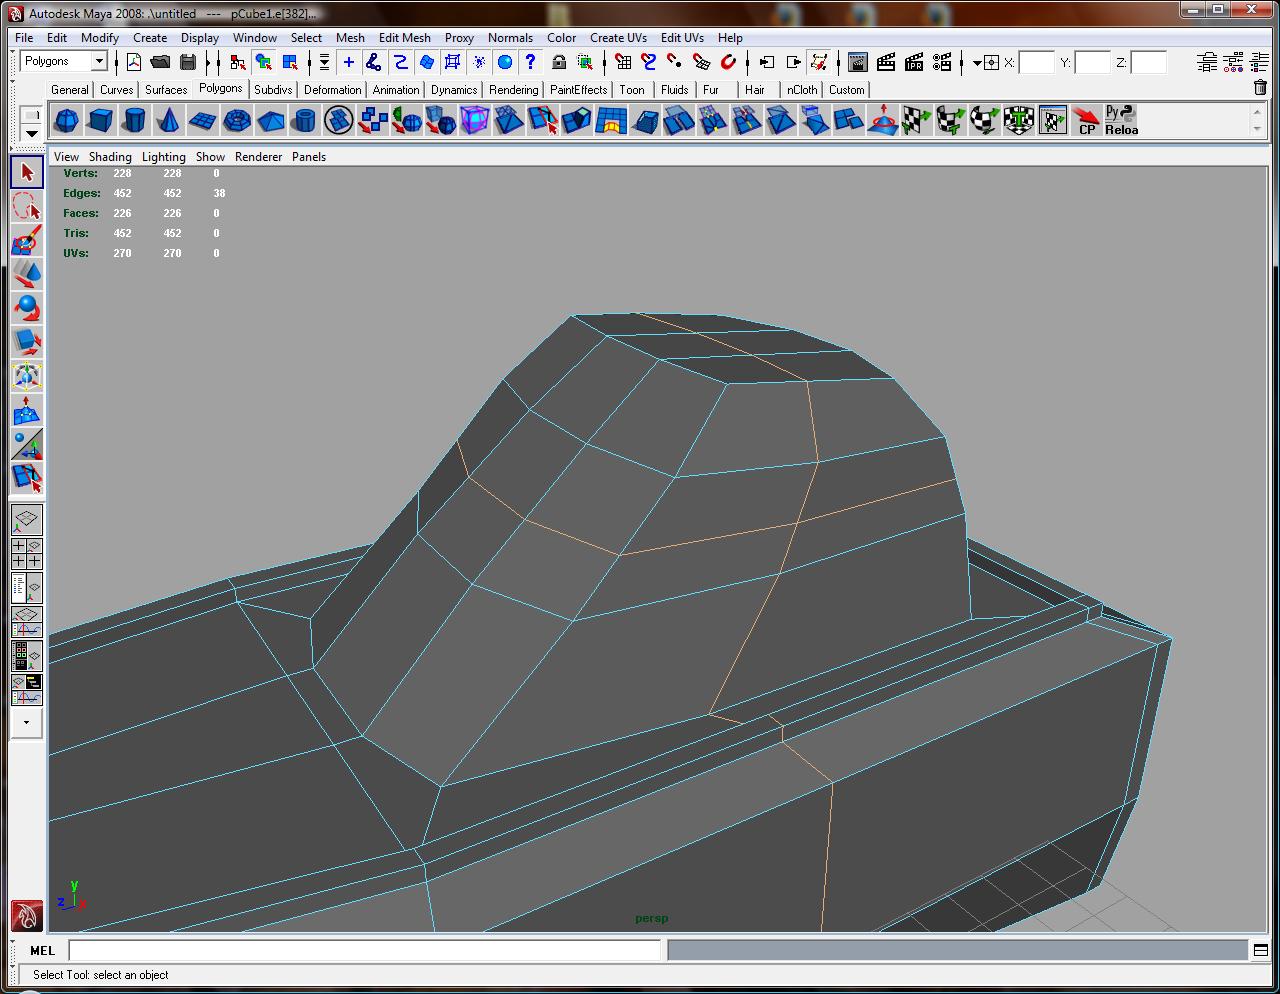
Select the top faces of the cabin , extrude them up and move them down as necessary to create the lip of the roof
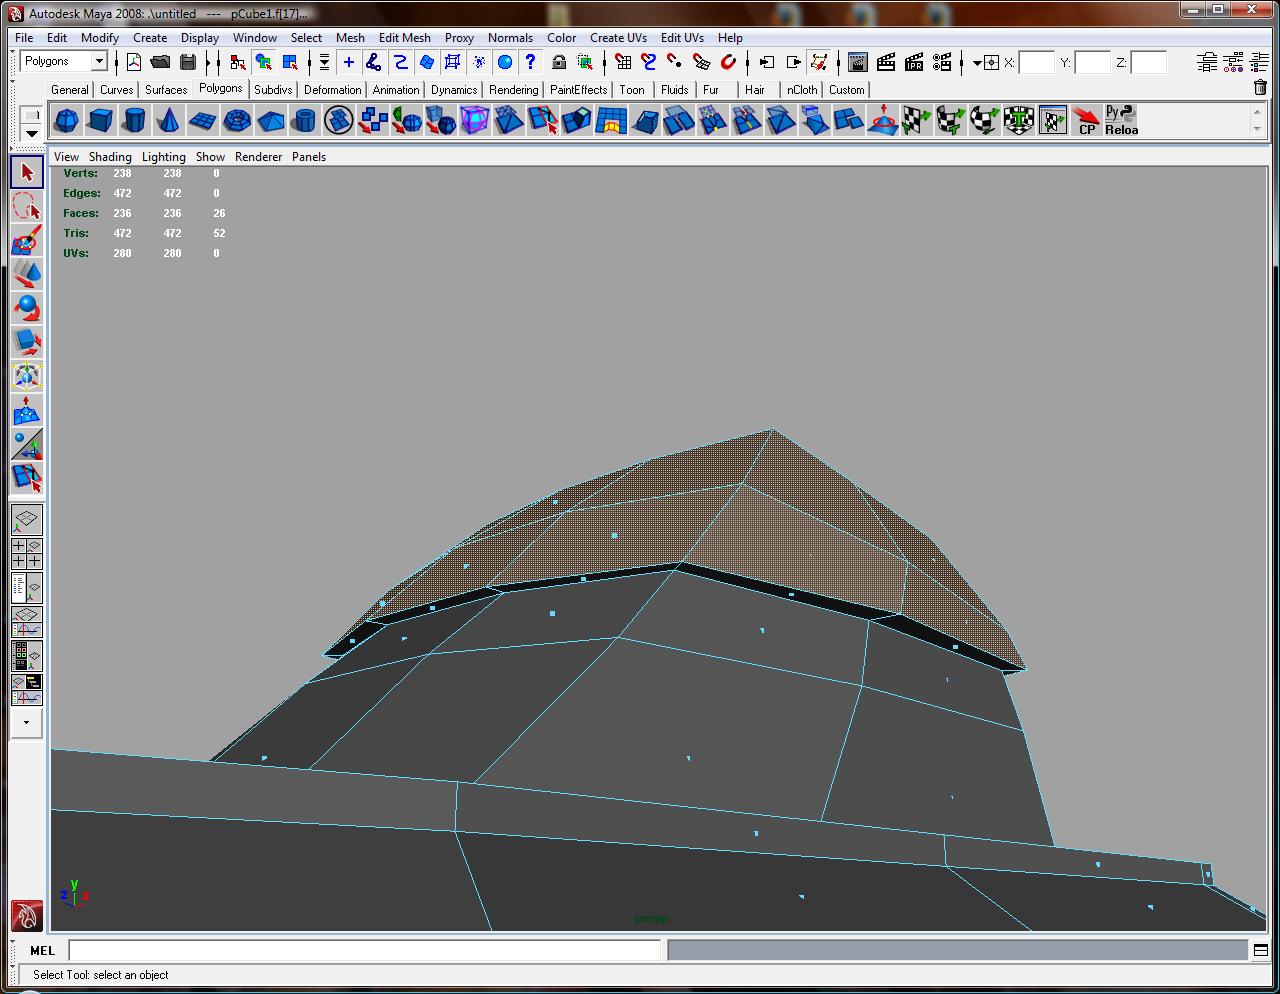
Use the split polygon tool to create the lines shown in the picture on each side of the cabin room
Split edge tool can be found in the "edit mesh -> split polygon tool".
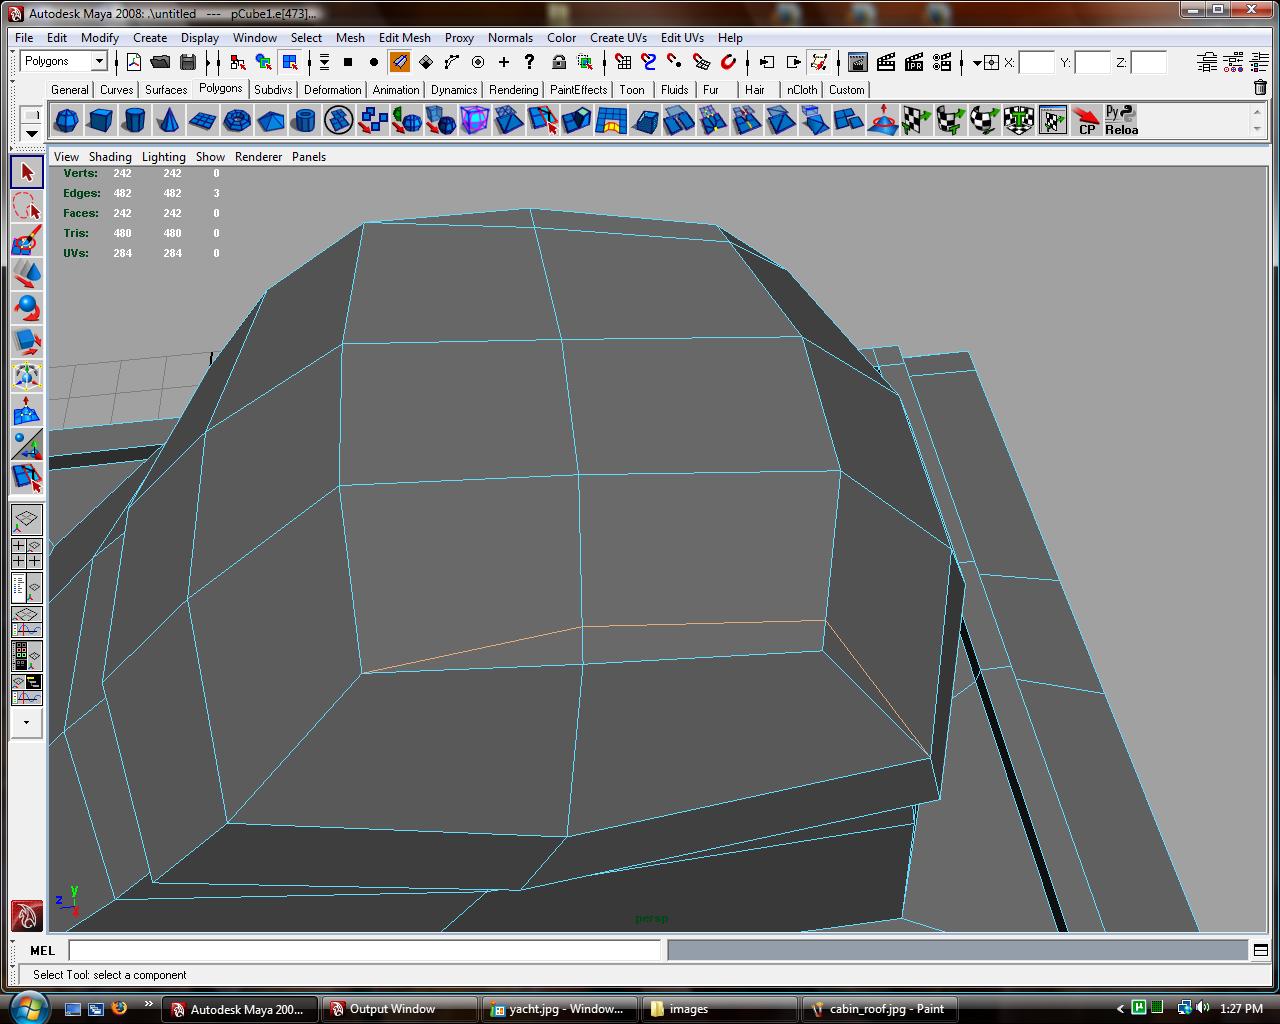
Extrude the newly created quads up twice and slant them slightly backwards, using the move tool
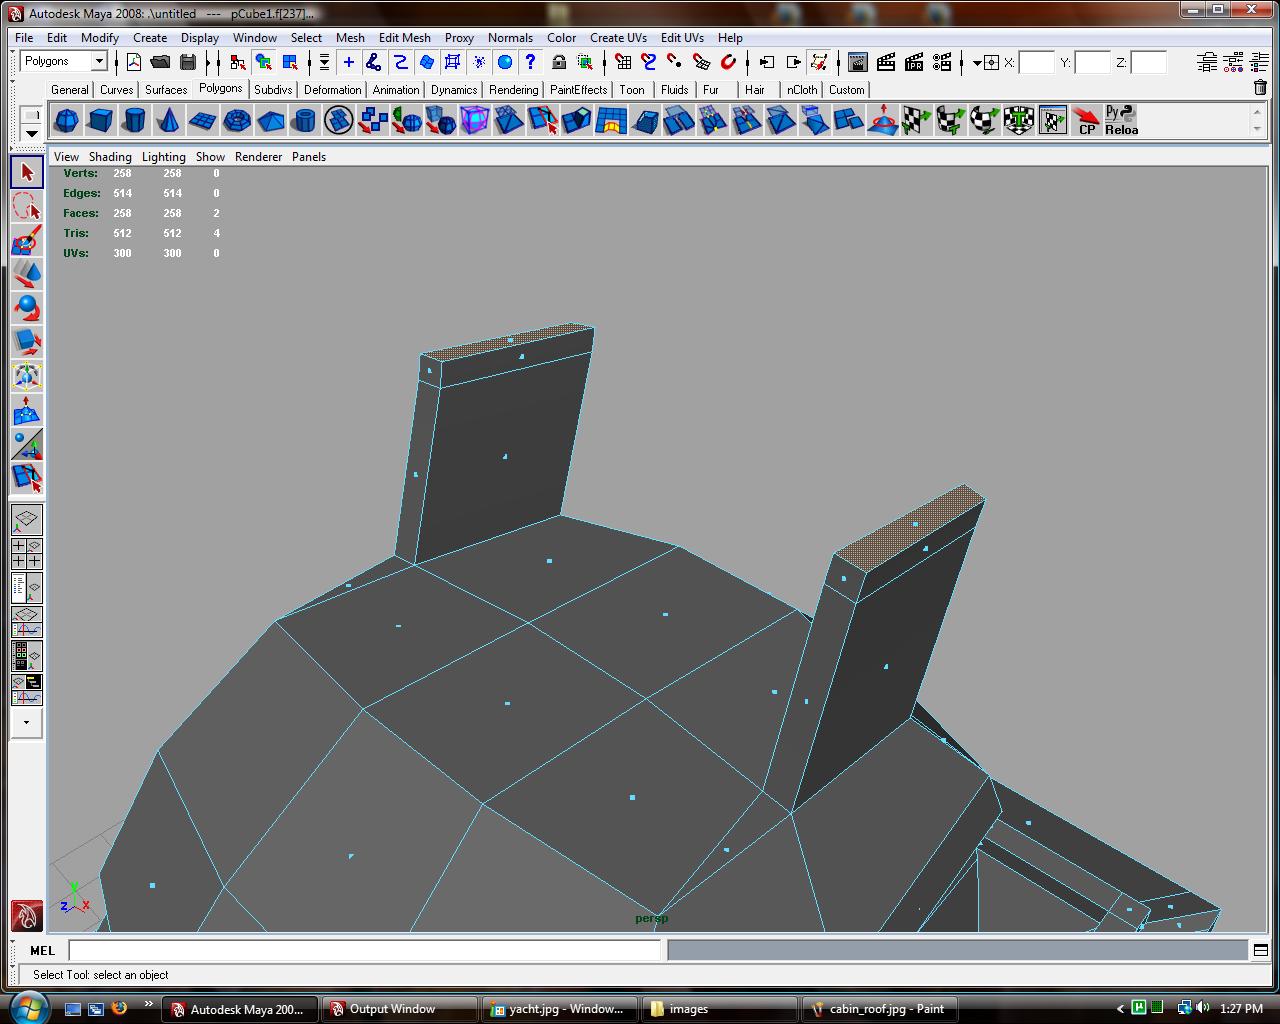
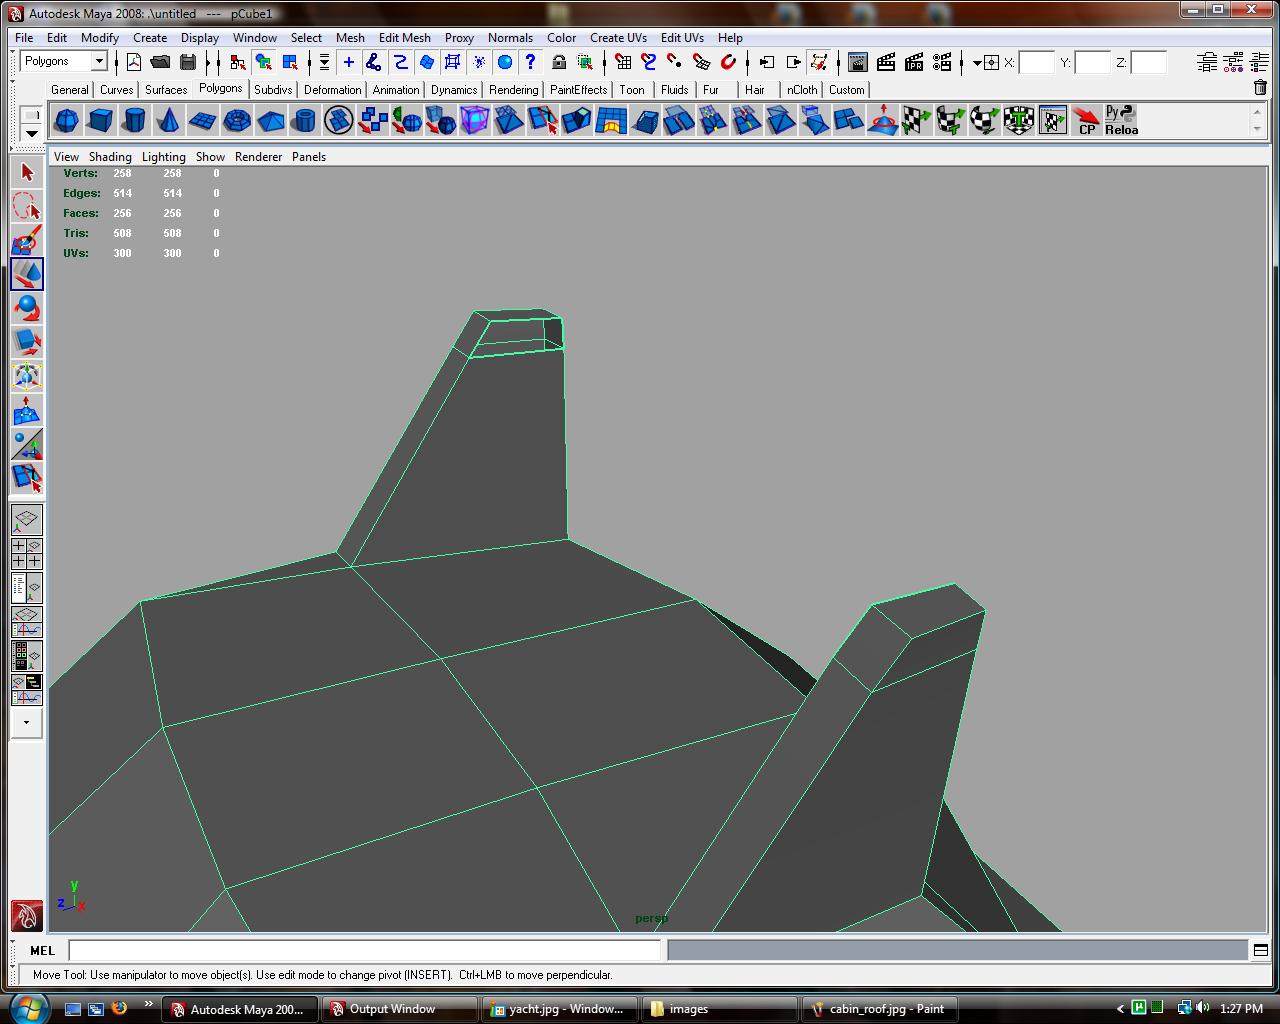
Scale and move the vertices as shown and delete the inside faces of the fins
You can delete the faces by selecting the faces and pressing the delete key.
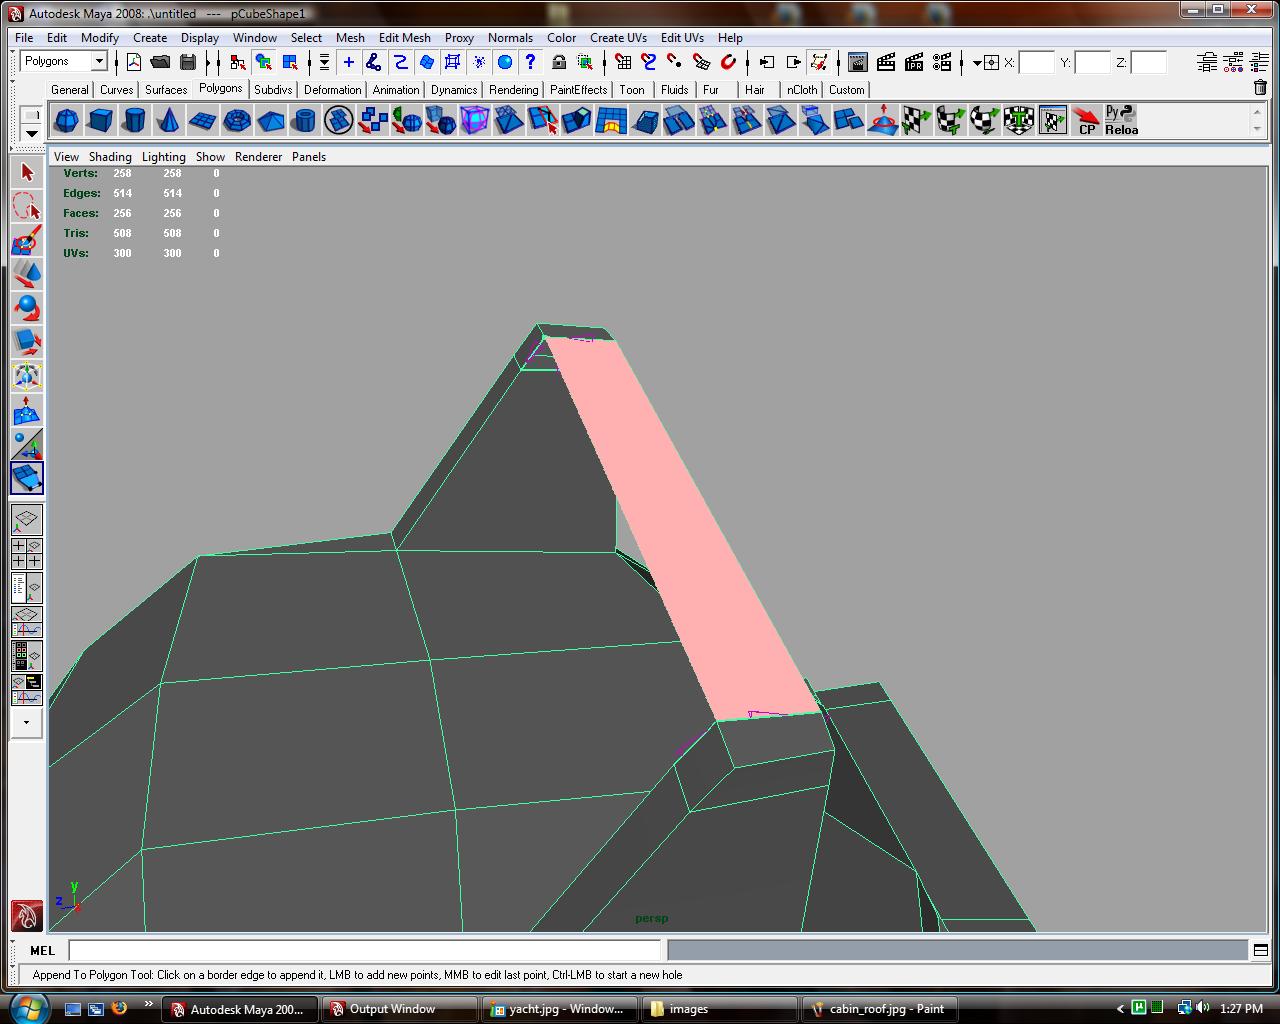
Using the append polygon tool select one of the edges and on the border of the deleted face, then select the corresponding edge on the other fin
the append polygon tool is found via "edit mesh -> append to polygon tool"
Continue this for the other remaining edges
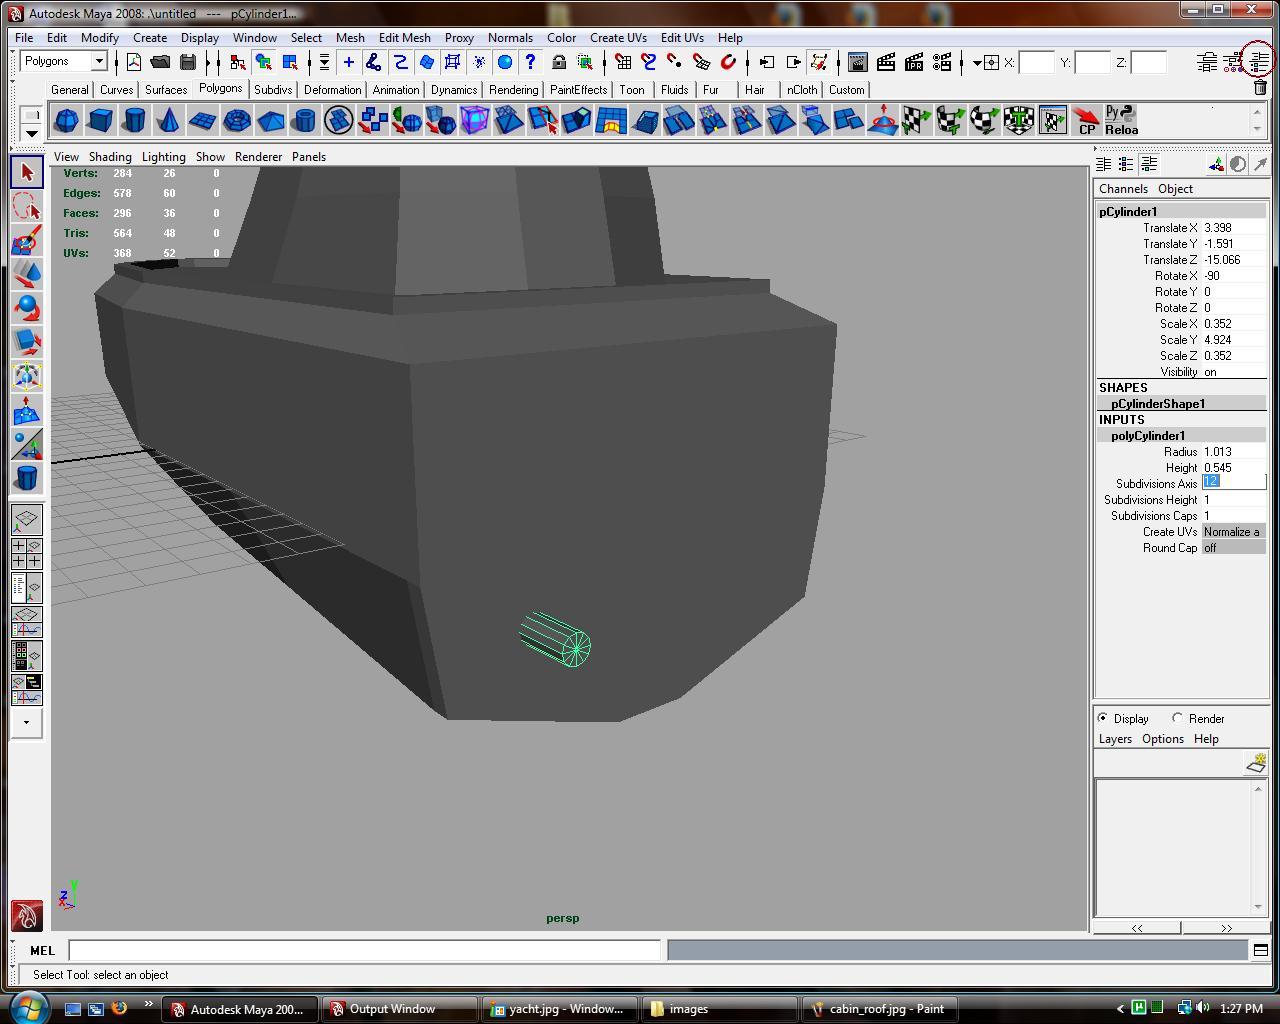
Create a cylinder.
Move scale and rotate as shown
In the channel box select polyCylinder1 under the Inputs section and make sure subdivisions axis = 12.
if you don't see the channel box on the right of your screen, press the far right icon on the screen.
Using the edge loop tool, add an edge loop toward the end of the propeller shaft
In groups of two, select every other group of faces and extrude them to create the basic propeller shape.
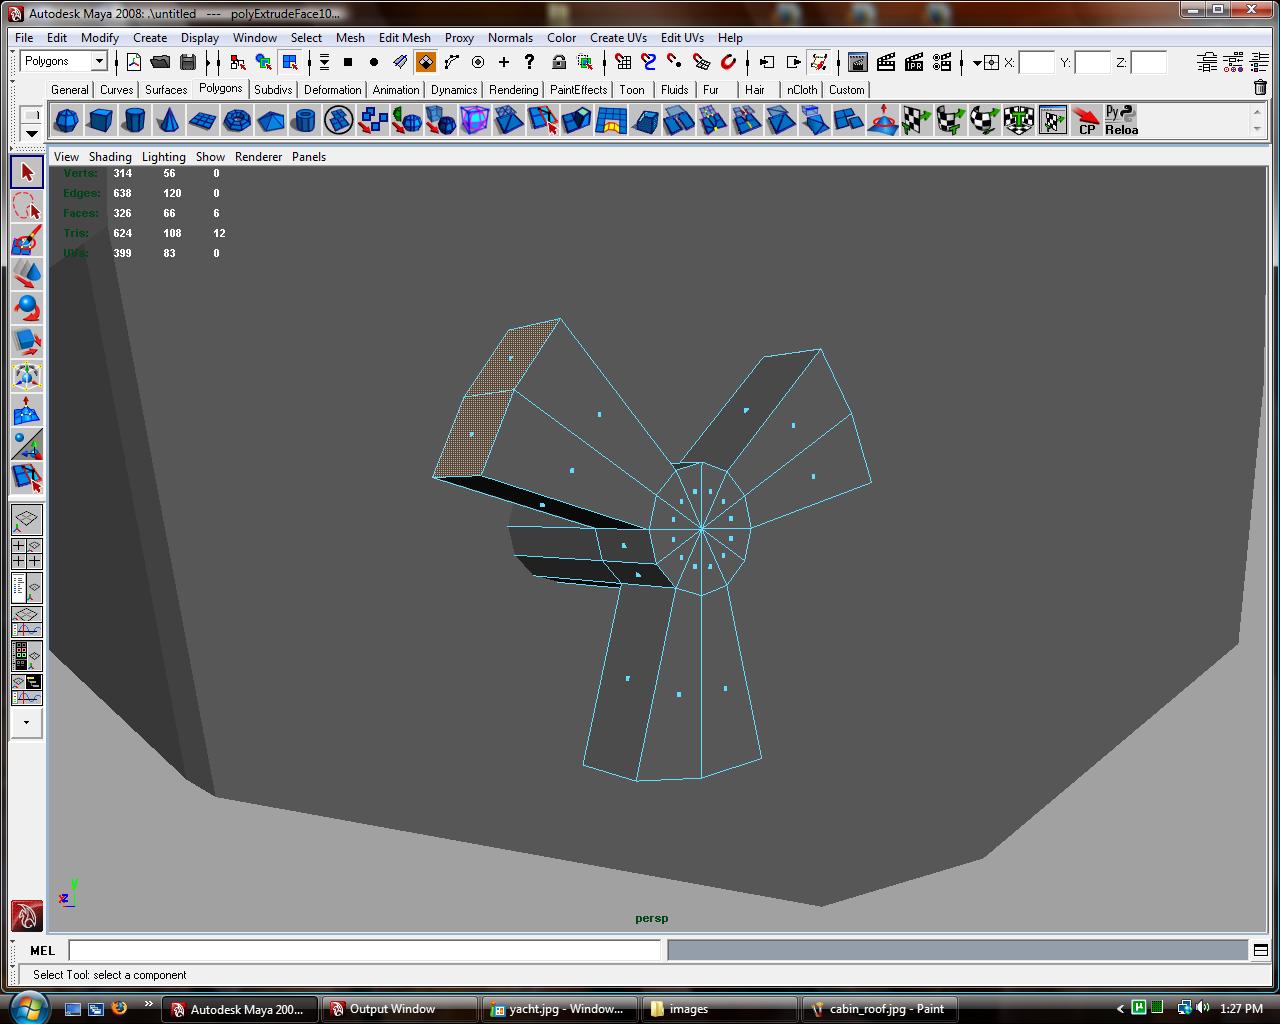
Scale and rotate the vertices on the edge of the propeller blades like image shown below.
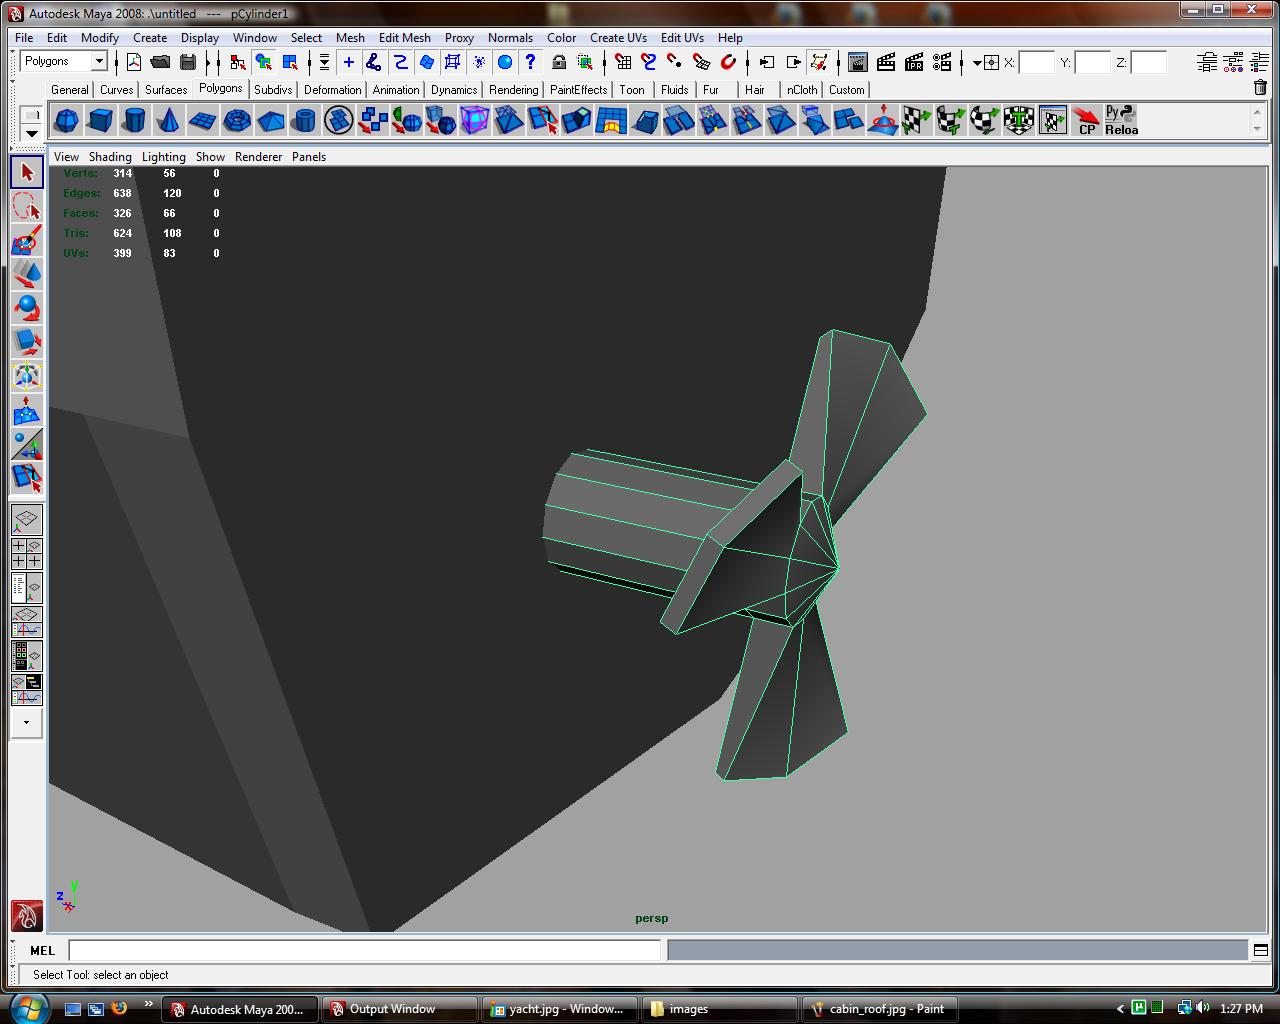
Select the newly created propeller
Duplicate the propeller "Edit -> duplicate or ctrl-d"
Then move the new propeller to a new position
Do this one more time so you have 3 propellers
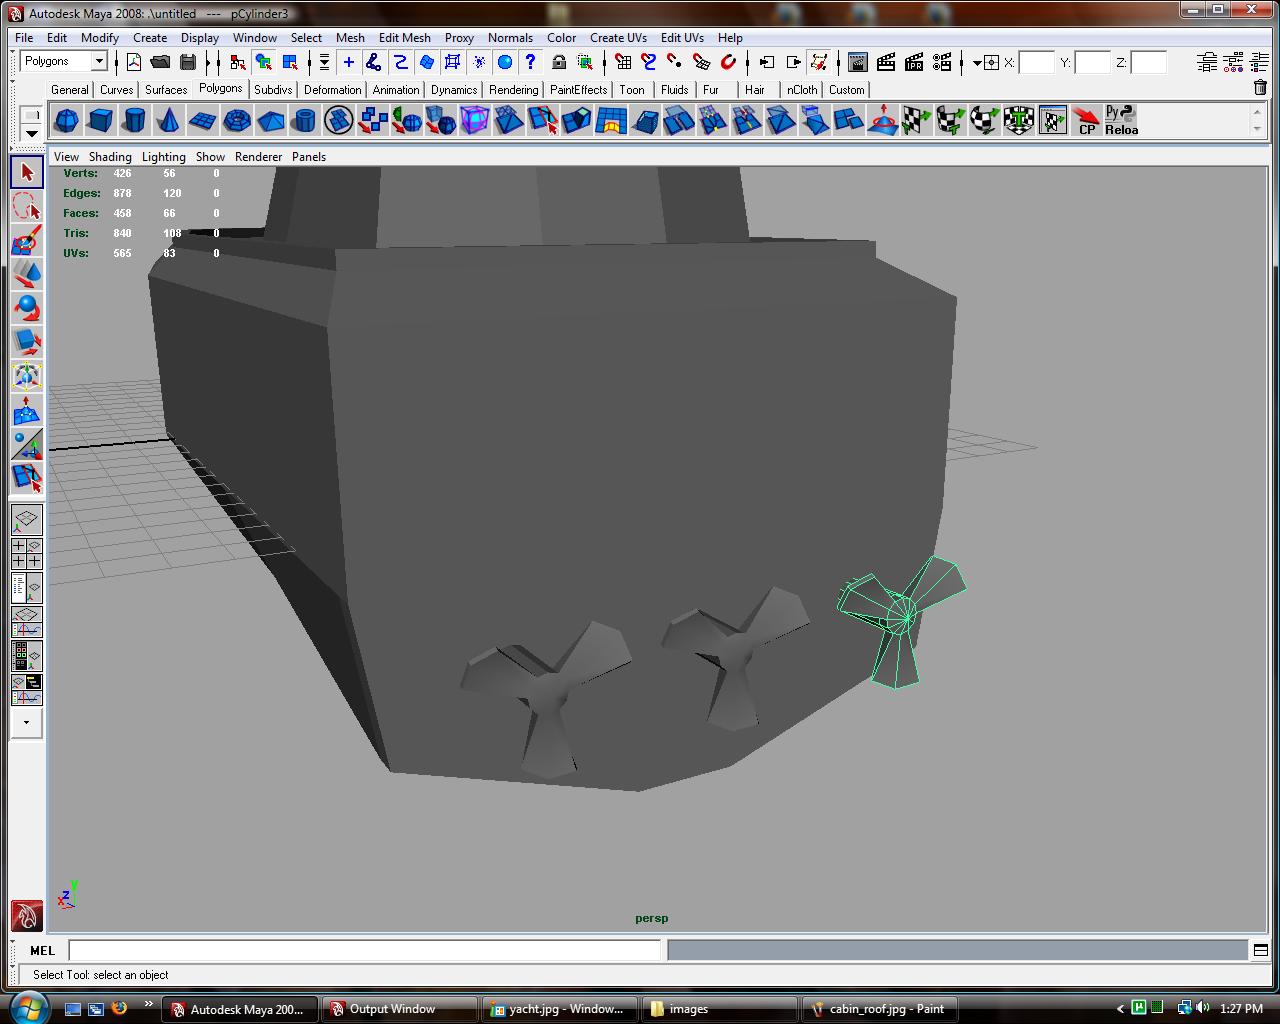
In object mode select all three propellers and the ship
You can change between object and component mode easily by pressing f8 while the object is selected
Use the mesh-> combine to merge them into one mesh.
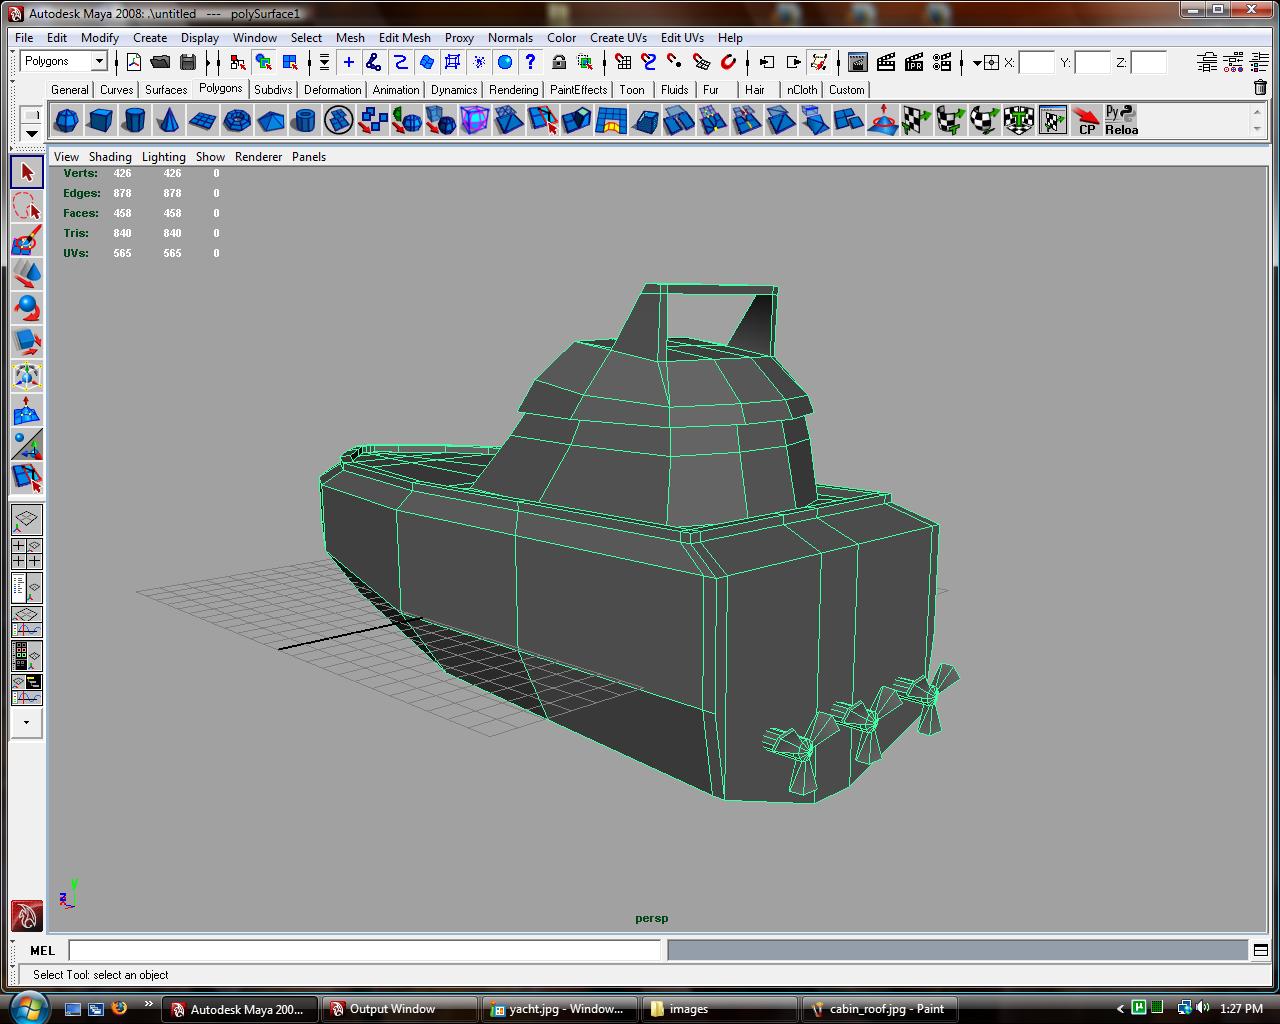
Clean up the outliner and polygon, "Edit->Delete By Type-> History"
Rename the boat in the outliner or channel box to "poly_boat"
to open the outliner go to "Window -> outliner"
the outliner is a way to organize the scene you are currently working. ALWAYS make sure when you are finished with a scene that the outliner doesn't have a bunch of random objs or groups in it