Project 4b: Room Lighting
Part 1: Match the Lighting
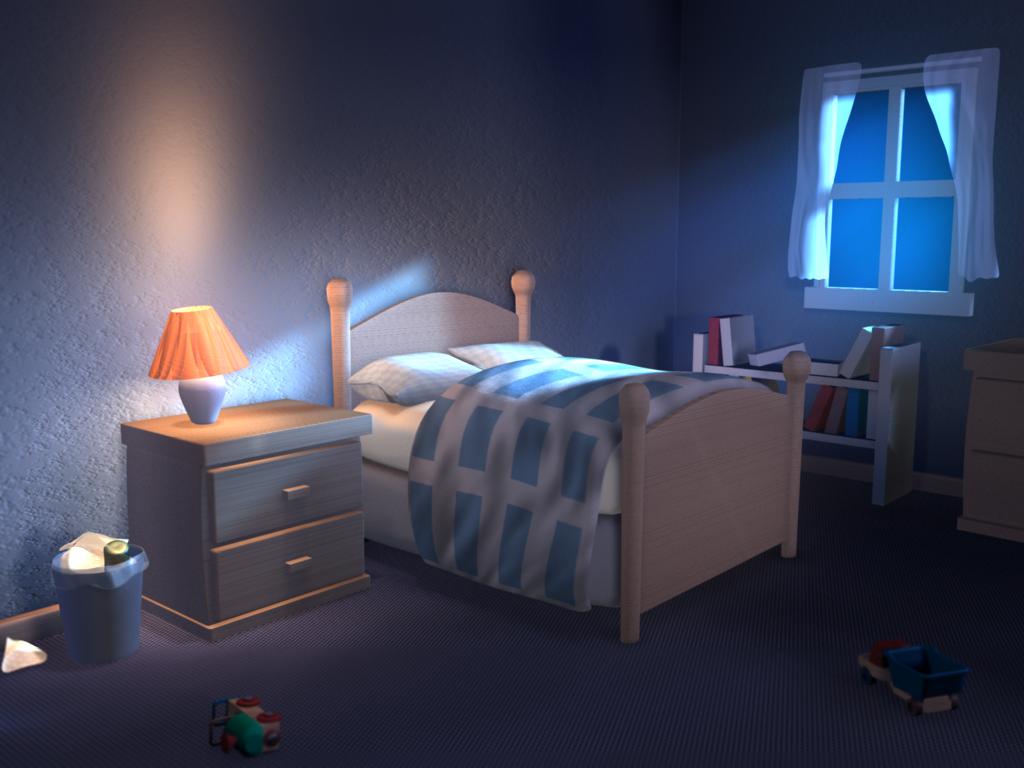
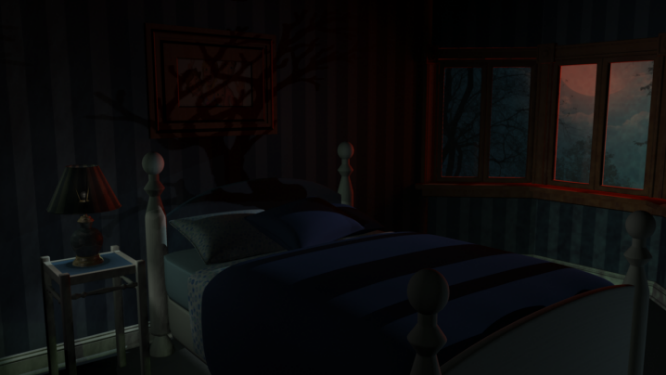
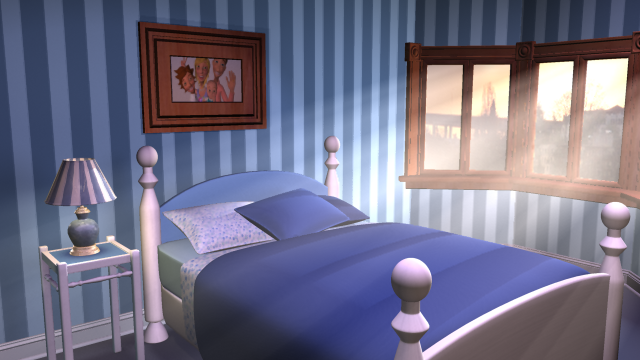
For the first part of this assignment you are to match the provided image's lighting to the best of your ability.
- Download the Maya file and the target image.
- Constantly save iterations while you work! If a file becomes corrupt or you no longer like the direction you are going you can always go back.
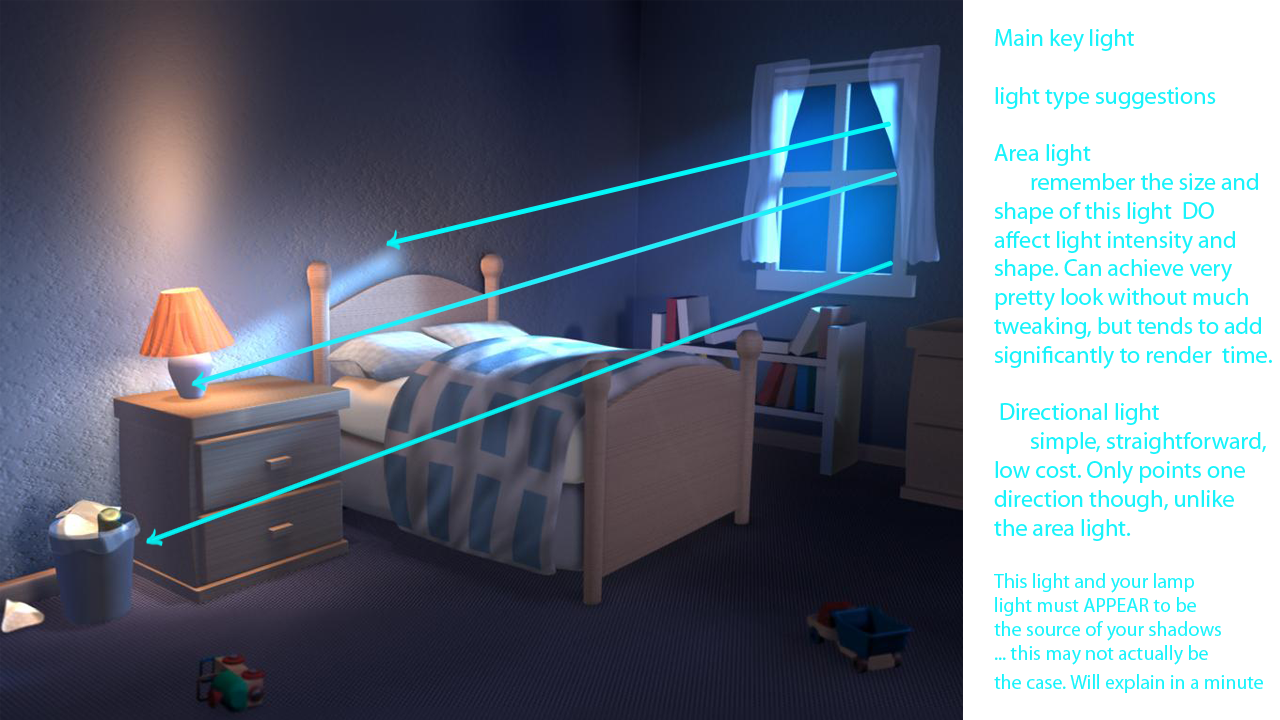
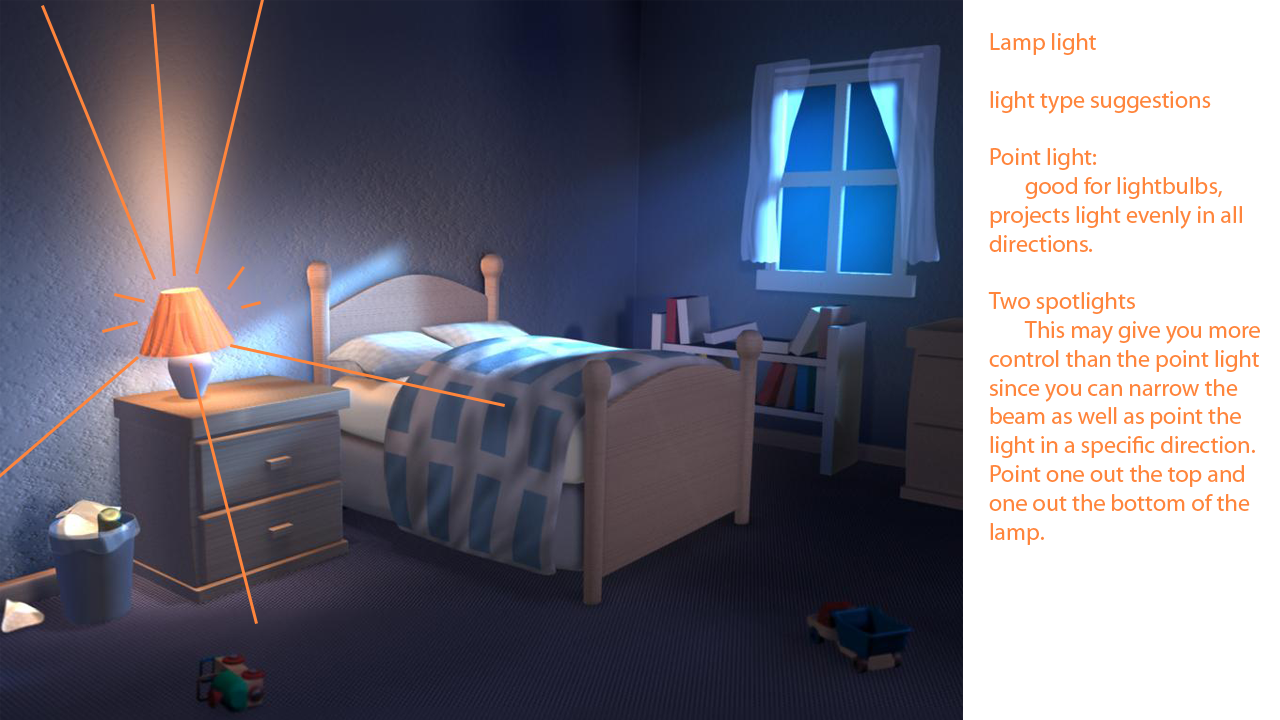
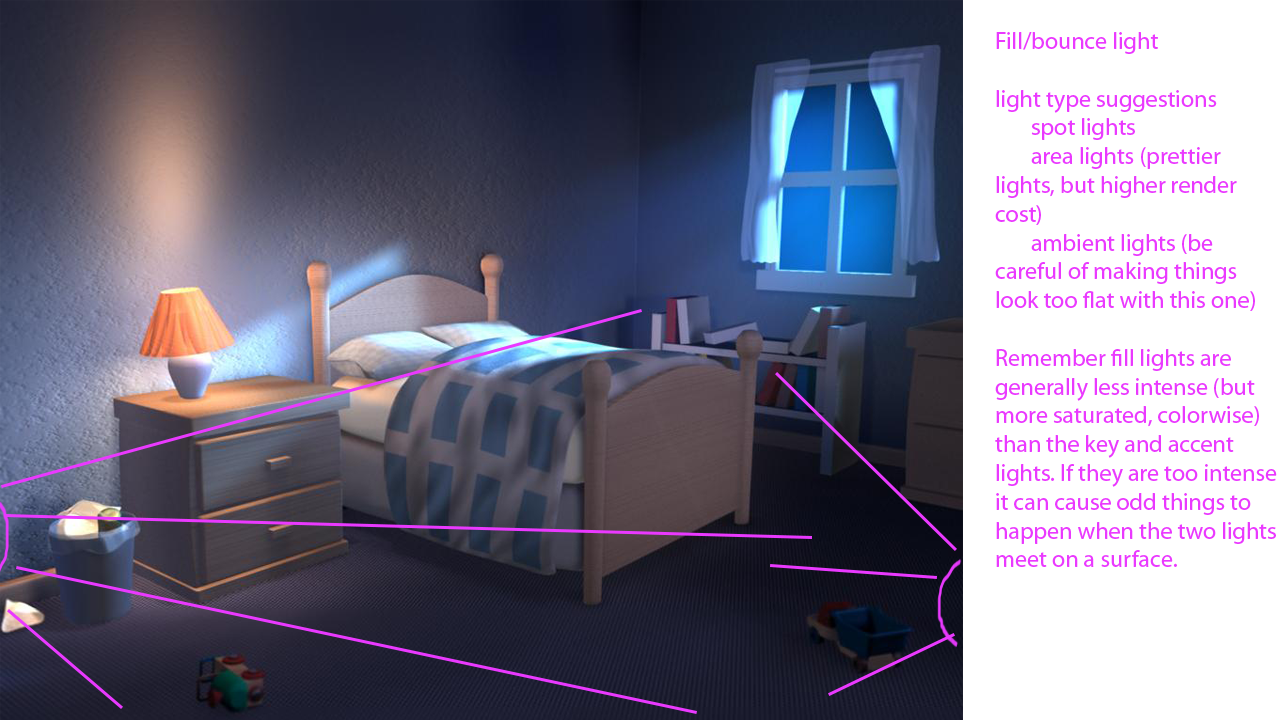
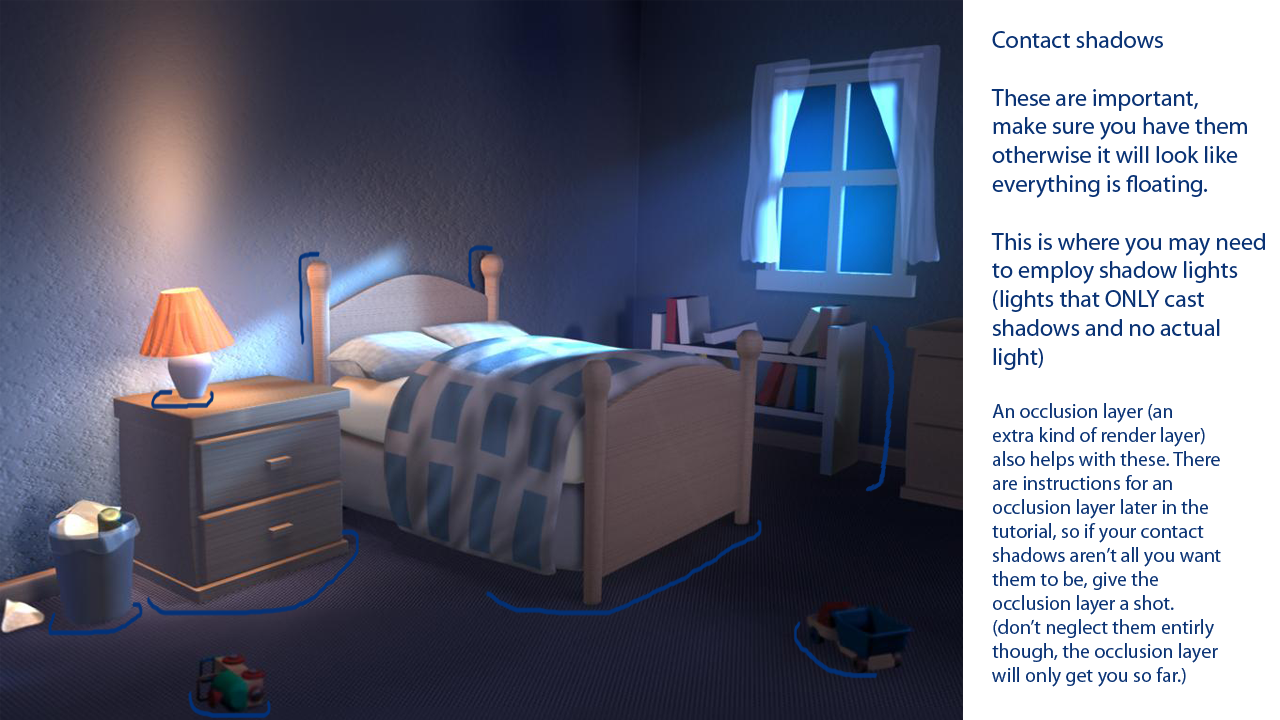
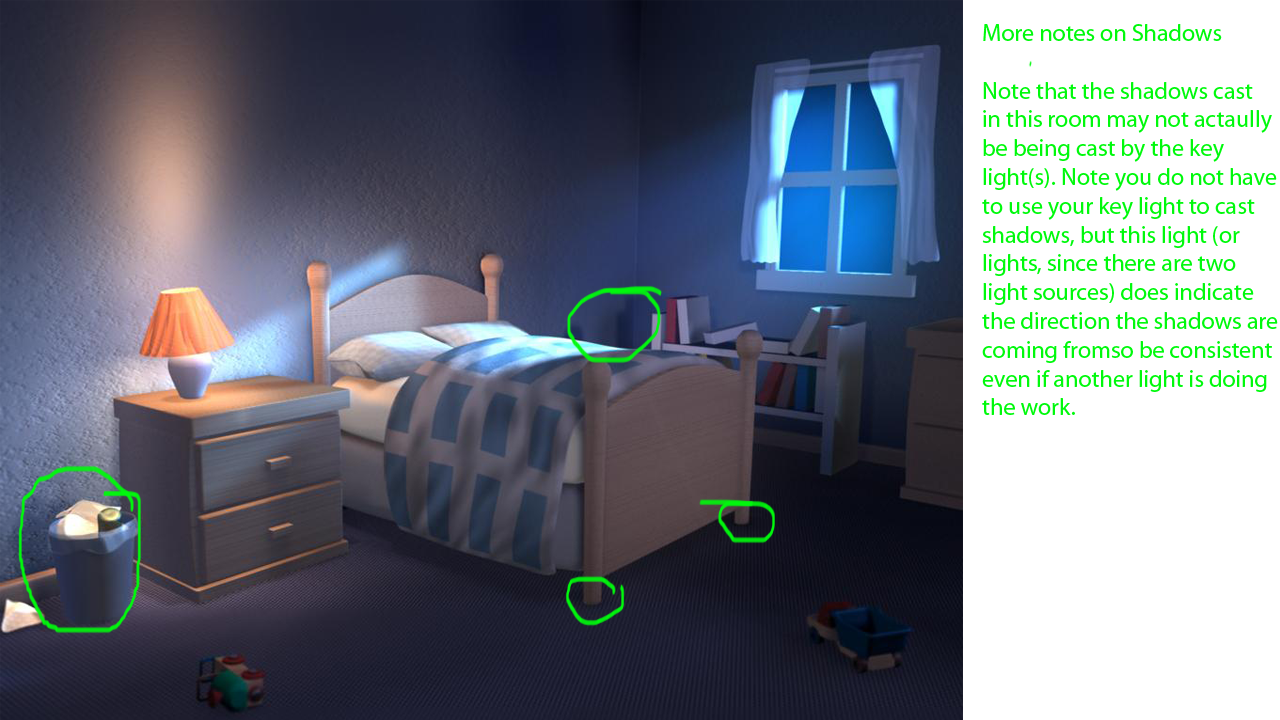
- Take a look at this breakdown of the various light sources, fills, and shadows in the room. Think about the approach you will need to take for lighting the different parts of the scene. Note that there are also some tips on what light types you may want to use to get you headed in the right direction.
- Light your scene. Do your best to match the target image. Consider what the light motivation is, the overall color of the scene, the intensity, etc. Which diretion is the light coming from, where are the shadow casting lights, where do you need fills, rims? Decide what kind of light will get you the effect you need.
- Use a variety of light types, experiment. Be aware that depth map shadows and some effects that work with Maya Software will not work with raytracing.
For a basic explanation of each light type check out the light creation section of the Maya help documentation.
- Organize! Create a group in your Outliner (Ctrl+g) and call it "lights". All of your lights should go in here! You can also subdivide this group for further organization - it is up to you. Also be sure to name your lights in a logical manner, including information on what objects they are hitting and their purpose. (For example, lamp_shade_fill, lamp_light_on_wall, etc.)
- Link your lights. By default new lights hit every object in the scene. Most of the time this isn't necessarily what you want.
- Go to a light's attributes and uncheck "Illuminates by Default".
- Go to Window → Relationship Editor → Light Linking → Light-Centric (Note that you may want to tear off this panel for the duration of the assignment).
- On the left is a list of all the lights in your scene, on the right is a list of every light receiving object in the scene.
- Select the light you want on the left and then the objects and/or groups of objects you want that light to affect on the right.
- Rinse and repeat!
- Make "shadow lights" to create pools of shadow. Shadow lights are custom light setups in Maya that cast shadows without any additional illumination. They are basically two lights sitting on top of each other: one casts shadows, and one does not. The light that does not cast shadows has a negative intensity to cancel out the illumination of the one that does.
With the production workspace installed, there is a button ( ) on the Production shelf that automatically converts a selected light to a shadow light. Once converted you can still move the light around and modify its attributes. However, you will need to setup your light linking before the conversion. The shadow light setup also assumes you are using Mentalray and raytracing, and will not work with Maya Software.
If the automatic method does not work to your liking, you can also set up a shadow light manually. Below are the steps you will need to take to do so:
- Make a spotlight and name it [object casting shadow]_shadow_light (ex: lamp_shadow_light).
- Go to the light attributes and uncheck Illuminates by Default.
- Under the Shadows section make sure Use Ray Trace Shadows is checked.
- Link it to the thing that is casting the shadow and the thing that the shadows are being casted on - for example, the floor.
- Leave the intensity at one. You will adjust this up or down as needed as this is how you will control the darkness/intensity of the shadow.
- Position the light where you want it.
- Duplicate that light. (Ctrl +d)
- Name the copy of your light [object casting shadow]_negative_light (ex: lamp_negative_light)
- Turn off shadows.
- Link it to the same objects as the shadow light. Duplicating does not copy your light links.
- Make the intensity of your negative light the exact opposite of your shadow light (-1 if the shadow light is 1, etc).
- Render and adjust as needed. Remember this light will need to have the exact same position, cone angle and prenumbra settings as your shadow light. This means that if you change anything on the shadow light you will also have to change it on the negative light.
Note that the color of the lights will affect the color of the shadow.
- Use a variety of light types, experiment. Be aware that depth map shadows and some effects that work with Maya Software will not work with raytracing.
- DO NOT use Photoshop to tweak the lights in your scene. Do all of the work in Maya.
DO NOT change geometry, shaders or camera settings. This project is only about "painting" your scene with light.
Make sure to use raytrace shadows and to render in mental ray. While working you will want to use preview render settings. To do so go to Windows → Rendering Editors → Render Settings, then go to Presets → Load Preset → Preview. Be sure to change the preset back to Production for your final render.
- Render your scene. Go to Windows → Rendering Editors → Render Settings.
Make sure to use the Production quality preset. In the Common tab change the Image format to PNG. Scroll down to the Image Size section and make sure the Width is 1024 and the Height is 768. Next hit the render button, making sure to render from render_cam.
Save the image by right clicking on the rendered image and go to File → Save Image. Name it [lastname]_[firstname]_part1_beauty.png.
Your "beauty" render is your high quality render straight out of maya with no additional render passes. You will learn more about additional types of render passes later in the course. - Render an occlusion pass. (This is optional!)
- Below the channel box is the layer window. Click on the Render tab. Select all the physical objects in your scene besides the view_outside object (do not select any lights or texture placement nodes). Go to Layers → Create Layer From Selected. Rename your layer to occlusion pass by double clicking the layer name
- Right click the layer and select Attributes. Make sure the occlusion tab is selected. Go to Presets → Occlusion.
- Change Samples to 250, Spread to 1, and Max Distance to 3.
- Make sure the render layer is selected and render from camera_1.
- Bring both renders into separate layers in Photoshop. Make sure the occlusion layer is above the rendered scene. Use the Multiply Blend Node and save your image.
Part 2: Mood Lighting
For the second part of the assignment you will pick a specific mood from the following list: sad, happy, or fearful, and be sure to select two reference images that inspired you. The staff and students will guess which mood you've selected so prepare by showing friends and family and getting their response. Indicate your chosen mood by commenting in the Catalyst turn-in area for Project 4b.
- Gather reference. Gather at least two pieces of visual reference that supports the theme (day or night) and mood you have chosen. The references you choose can be paintings, photographs, film, etc. Use the reference to adjust your lights to excentuate the mood you are working with. This could involve shifting the colors (say to green if you are going for fear, for example), the contrast or the angle of the lights and sharpness or length of shadows.
- As before, constantly save iterations while your work! If a file becomes corrupt or you no longer like the direction you are going you can always go back.
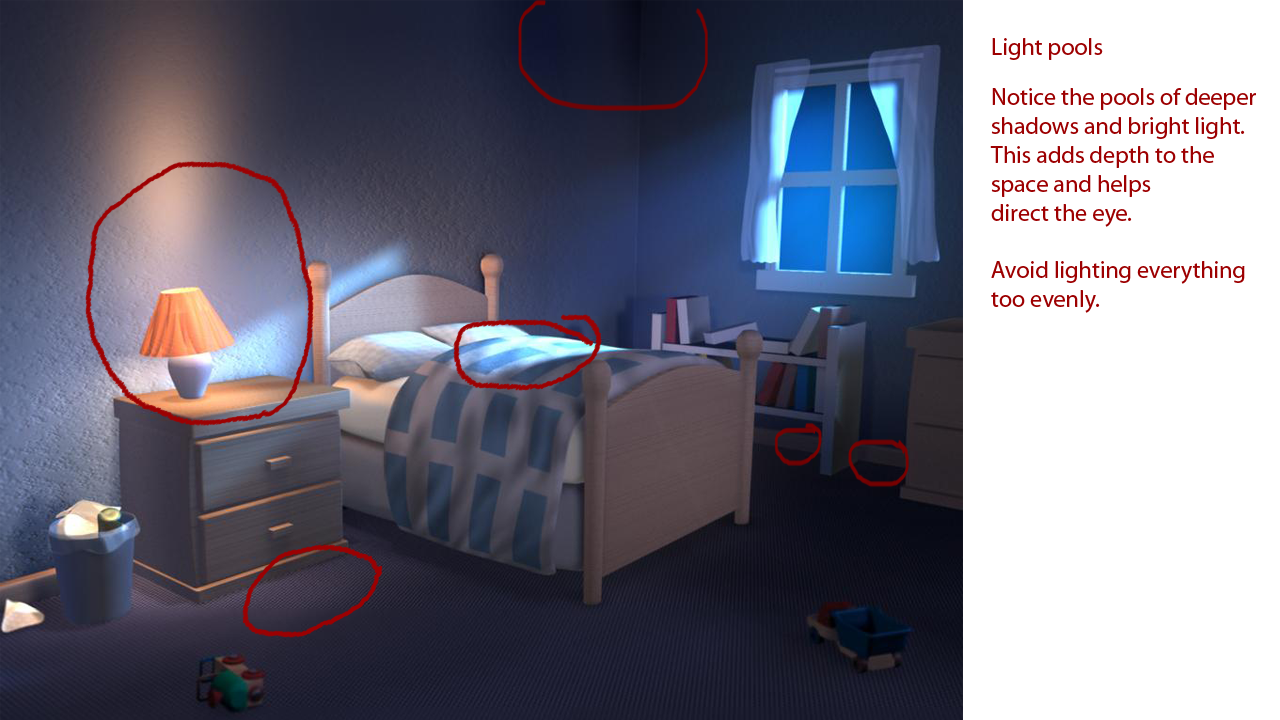
- The ultimate goal is to convey a particular mood with your lighting. Pay close attention the distribution of light and color throughout
your scene. Bad lighting is typically very flat, while good lighting
contains gradations. It is generally more visually interesting
to juxtapose at least two colors.
Motivate your lights as much as possible. This means that the viewer should be able to understand where each light is coming from, whether it is a window, light fixture, or even just bounce light. This is a fairly loose guideline, but one you should think about. You should also use contact shadows where needed. An object on the ground typically casts a shadow below it. If you forget these shadows, your overall lighting will suffer for it.
Lighting is an art, not a science. Use reference. However, the purpose of reference is not to provide you with something to slavishly copy, but to show you what good lighting looks like.
Make sure we can see your scene. Pools of dark and dim light can be effective when deployed in the right places, but if the overall brightness level is so dark that it is difficult to see what is going on, then that is no good.Experiment! You may have noticed the fog effect coming through the window in the scene you matched, below is a link to instructions for how to achieve that effect. You can also project images through lights (lower left picture) and many other things.
Play with effects and don't hesitate to try things, but always remember that if you use an effect it still has to support your mood.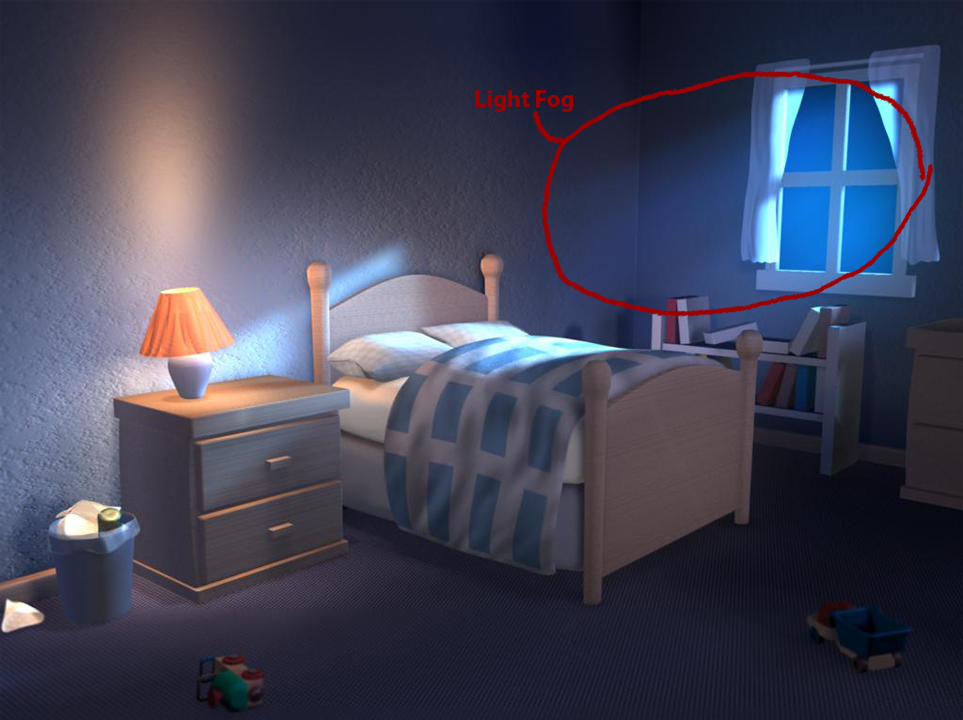
There are a few ways to create light rays through your windows. Here is one: Light Rays 101.
You can also acheive a similar effect by adding a light fog to a spot light.
- The same restrictions from before apply: don't touch up the lights in your scene using external image editors such as Photoshop, keep the geometry/shaders/camera as they are, and make sure to render using mental ray!
- Render your scene. Use mentalray and the same settings specified in Part 1, Step 6 and save your file as [lastname]_[firstname]_part2_[mood]_beauty.png.
- Render an occlusion pass. (this is optional - see Part 1, Step 7 for details)