Reference Plane Exercise
When modeling an object, it is extremely useful to use reference. Typically your reference will be an image, which requires another program besides Maya to view. Switching between Maya and the image will quickly become a hassle. However, it is possible to import an image directly into Maya, which allows you to use it as a guide for modeling. These images are called image planes because they appear as a plane in the camera view.
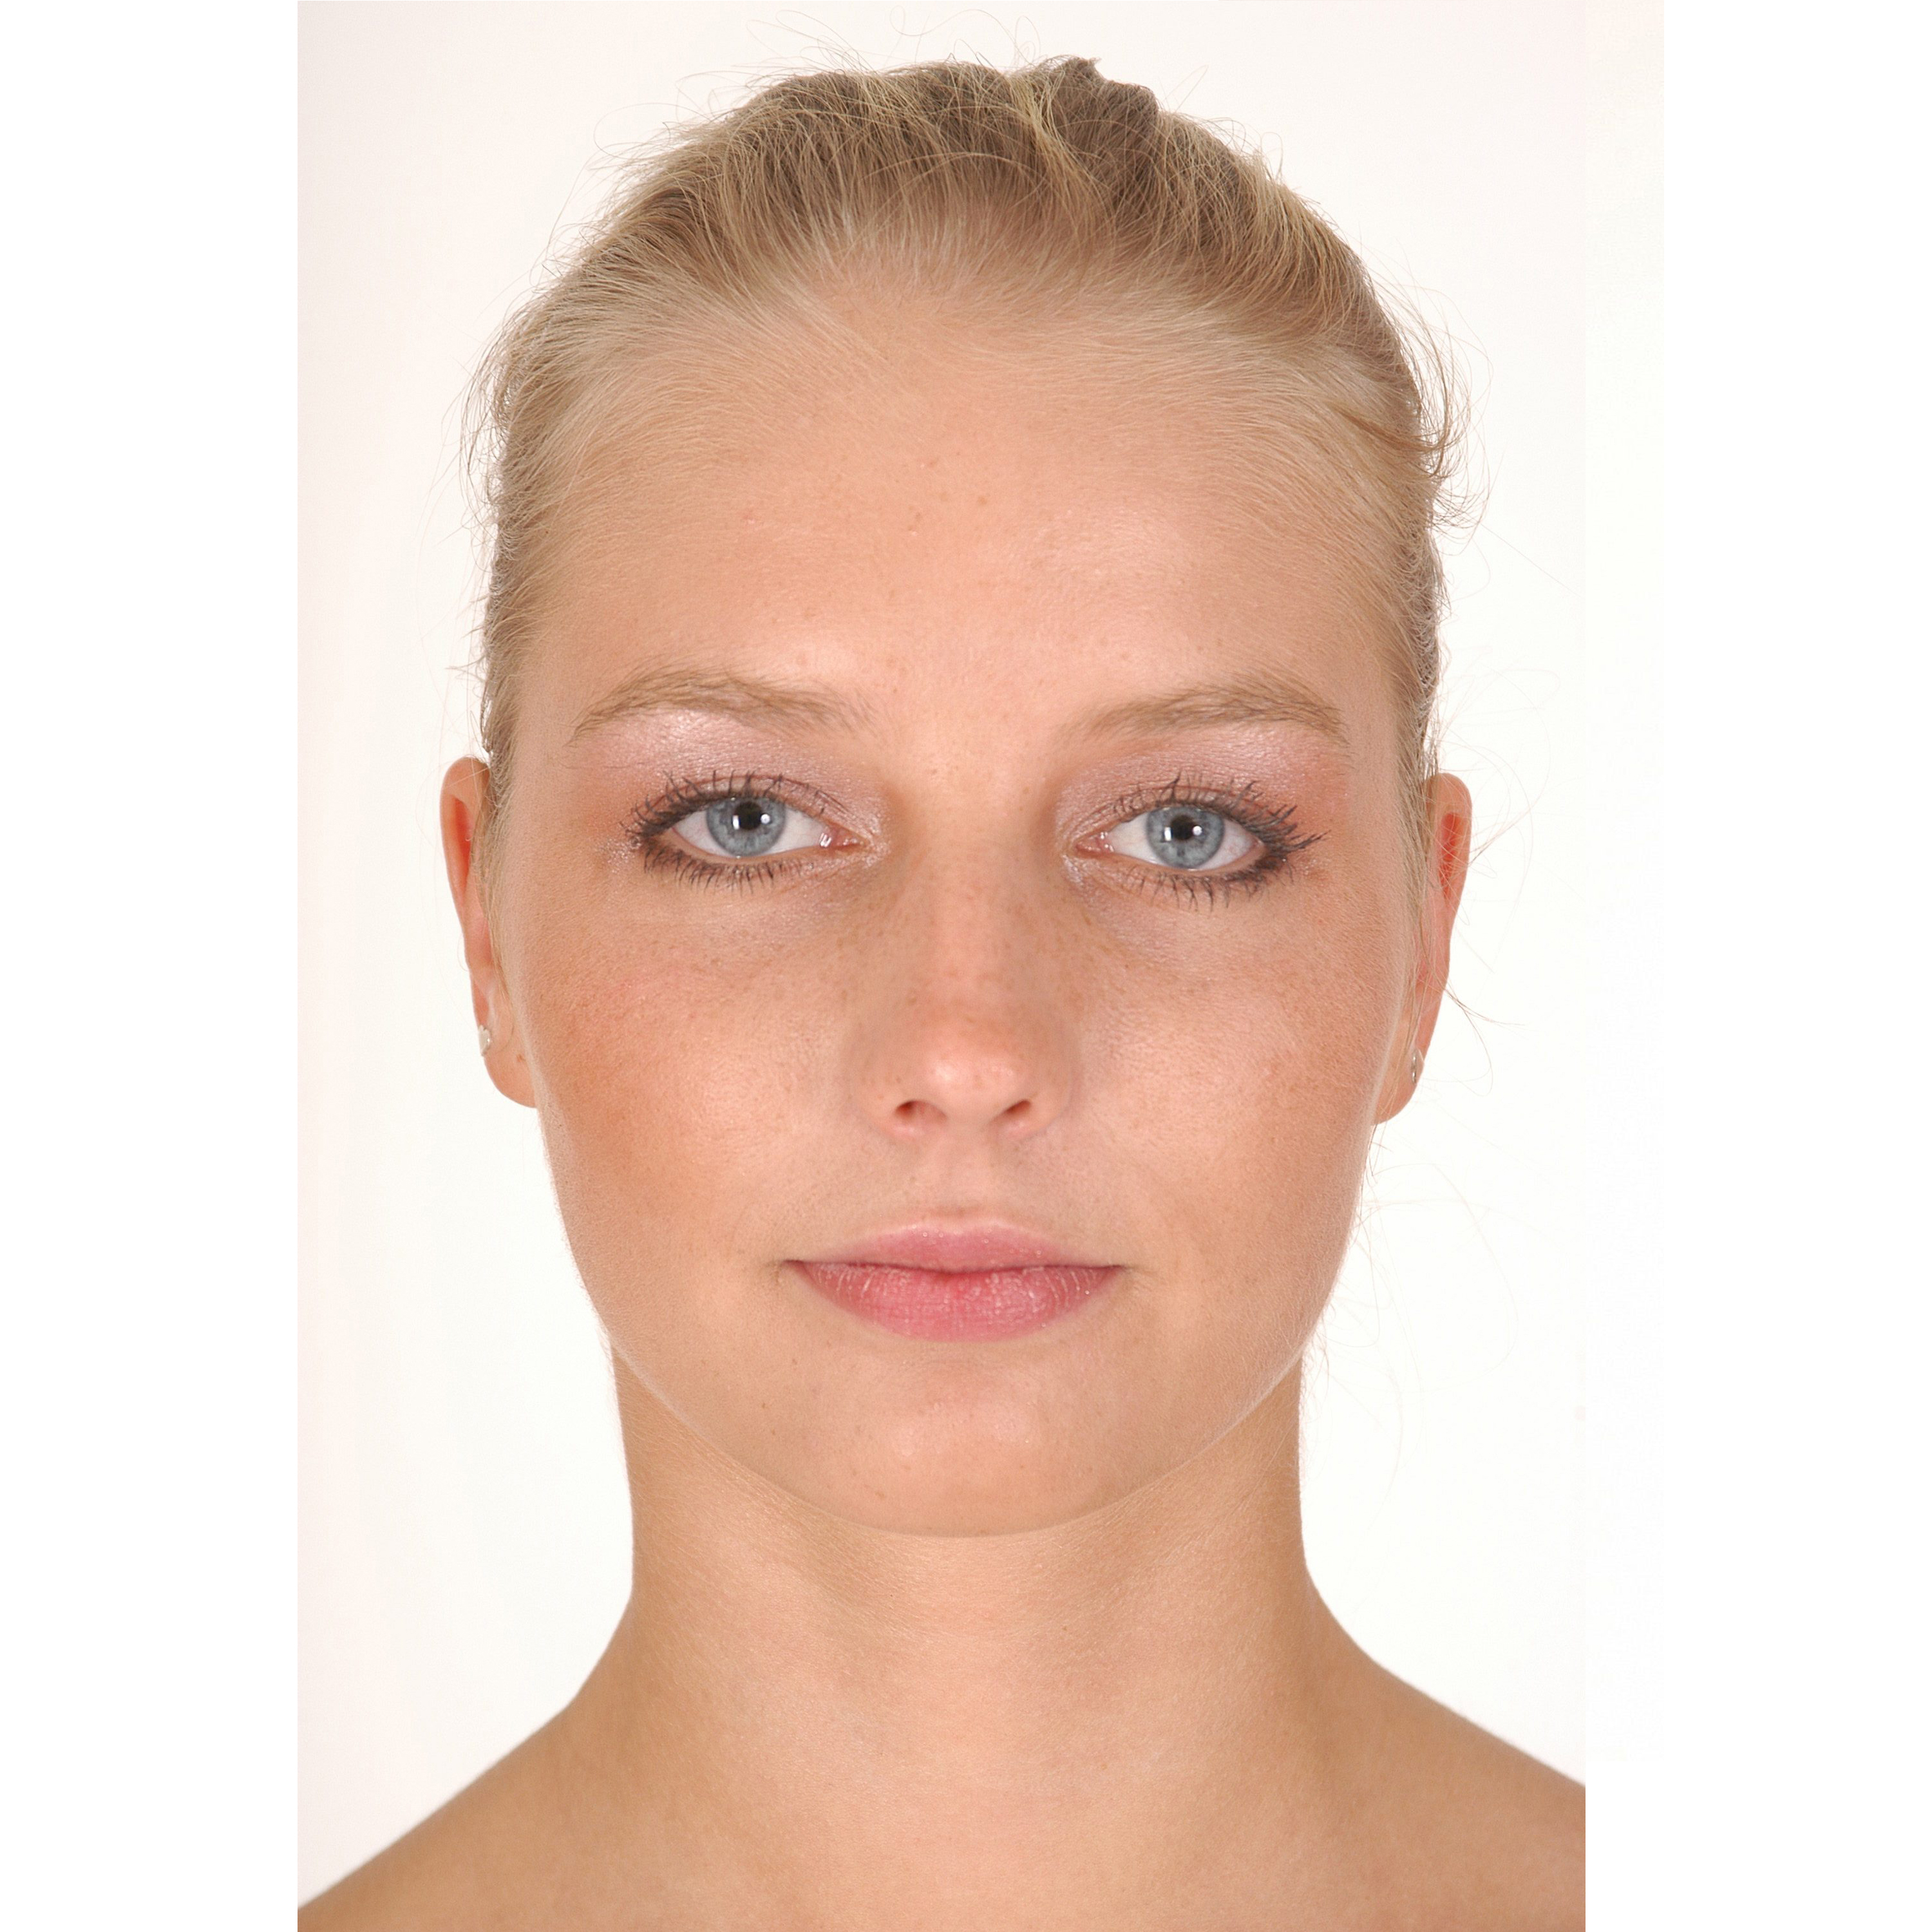
The first step to setting up image planes is making sure your reference images are aligned correctly. Most explicit modeling reference will include a front, side, and possibly top and back view. We will be using a front and side view in this exercise.
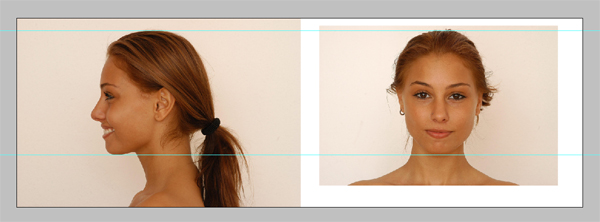
We will begin our alignment in Photoshop. First create a new image that is large enough to hold the two views (6000 x 2000 in this case). Copy the two images into the blank image and position them as shown below. Note that the top of the head and the chin do not line up yet. You can create helpful guidelines by clicking on a ruler at the top and side of the window and dragging down. If you do not see the rulers go to View &rarr Rulers (Ctrl-r). You can adjust the position of the guidelines by using the Move Tool (m). Drag them off the screen to remove them.

We need to adjust one of the heads so that they match. We will adjust the one on the right in this example. Scale the head so that the top of the head and bottom of the chin match the guidelines from the other image. You can scale an image by doing Edit → Free Transform (Ctrl-t) in the image's layer. Drag the corners of the control box to scale the image, but be sure to hold Shift when doing this to maintain the image's proportions.
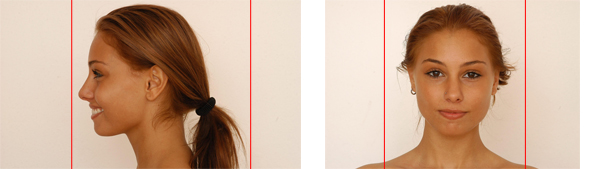
Once the images are aligned, remove the guidelines and crop off any white space on the top and bottom of the image using the Crop Tool (c). We can now extract the properly aligned front and side views. Copy each head into a new image. The red lines in the image below give you a general idea where to select. Make sure that the height of the two new images are the same. Save these files as "side_view.jpg" and "front_view.jpg" and put them in a readily accessible location.
1. Creating the polygon plane
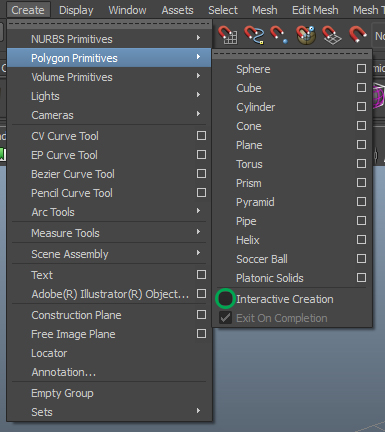
Now open Maya. To create the reference planes, first uncheck "Interactive Creation" in the Create → Polygon Primitives menu. This should be unchecked temporarily because we want Maya to create a square plane for us.
Create → Polygon Primitives → Plane
Press "f" to frame the selection
Press "6" to view the plane in smooth shaded view with texture. It should look the same as it did before.
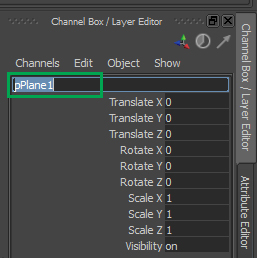
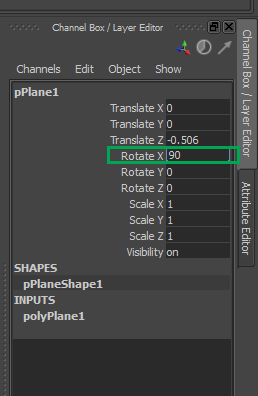
In the Channel Box, change the name from pPlane1 to "front_plane"
2. Load the image onto the plane
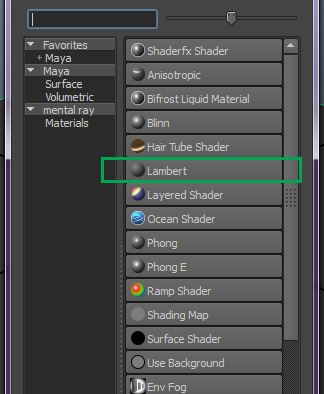
Right click on the polygon plane and click on "Assign New Material..." in the menu

In the window that appears, press "Lambert"
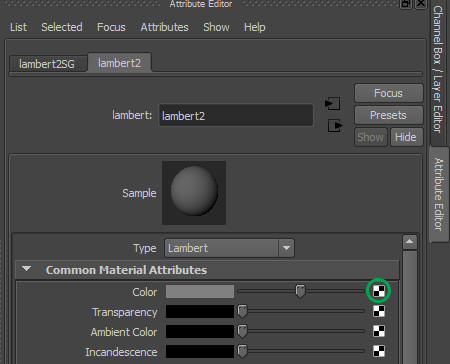
In the Attribute Editor (Ctrl + a) rename the material from "lambert2" to "front_material"
NOTE: If the material does not show up, right click on the plane and choose "Material Attributes..."
Click the checker box next to the Color attribute
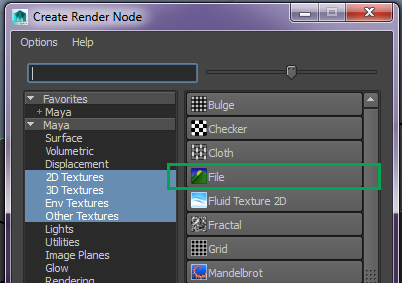
In the window that appears, choose "File"
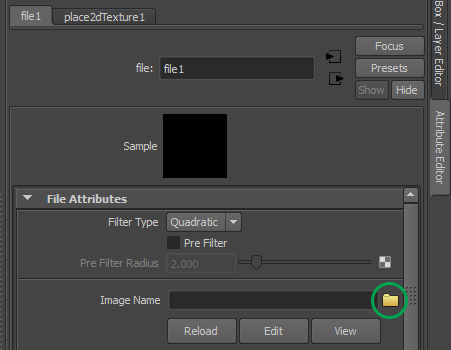
In the Attribute Editor, click on the file button next to the "Image Name" field and browse to your front image.
NOTE: If this does not show up, right click on the plane and choose "Material Attributes..." This should bring you back to the material. Now click on the arrow with the black box around it next to Color to access this tab.
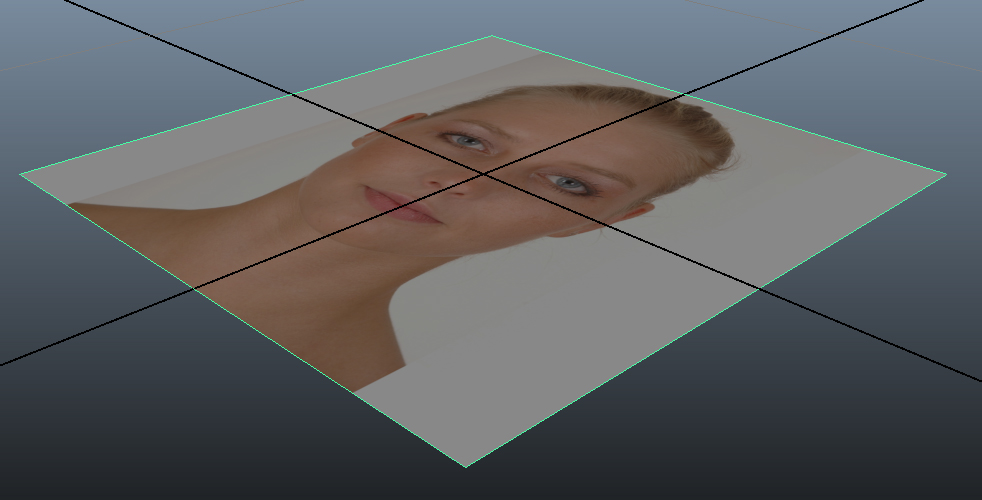
The image should appear on the plane like so.
3. Aligning the plane to the front camera
Select the front_plane that we created
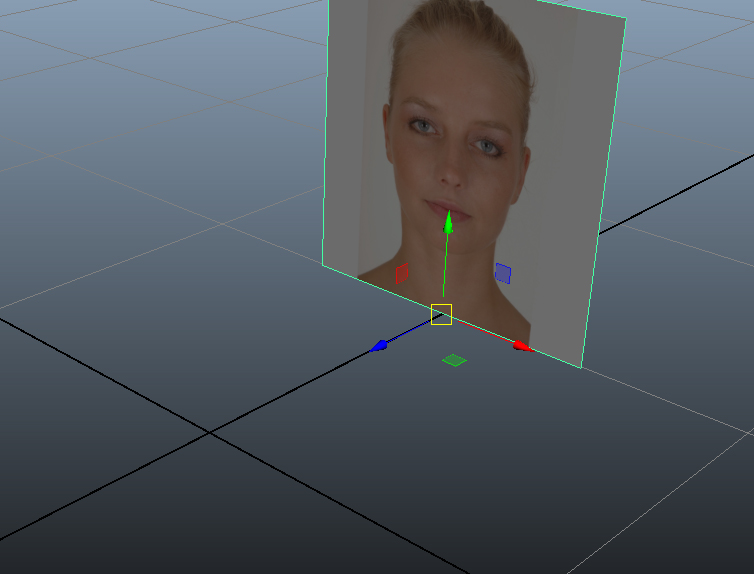
Press "w" to activate the move tool.
Click and drag the blue arrow until the bottom of the image lines up with the origin
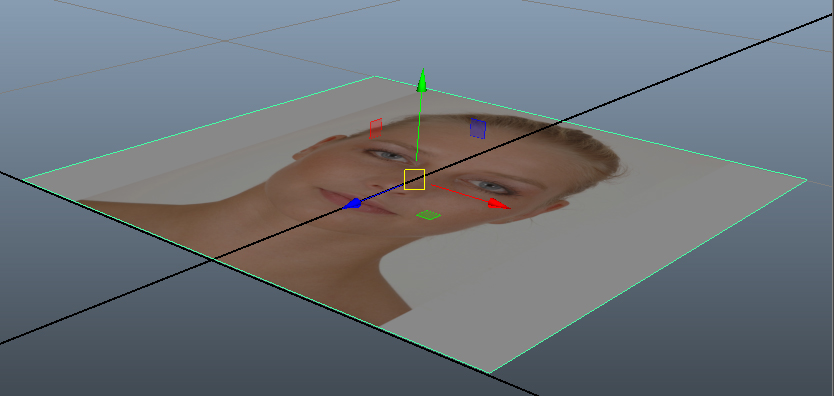
Now we want to move the pivot point. This is the point from which the plane rotates. As it is currently, the pivot is in the middle of the plane, but that is not helpful to us.
To move the pivot point, hold down "d" AND "x" at the same time. This will move the allow us to move the pivot of the plane by snapping it to the origin.
While holding those keys, click the middle of the circle and drag it toward the origin so that it will snap to it.
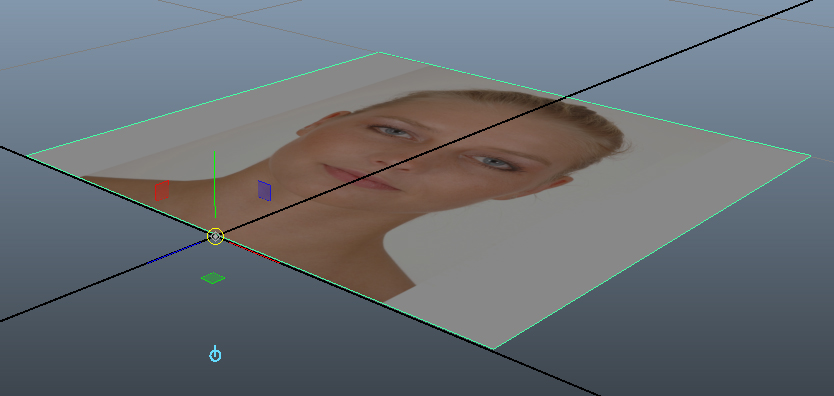
We can now rotate the image the way that we want it, so access the rotate tool by pressing "e"
Go into the Channel Box and type in "90" to the Rotate X field
Move the front_plane back on the Z-axis
Delete the History. This will help to keep the scene clean.
With the front_plane selected, press Edit → Delete By Type → History

4. Making a plane for the side image
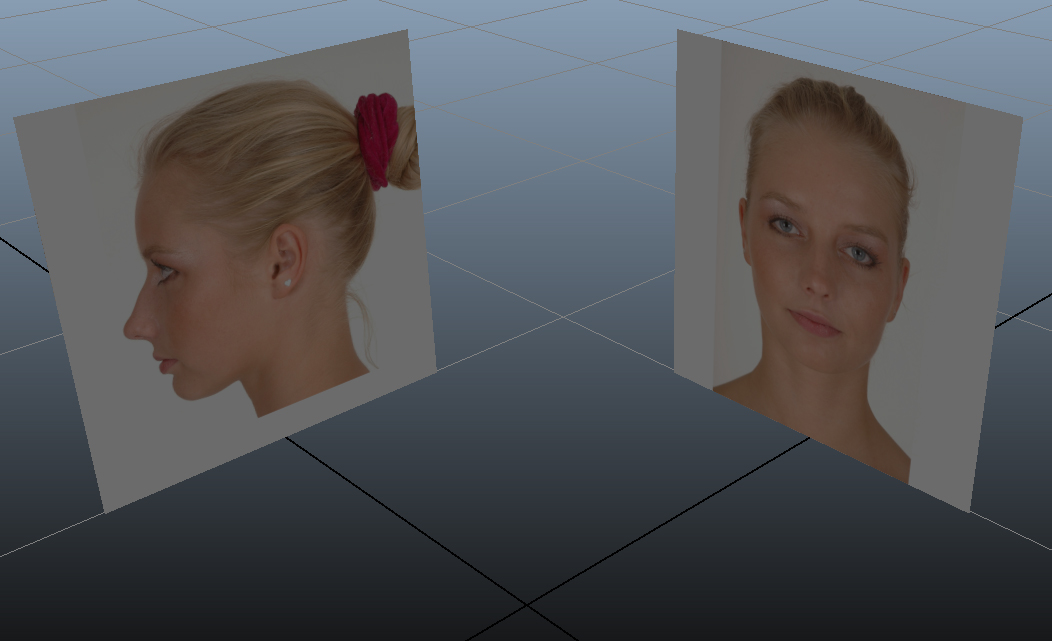
Repeat steps 1 - 3 for the side view image. This time the image should be rotated so that it is aligned with the side camera.
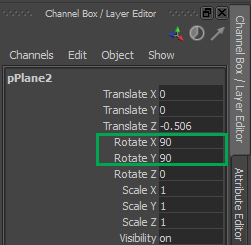
In the Channel Box, type in "90" to the Rotate X field and "90" in the Rotate Y field.
For the side image, it will also be moved back on the X-axis
When this is done, it should look something like this
5. Group the front and side planes
Select both front_plane and side_plane and press "Ctrl + g"
In the Outliner a new object called "group1" will appear. Inside will be the two planes.
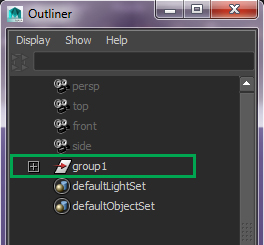
Rename "group1" to "reference_grp"
6. Add the reference planes to a display layer
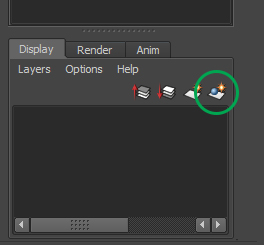
In the Outliner, click on the plus icon next to "reference_grp" to expand it. front_plane and side_plane should be visible
Shift select both of them

With the planes selected, go into the Channel Box/Layer Editor tab. At the bottom, click on the new layer button as shown below.
Double click on the new "layer1" that appears
Rename it to "reference_lyr"
Set display type to "Reference"

The reason why we want to set this layer to reference is that, as you work, it may be frustrating if you constantly keep clicking on the images when you don't mean to. By setting this layer to Reference, even if you click on it, nothing will happen.
If you do, for instance, need to move the images, feel free to change it back to "Normal"
You now know how to create and align reference planes. Continue on to the other exercises to learn more about the basics of Maya.