The first step in setting up a particle system is to create a particle emitter. Go to Particles → Create Emitter (Options). We will need to adjust several of the emitter's attributes. This can be done before creation or afterward through the Attribute Editor.
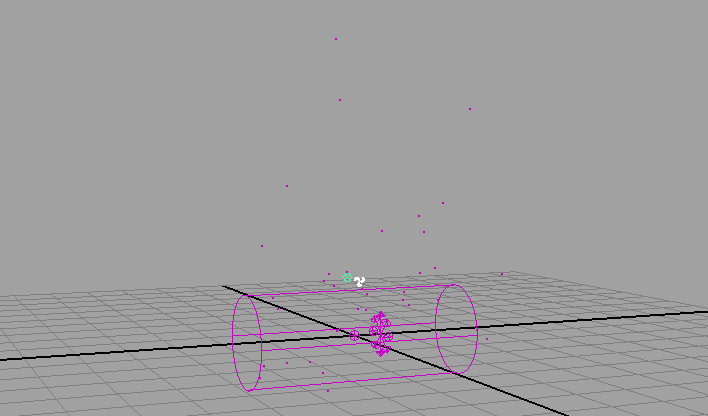
Call the new emitter sparksEmitter. Since we want our sparks to come from a log, set the Emitter type to Volume and the Volume shape to Cylinder. Rotate and scale the new volume emitter until it resembles a log. If you hit Play, you should see particles being emitted in all directions. You may want to increase the time visible on your Time Slider so that you can see more of the animation. Going back to frame 0 will reset the particle simulation back to its initial state.
By default Maya will try to play your effect in real-time. If it can not keep up with the computation required to simulate your effect, then it will cut some corners to make up time. This generally not what you want and can be especially problematic with fluids. To make sure Maya calculates every frame go to Window → Settings/Preferences → Preferences → Timeline and set Playback speed to Play every frame.


At the moment, the particles are emitted in all directions and travel in a straight line. We can affect the trajectory of a particle after it has been emitted by creating fields that are linked to the particles. Fields act as forces that affect the particles in a certain way, such as being pulled down by gravity.
Fields can be linked to particles when they are created by selecting the particles before creating the field. You can also link them using an editor similar to the Light Linker found at Window → Relationship Editors → Dynamic Relationships. Create an Air and a Turbulence field from the Fields menu and make sure they are linked to the particles. The default settings for the Air field should be sufficient, but change the Magnitude of the Turbulence field to 25.

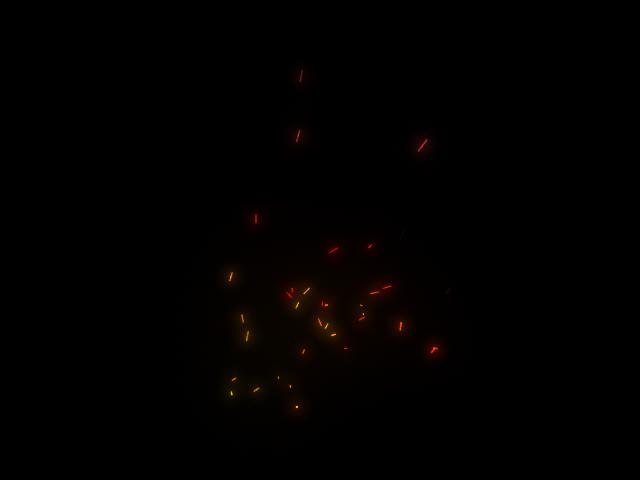
The particles still have the default particleCloud shader assigned to them. Assign a new Particle Cloud shader to the particles. This can be found under the Volumetric category if you are using the Hypershade. The Particle Cloud has Life Color, Life Transparency, and Life Incandescence attributes. These affect the appearance of the particles based on how old they are.
Map the ramp on the left into the Life Color and Life Incandescence of the Particle Cloud. Map the right ramp into the Life Transparency. Change the Glow Intensity to 0.3. This will simulate the spark cooling as it travels through the air, eventually turning to ash and disappearing.