Use Fluid Effects → Create 3D Container With Emitter (Options) to set up a new fluid. Set the X, Y, and Z Resolution to 20. Unlike particles, fluids are contained in boxes which they cannot escape. The insides of these boxes are divided into a set of "voxels" — points in space at which the various properties of the fluid are calculated. Increasing the resolution results in a higher fidelity image, but also takes longer to calculate and consumes more memory.
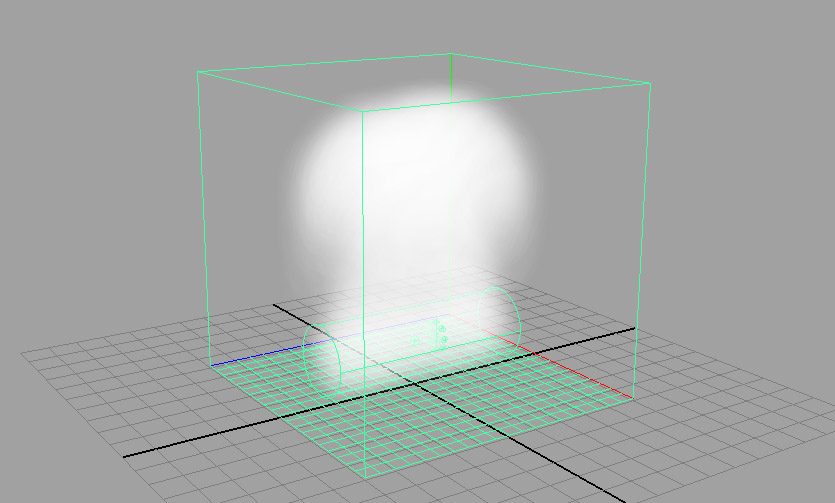
Set the Emitter type to Volume and the Volume shape to Cylinder. Scale and rotate the emitter to create a log shape as you did with the particle emitter. If you are shaded mode (6) and you hit Play, the emitter should create a white fog that fills up the box.

Your final fluid flame should look something like the image below. Once you import your spark particles you are almost ready to render. You may have noticed that it takes a while for the effects to start up and get to a steady state. Generally you are not interested in rendering this start up phase. To avoid this you can play the effect to a point where it is stable and then set the current frame as the initial state. You can do this for particles by using Solvers → Initial State → Set for Selected. For fluids use Fluid Effects → Set Initial State.
Rendering effects is a bit tricky because you have to cache out the effect first. Normally Maya determines the next state of an effect based on the current frame. When you cache it, Maya calculates everything up front. This allows you to scrub through your effects much faster and avoids a class of render problems.
The first step when caching is to set a new project (File → Project → New). This will give Maya a place to save its computations. It goes without saying that this should be on the network. To cache particles, use Solvers → Create Particle Disk Cache. To cache fluids, use Fluid Effects → Create Cache. Once you have cached your effects, render out 5 seconds of your combined fire effect. Rendering on the render farm should work, but you may have to fall back on batch rendering if the render farm doesn't feel up to it.
