Assignment #3: Posing and Forward Jump
Assigned: Thursday, October 11th, 2012
Due: Thursday, October 18th @ 3:00 PM
Resources:
- This week's Basic Guy rig - and all the scripts
- Posing A Character
- Muybridge human jump from a side view (taken from The Animator's Survival Kit)
- Dave's example character sheet for thumbnail drawing
- Dave's example pose research sheet (testing to see which pose works best for anticipation)
In this assignment, you will be working with a complex character rig for the first time. This will involve practicing the basics of posing followed by blocking in the extremes of a forward jump, an animation that will be taken to completion next week.
For both parts of the assignment you will be using the "Basic Guy" rig. Luckily, this rig comes packaged with some handy features that should make the keyframing process a bit easier. A zip archive containing the rig and instructions on installing its scripts into Maya follow:
- Download the Basic Guy package and unzip the archive.
- The actual rig file is in the Basic_Guy\scenes
- Navigate to Libraries\Documents. "Libraries" can be found in the file tree to the left of an open file browser. You will be dragging files into subfolders of the maya folder.
- Move bgWin.mel from Basic_Guy\scripts to maya\2012-x64\scripts
- Move shelf_BasicGuy.mel from Basic_Guy\shelves to maya\2012-x64\prefs\shelves
- Move all .dib files from Basic_Guy\icons to maya\2012-x64\prefs\icons
- Open the Basic Guy rig. There should be a shelf labeled "Basic Guy".
Part 1: Character Posing
Posing a character correctly is critical in creating believable movement. The focus of this portion of the assignment is to give you practice executing the basic principles of posing: line of action, silhouette, and a sense of weight and balance. Your goal will be to pose the Basic Guy character in eight distinct poses listed below with these principles in mind.
It will be helpful to act out the character's actions yourself to give you an idea how the weight should be distributed. Also, read through Posing A Character. Of crucial importance are the concepts of line of action and silhouette.
The line of action is an imaginary line that travels through your pose. These lines are usually broad "C" or "S" curves that define the direction of an action and/or how forces are applied. For example, the line of action of a character pushing a large object would originate at their feet, curve up their back, and finally end at their hands where pressure is applied to the object. It is also important to note these lines are never completely straight. Even mundane actions such as a character simply standing and doing nothing should have a curved line of action, if only slightly. In general, lines of action make your poses more dynamic and believable.
The silhouette refers to just the outline of your character, which means that you should always pose your character relative to a fixed camera perspective. You can disable the normal shading and see just the character's silhouette by hitting the 7 key. What this really does is display the scene with lighting, but since there are no lights in the scene, the character will display as all black. You will want to view the silhouette from time to time to assess how your poses are progressing, as poses should be able to be read by the silhouette alone.
In the same Maya scene (starting from the Basic Guy rig file), do the following:
- Review the poses you will be doing and their examples below.
- Pose the character so that it is carrying an object that is light.
- Pose the character so that it is carrying an object that is heavy.
- Pose the character balancing with one leg in lifted in front of it.
- Pose the character balancing with one leg lifted high to the side. The character does not have to be holding their leg like in the examples.
- Pose the character pulling a rope.
- Pose the character pushing something large and heavy while facing it.
- Pose the character so that it conveys the emotion of being sad.
- Pose the character so that it conveys the emotion of being frightened.


- Key each new pose every ten frames in the order given. Carrying a light object will be on frame 0, carrying a heavy object on frame 10, balancing with one leg in front on frame 20, and so on.
- Remember to key all of the controls for each pose. In addition, use stepped tangents. There should be no splining for this assigment. Making sure that the default tangents in your Animation Preferences are set to Clamped/Stepped.
- Create a render camera and pose your character relative to this. How the silhouette, line of action, and weight come across in the final 2D image is what matters. Go to Create → Cameras → Camera. Name this new camera "render_cam".
Next, go to Window → Rendering Editors → Render Settings. Under the Common tab, scroll to Image Size. In the Presets drop-down menu, select "HD 720".
Finally, find a suitable position for the camera. Approximately to the side and level with the ground should suffice. With the camera selected, in the Channel Box select all of the attributes, and in the right-click menu choose "Lock Selected". This will prevent you from accidentally moving the camera.
- After you have finished posing, scrub to each pose and do a quick render. You will be turning in these eight renders alongside your Maya file.
Part 2a: Forward Jump Planning
For this part of the assignment you will be creating a planning sheet for a forward jump using the specified key poses. The character will start in a neutral standing position, jump with forward momentum, then land and settle into a neutral standing position. The feet must also take-off from and land on the ground at the same time (also known as a symmetrical jump). Planning sheets make the entire animation process faster and easier; they are invaluable tools for visualizing and planning your motion even before you get into Maya. When drawing your planning sheets, you will want to try to make your poses as interesting as possible and avoid twinning. You can find an example of the poses we want you to draw from The Animator's Survival Kit here.
What to do:
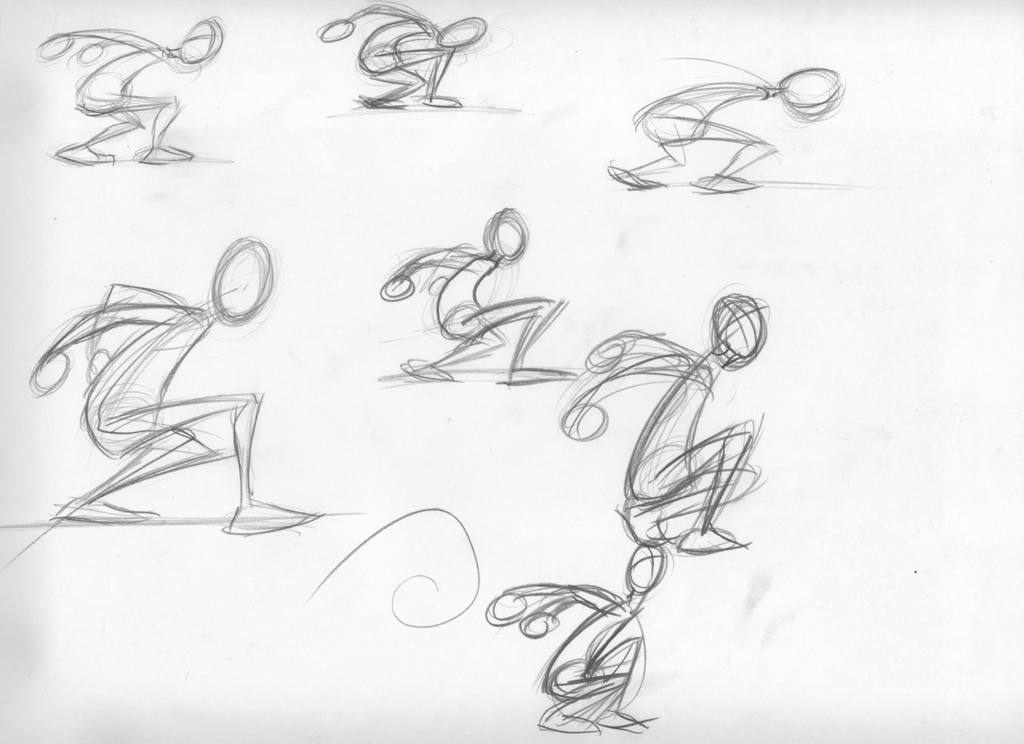
- On one or more sheets of paper sketch out several "research" poses. Try drawing different variations of each jump pose to see what works and what doesn't. Don't worry about perfection. These sketches can be rough as you are only experimenting at this stage. You are only required to turn in one sheet of research, though it is encouraged you do more. Here is an example of pose research.
- Draw out a planning sheet for the standing jump, using only the following poses:
- Start and end with a neutral pose
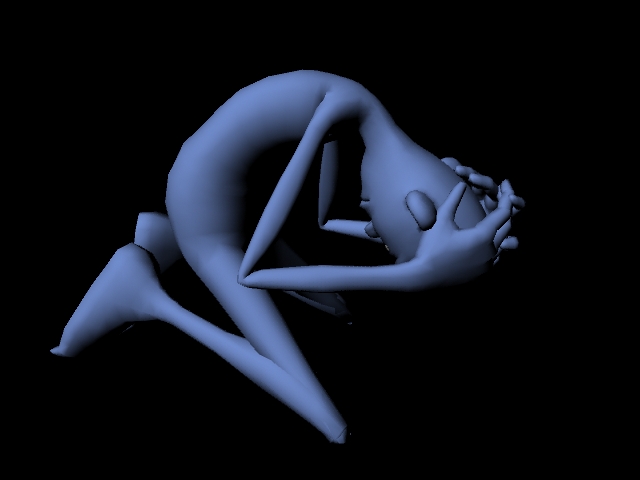
- Anticipation (squash)
- Jump (stretch), contact with the ground
- Mid-air (squash)
- Fall (stretch), contract with the ground
- Recovery (squash)
Check out this example of a jump planning sheet from a previous year. Note that though this is the optimal level of detail, your planning sheet at the minimum just needs to be enough to convey poses and lines of action.
Part 2b: Forward Jump Posing
Now that you have a planning sheet it's time to start posing. You will also be using the Basic Guy rig from the first part of the assignment. Save these poses in a separate Maya file than the one you have for Part 1.
What to do:
- Pose the basic guy rig directly from your planning sheet in an orthographic side view. You don't have to set up a camera like in the first part. However, make sure your playblast is a reasonable distance away from your character, and that the full motion is visible.
He should jumping from left to the right. There should only be the seven poses specified above -- two of which are neutral. Set Maya to stepped mode. The poses should be in order with 10 frames between each pose, as is the case with your poses in Part 1. We are not worrying about timing. Also don't do any inbetween/break-down poses. Make these seven, particularly the inner five, as perfect as you can! - Draw CV curves over each of the poses indicating motion arcs. Just use the Create CV Curve Tool (or use the EP Curve Tool for more control) in the orthographic view you are posing from. For each CV curve, key the Visibility attribute such that the curve only shows up for its respective pose.
- Create two playblasts: One with the CV curves visible and one with them hidden. One method to temporarily hide all of the animated curves is to group them together (with every curve selected hit Ctrl+g) and then hide the group in the Outliner.
Grading Criteria and Turn-In Checklist:
- MOTION CHECK-IN:
- At least two or more poses in Maya (either for Part 1 or Part 2)
- Forward jump planning sheet and research sheet
- Part 1: Character Posing
- Poses
- Clear line of action
- Strong silhouette
- Character appears to have the correct weight/balance
- Full body posing
- No twinning
- Posed hands (no "pancake" hands)
- Shoulders and hips oriented correctly
- Dynamic/interesting
- No foreshortening
- Object interaction
- Heavy object appears heavy
- Light object appears light
- Push and pull show the proper force
- For Turn-In:
- Maya file with the poses
- A render of each pose (for a total of eight)
- Poses
- Part 2: Forward Jump Posing
- Poses
- Clear line of action
- Strong silhouette
- Character appears to have the correct weight/balance
- Full body posing
- No twinning
- Posed hands (no "pancake" hands)
- Shoulders and hips oriented correctly
- Dynamic/interesting
- No foreshortening
- Smooth arcs
- Good trajectory and motion path (plausible distance traveled)
- All anims keyed on each pose
- Arms in FK (do not pose them in IK)
- For Turn-In:
- Research sheet (digital copy)
- Planning sheet (digital copy)
- Maya file with the poses
- A playblast with CV curves
- A playblast without CV curves
- Poses