Tutorial: Image Composition using Photoshop
Basic Concept
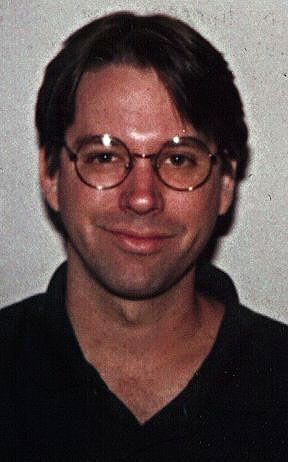
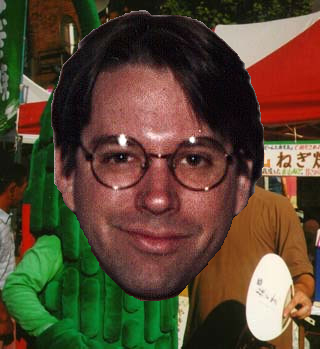
By image composition we mean the process of extracting one or more objects from different images and putting them together, perhaps with a novel background, to synthesis a new image. In the Intelligent Scissor project, you create a useful tool that allows a user to cut an object out of one image and paste it into another. For example, we can replace Prof. Hertzmann's face on the left image with Prof Curless' face in the middle; the composite image is on the right.
 |
|
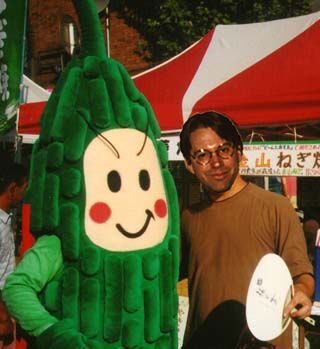 |
| Prof Hertzmann in Japan | Prof Curless in Sieg | Prof Curless in Japan |
Description
The techniques behind the composition is very simple. There basis steps involved are: image segmentation, shape transformation, color adjustment.
Image Segmentation
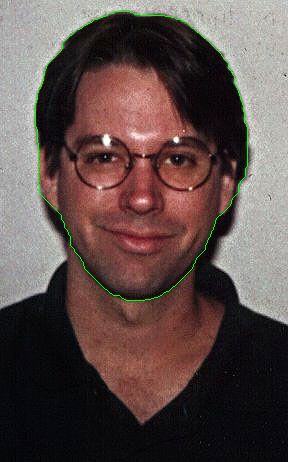
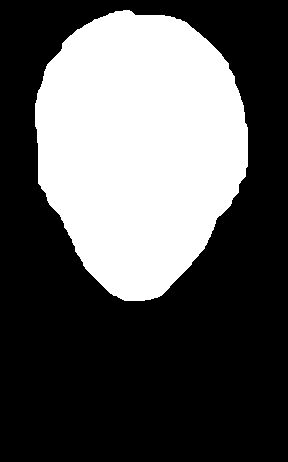
Image segmentation can be achieved by using your Intelligent Scissor tool. After you finish a closed contour in the scissor tool and choose "save mask" menu item, you will get a binary mask image, in which the segmented objects in the contour (including the contour) is white and other regions are black. Taking an example of Curless' case, the contour and mask are show below:
|
|
|
When you composite this image onto a background image, the white mask pixels indicate which pixels should be drawn over the background, and black ones indicate which should not. The same principle applies to compositing more than two images, where multiple images (each one has a mask) are drawn onto a background in a predefined order; each mask decide which part of the image should be drawn over the background and images drawn previously.
You can do this mask based operation in Photoshop easily, where each image may consist of several layers.
- Open a background image, a foreground image and a foreground mask image in Photoshop.
- Create a new layer, layer 1, for your background image. Copy the foreground image to layer 1 of the background image. To create a new layer, choose layer-->new-->layer menu item.
- Create a mask for layer 1 of the background image by clicking the New Layer Mask button (leftmost button) at the bottom of the Layers palette. Alt-click the layer mask thumbnail. Copy the foreground mask image to the layer mask.
Then you should be able to see the following picture. The first problem is the sharpness of the edges; you may wish to apply a small Gaussian blur to the mask. The next problem is the original face size does not match the one in the background and they are not aligned either. We need to do some shape transformation.
|
|
Shape Transformation
The goal is to rotate and scale the foreground image so that Curless' face match Hertzmann's face. This is easy to do in Photoshop. You can select the layer 1 (by ctrl+A) and rotate and scale it (by first selecting edit-->transform-->rotate/scale and interacting with the mouse) until Curless' face is aligned with well with Hertzmann's face. Make sure the mask and foreground layers remain linked, or only one will be transformed! Try holding the shift key wile scaling to maintain the correct aspect. During the rotating and scaling, you may find some mask pixels along the outside boundary of the mask images become white. You can fill them black by a right click and choosing the fill menu item. After the transformation, you should see an image like the one below:|
|

Color Adjustment
After the shape transformation, the result is much better. However, the face is still sticking out of the background. One reason is that the color of Curless' face is different than Hertzmann's neck. One way to improve this is to change the color balance of layer 1. You can achieve this by choosing "image-->adjust-->color balance" in the menus and changing the R, G, B balance for Curless' face (for this to work, unlink the mask and foreground). Then you will see the better result shown below.
|
|

When carrying out any of the operations, please make sure that you are working on the proper layer. You can choose which layer to work with by selecting appropriate items in the Layers palette.
Others
These are just basic steps to do simple image composition in Photoshop. Photoshop is a powerful tool and has many features. You can refer its help menu for more information, or ask us the TA.
Last modified on March 28, 2003