Welcome to Classroom
Presenter!
[Note: This document refers to older
versions of Classroom Presenter. For the
latest version, please visit this site. A more recent guide is here.]
Hardware Requirements
At a minimum, you will need a Tablet PC running WindowsXP connected to a computer projector. To hide toolbars and navigation controls from the projected display and to take advantage of instructor-only notes you will need an additional computer (desktop, laptop, or Tablet PC) connected to the projector. To allow the instructor to move about the classroom while still controlling the presentation, you will need wireless connectivity (an inexpensive base station works nicely for this). If your classroom already has wireless coverage then a base station may not be needed. To take advantage of Presenter's student interaction features, students will need laptops with wireless connectivity or Tablet PCs running WindowsXP.
Presenter Controls
Presenter's main toolbar is described below. Tooltips are enabled, but holding the pen still enough to invoke them takes some practice. If the pen for your Tablet PC has an eraser (e.g. Toshiba Portege) this will erase ink strokes as well.
![]()
Creating Presentations
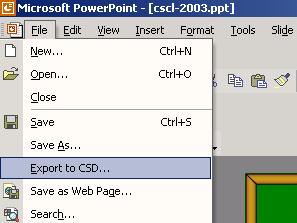
Presenter uses the conferencing slide deck (.csd) file format. You may create csd files using a convenient PowerPoint Add-In (available for OfficeXP):
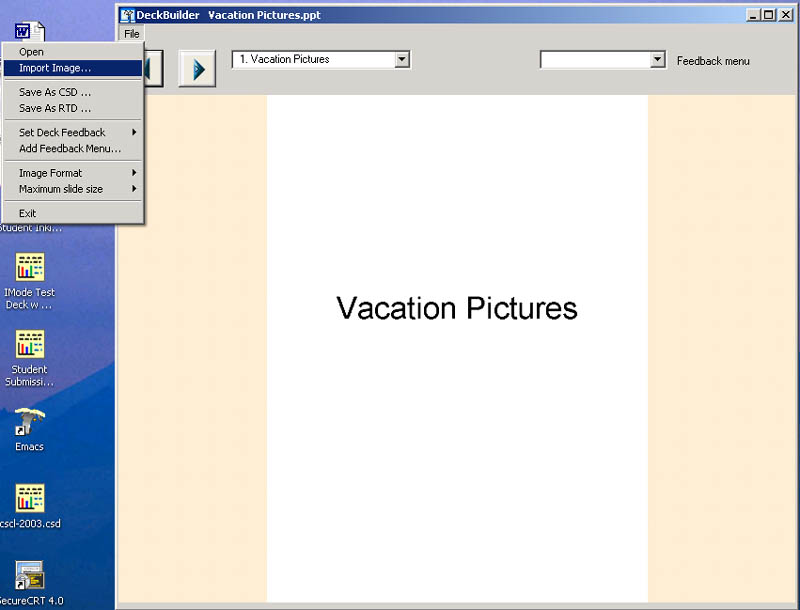
or using the DeckBuilder application found in the ConferenceXP program group:

Deckbuilder (available for OfficeXP or Office 2000) accepts PowerPoint presentations as input or it allows you to import images (bitmap, jpeg, gif, tif, png) directly into your .csd file. PowerPoint presentations in landscape or portrait mode can be converted into .csd files.
Getting Started
You may start Presenter from the ConferenceXP program group (shown above) or by double clicking a .csd (conferencing slide deck) file. After connecting to a classroom and connecting a projector to your presentation, you are ready to begin presenting!
[It is also possible to hook your Tablet PC directly to the video output without using a separate computer for the projector. Select the Full Screen option on the View menu, or use Alt+F11 to use this.]
Navigating your Presentation
Presenter starts up with a film strip view of your entire presentation showing to the right of the main slide window. The width of the film strip view may be adjusted by selecting the left edge of the film strip. The film strip view may be scrolled using the rightmost scrollbar. The film strip may be hidden by unselecting it on the view menu. The film strip may be aligned to the left or bottom of the main slide window by selecting film strip alignment on the view menu.
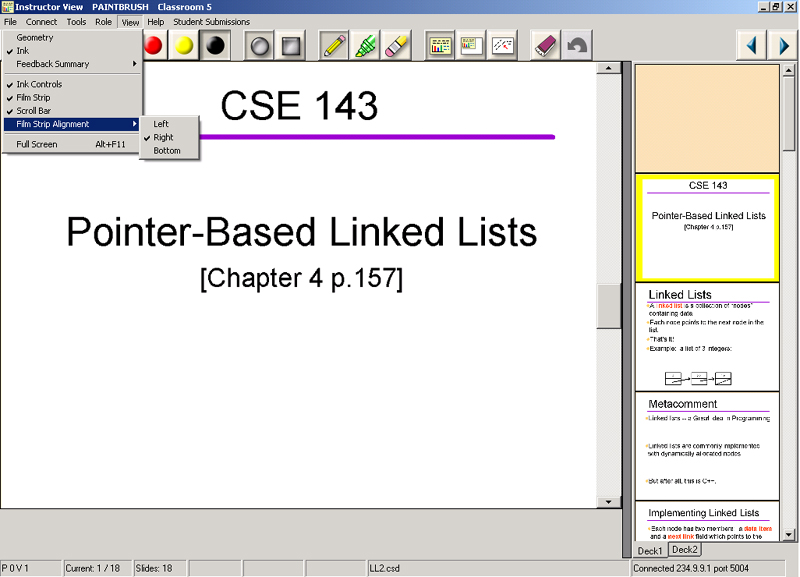
The yellow box in the film strip view indicates which slide is currently selected for display on the projector display. You may select a slide for display either by clicking on it in the film strip view or by using the advance slide arrows found at the top left and right of the screen. (Up and down buttons on most Tablet PCs are not currently configured to advance to the next or previous slide.)
The orange slide that appears at the beginning of every slide presentation
is a blank whiteboard slide. You may display the whiteboard either by
clicking on it in the film strip view or by selecting the whiteboard button ![]() from toolbar You may return to the last slide you visited by
hitting the full
from toolbar You may return to the last slide you visited by
hitting the full ![]() or minimized
or minimized ![]() slide view
button or by clicking on a slide directly in the film strip view.
slide view
button or by clicking on a slide directly in the film strip view.
Slide Previews
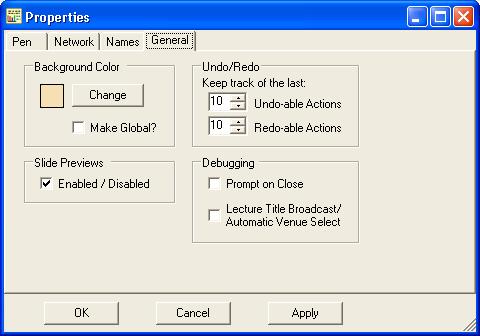
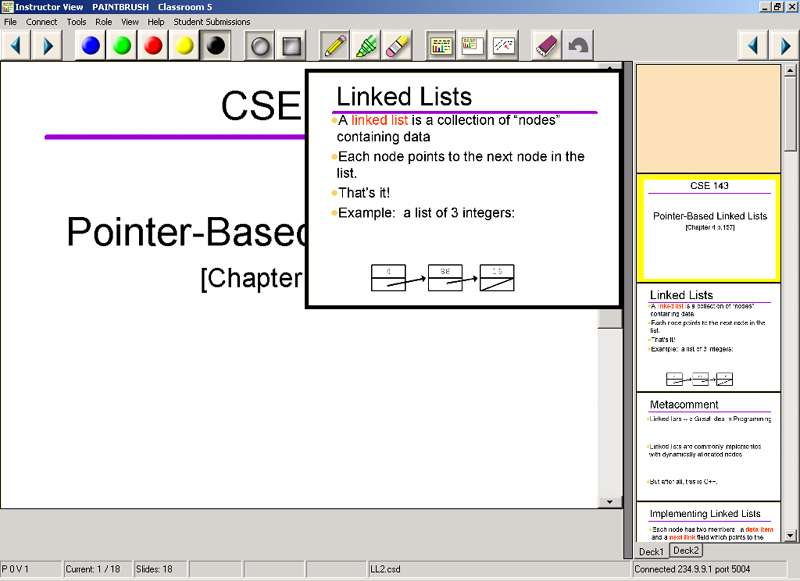
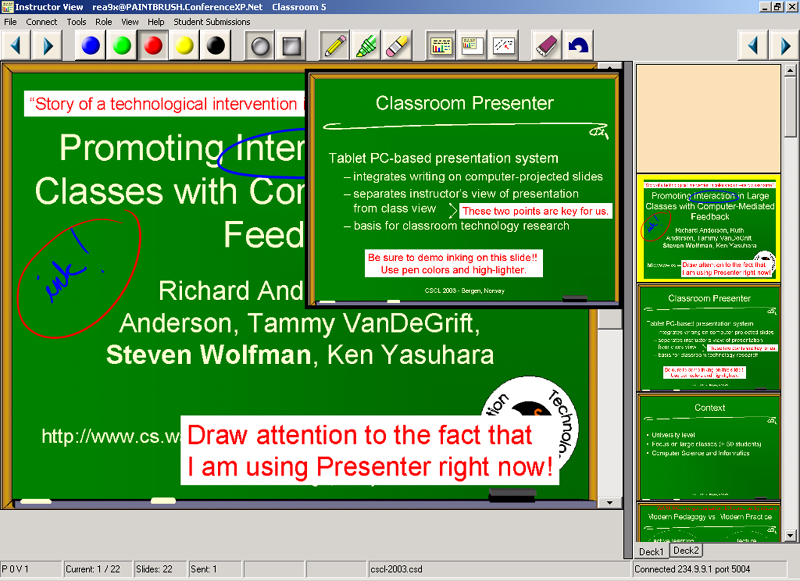
Hovering the pen over a slide in the film strip will cause a larger preview of that slide to appear temporarily. You can make the preview disappear by touching it with the pen. You may disable slide previews by unselecting the check box on the General tab of the Properties form (found on the Tools menu).
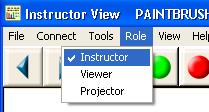
Instructor, Projector, and Viewer Roles
An instance of Presenter can be in one of three roles:
- Instructor - There should be one instructor controlling the presentation from a TabletPC.
- Projector - There may be one or more projectors displaying the slide selected by the instructor and any associated ink. This view is intended to be displayed on a machine connected to a computer projector.
- Viewer - This view is intended to be displayed on individual student devices (laptops, TabletPCs), if present in the classroom.
Select a role for an instance of Presenter from the Role menu:
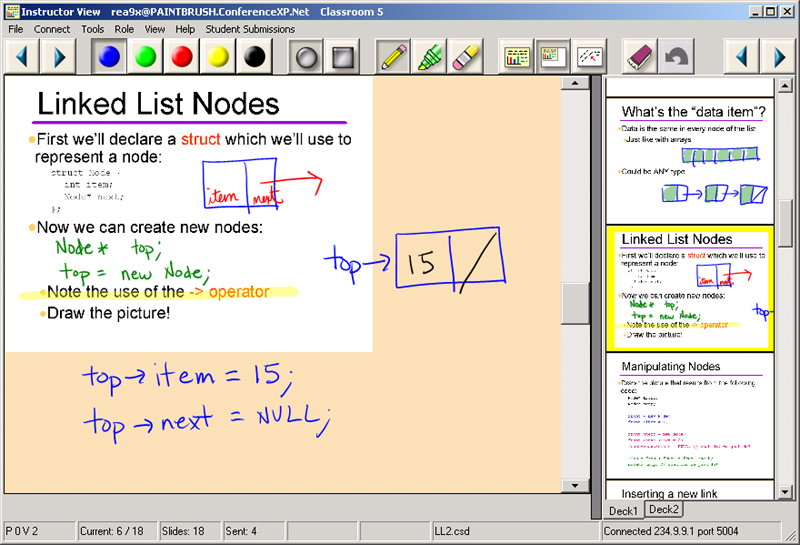
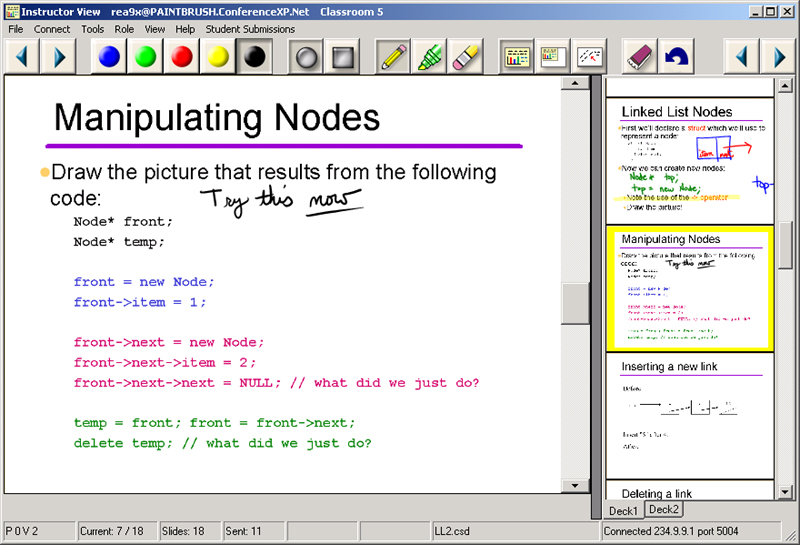
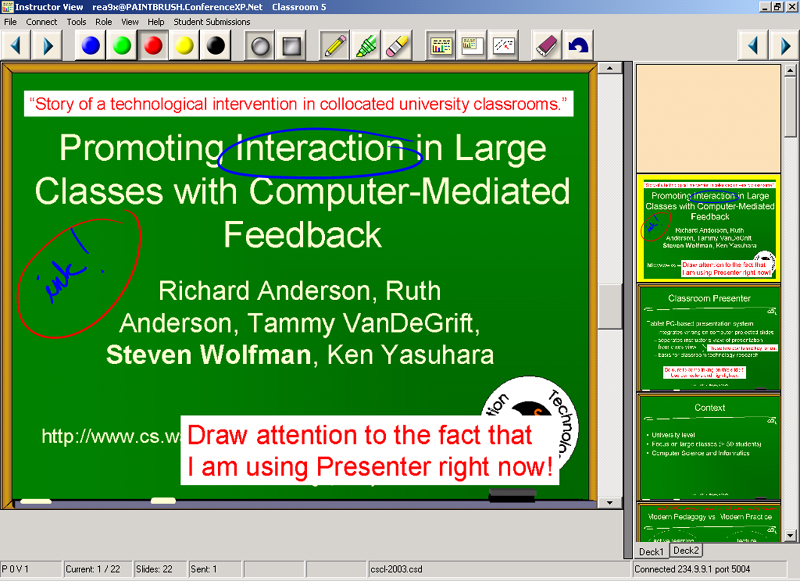
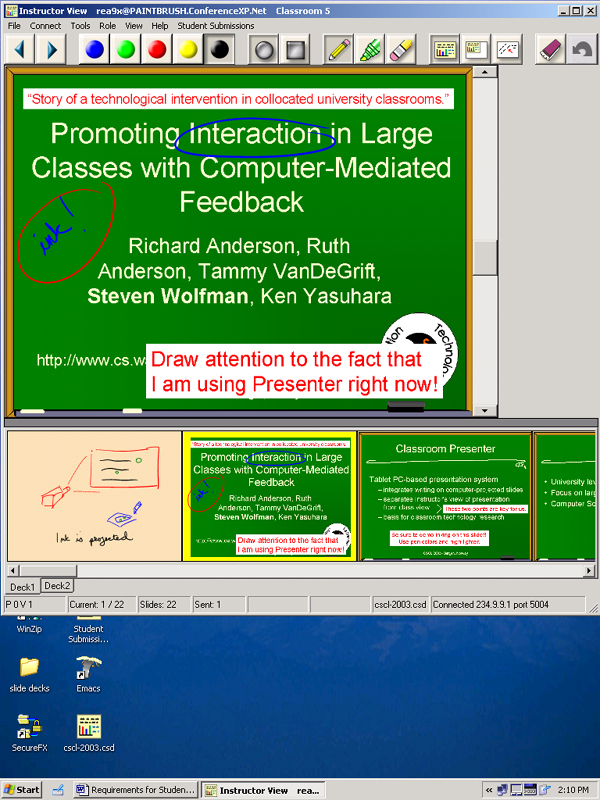
Below are sample views for the different roles. In this example, the instructor has minimized the view of the current slide to allow extra space for writing. The instructor's ink and slide transitions are transmitted both to the projector display and to instances of Presenter running on individual student devices.
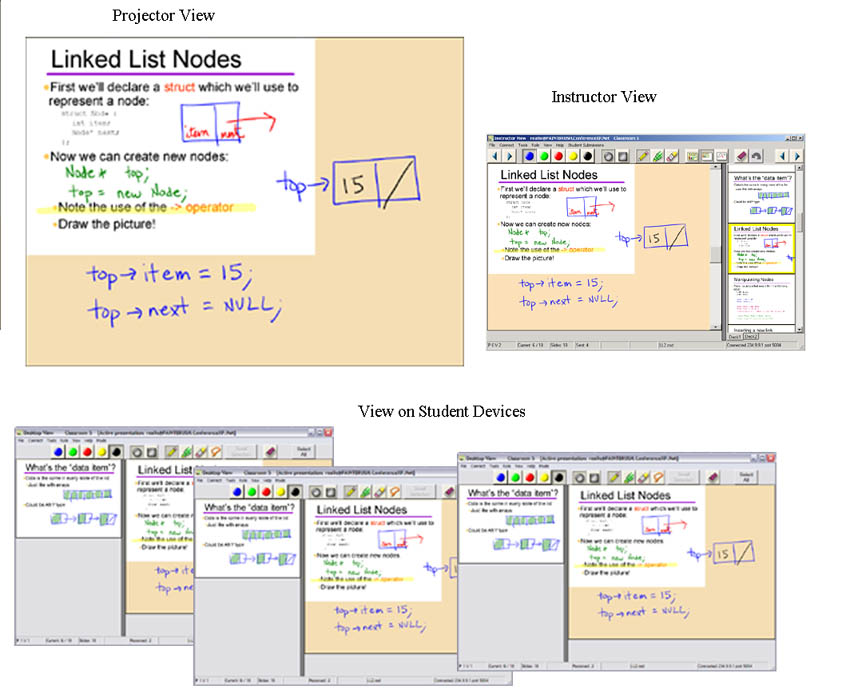
Instructor View:
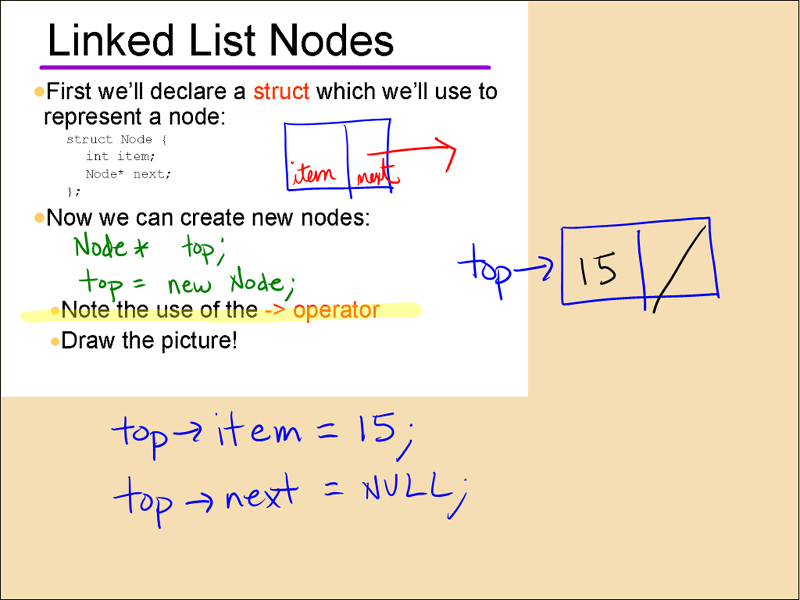
Projector View:
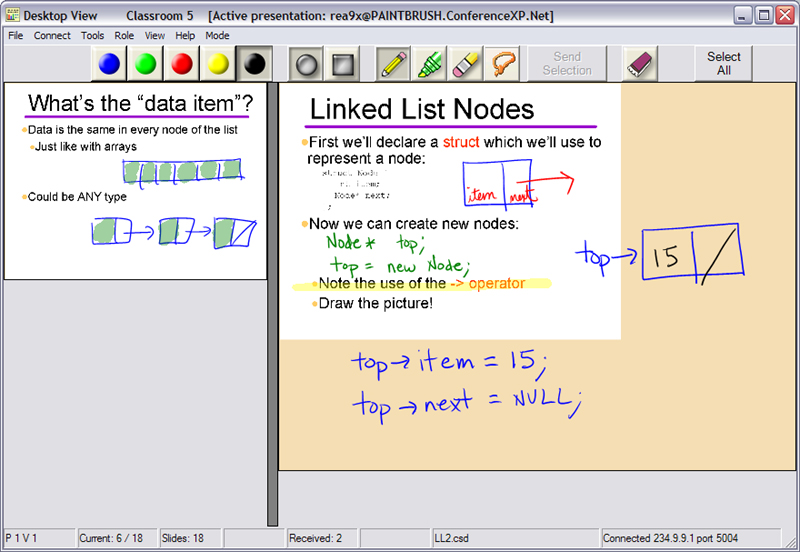
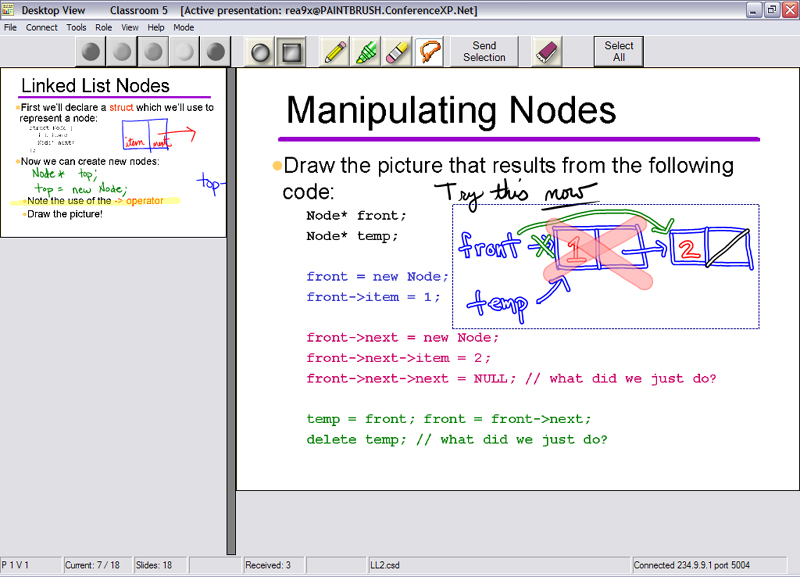
Student View: The student or desktop view displays the current slide (in the main window) and the slide that was last visited by the instructor (in the upper left).
Student Inking Activities
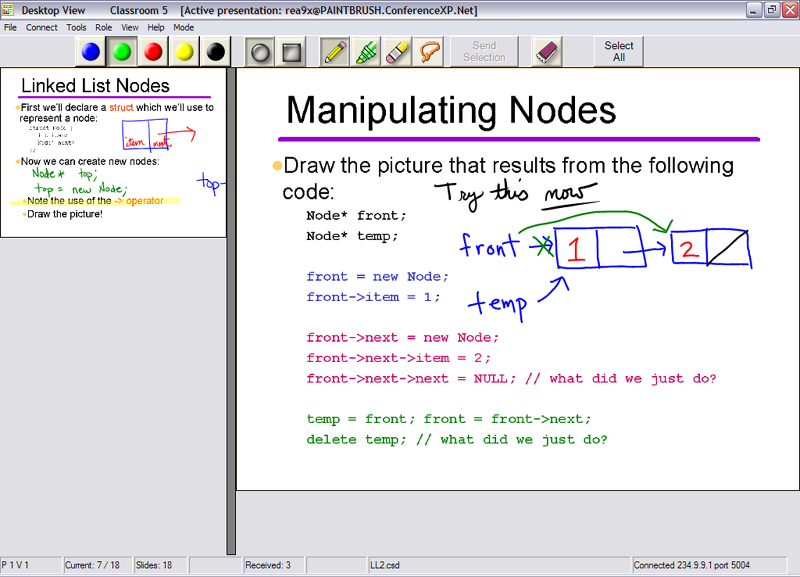
If you have wireless connectivity and students have Tablet PCs, then you may have them use their tablets to actively participate in the classroom. The instructor can use a slide from their slide deck or the whiteboard to initiate a classroom activity. In this case the instructor has prepared an exercise ahead of time and instructs students to draw a picture for their answer. Other classroom activities could involve drawing or labeling diagrams, doing mathematical calculations, highlighting portions of a slide, or modifying the contents of a slide or whiteboard.
Students can write on their Tablet PCs using the same inking controls available to instructors as shown in the student view below. The student has drawn their answer using blue, red, and green ink.
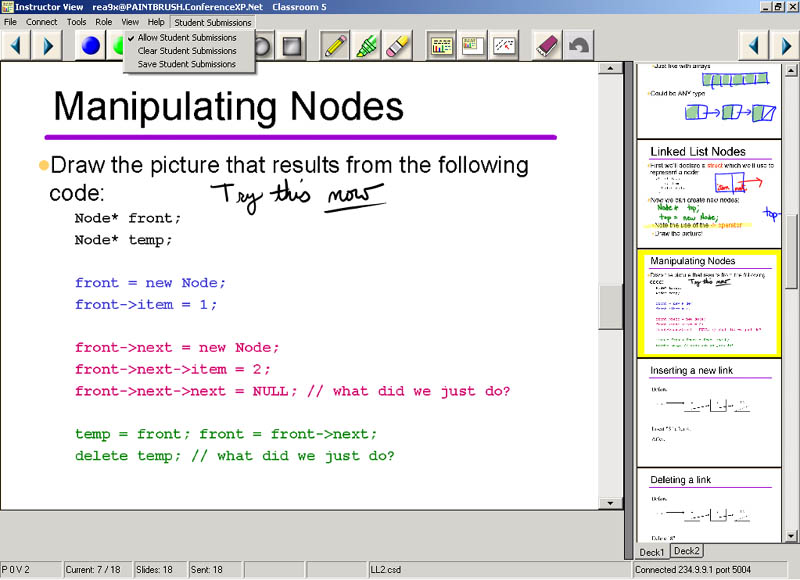
Instructors enable students to submit their work by selecting this option on the Student Submissions menu:
Students select and submit their ink to the instructor:
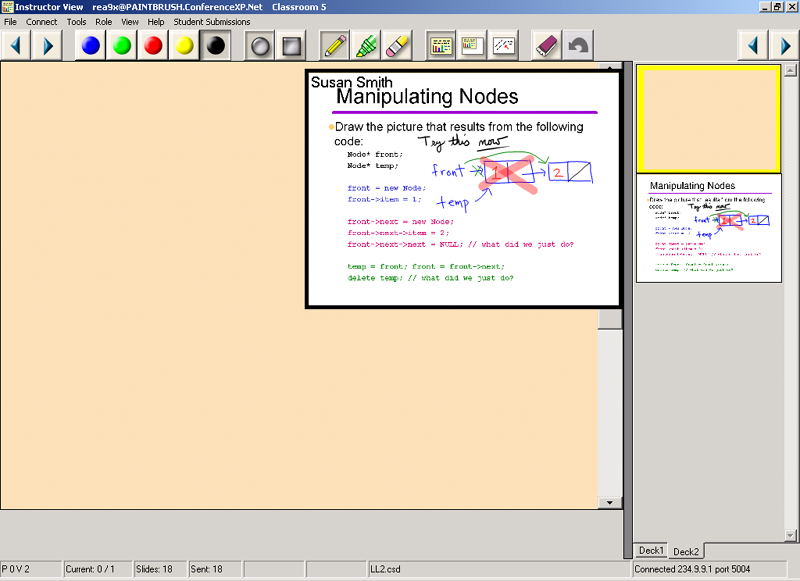
The instructor views student responses in deck 2. Hovering the pen over a student response in the film strip view will give an enlarged preview that also displays the student's name.
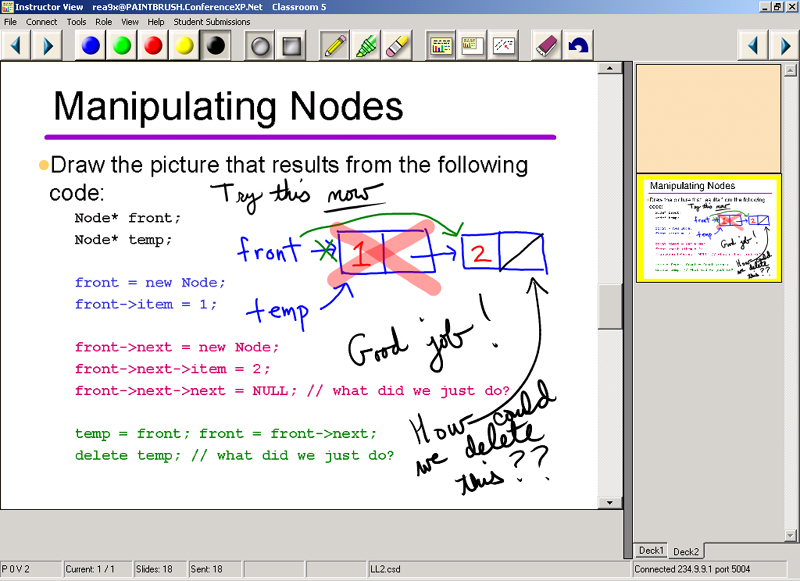
Clicking on the student response in the film strip will display the student response on the projector view. Student identity is not displayed on the projector view. The instructor can write on the student response with the pen as with any slide in the original presentation:
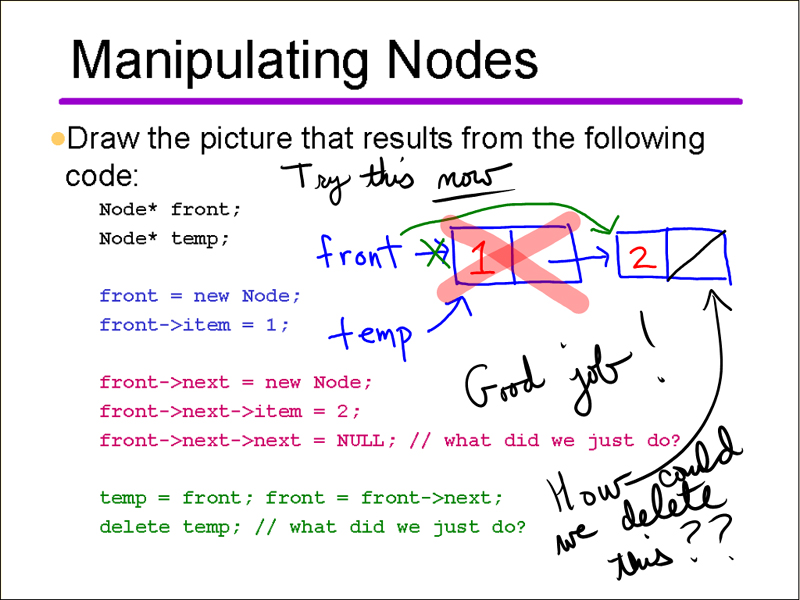
The projected view:
Instructor-Only Notes
Using a PowerPoint Add-In, instructors can add notes to their slides that will only be visible in the instructor's view (never on the student or projected view).
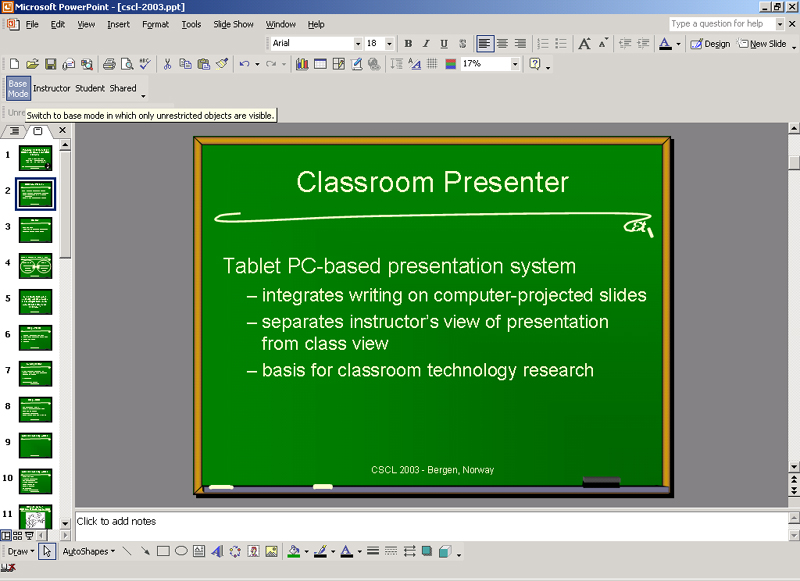
Toggle to show instructor-only notes:
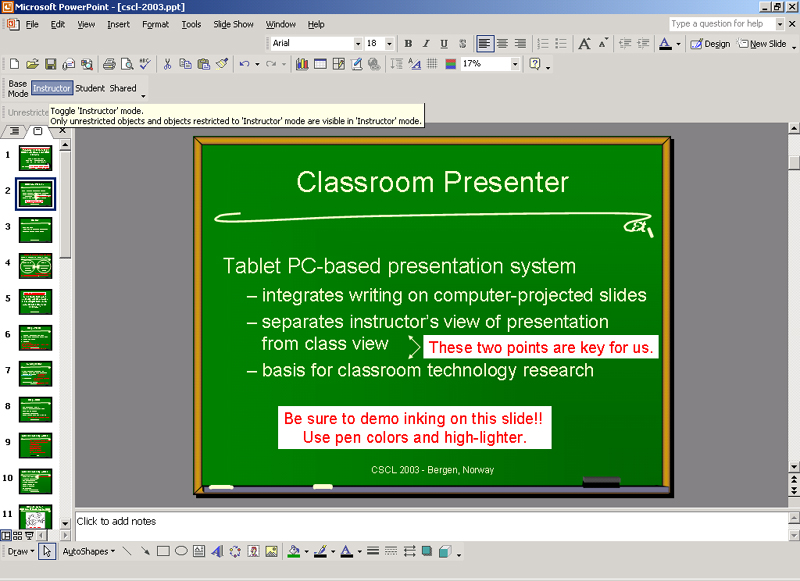
When you load the .csd file in Presenter, instructor only notes will be visible to the instructor only. You may ink on slides with instructor-only notes just as you would with any other slide:
Instructor-only notes are visible in the filmstrip view and in slide previews:
Instructor-only notes never show up on the student view or the projector view (shown below):

Tablet PC in Portrait mode
Presenter can be used in any screen orientation possible with the Tablet PC. Here the Tablet PC is shown in portrait orientation. Presenter is shown with the film strip aligned with the bottom of the screen.
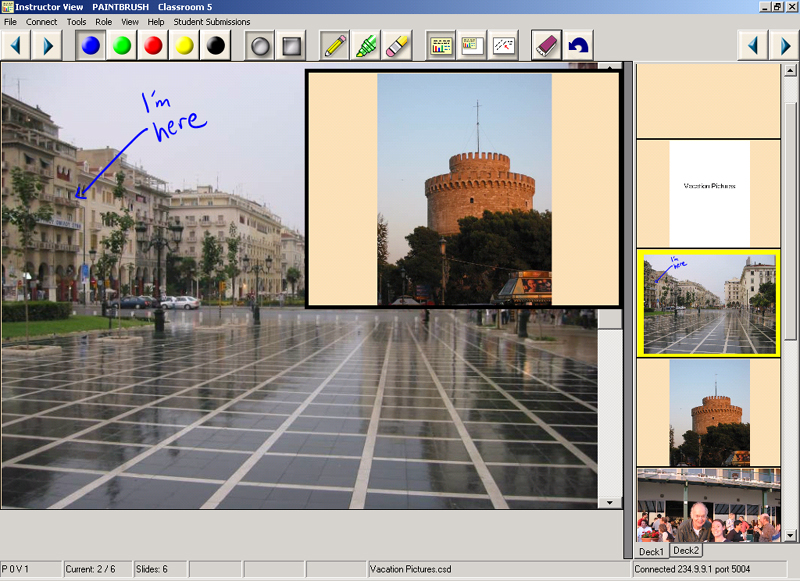
Use DeckBuilder to Create Presentations from Image Files
You can use DeckBuilder to add image files (bitmap, jpeg, gif, tif, png) directly to a presentation.
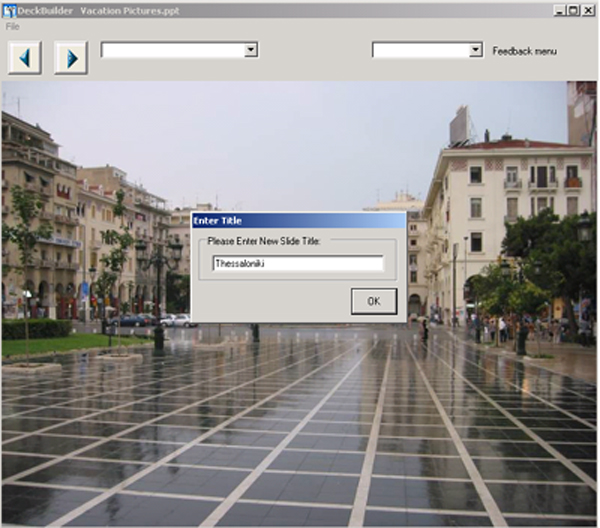
After saving your presentation as a .csd file, you can open it up in Presenter and write on slides just as you would any other presentation.
Personalized Settings
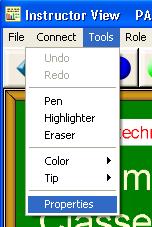
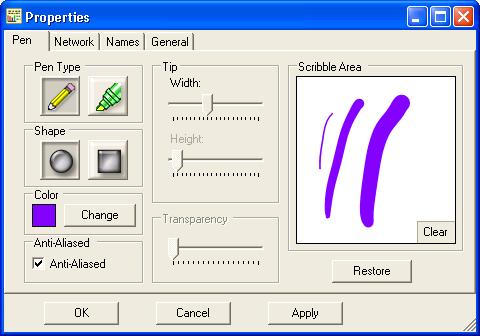
You may adjust many of Presenter's features using the Properties form found on the Tools menu:
Pen color and tip shape can be customized:
Whiteboard color, slide previews, and the undo feature can also be customized: