Shading Networks: Burning Log
Ok so now we are going to create a node network that goes over some of nodes talked about earlier. There are two very important things to realize when building a network. First of all, you start building the network very basic and slowly make it more and more complex. Second, It is very important to know what most of the nodes do and what they can be used for. This part can only be by trail and error, so I recommend spending time out and just playing inside maya with node networks. Another thing to mention is that for this tutorial I am going to be starting applying the texture to a sphere then later appling it to a log.
-
Step 1: Create the basic material
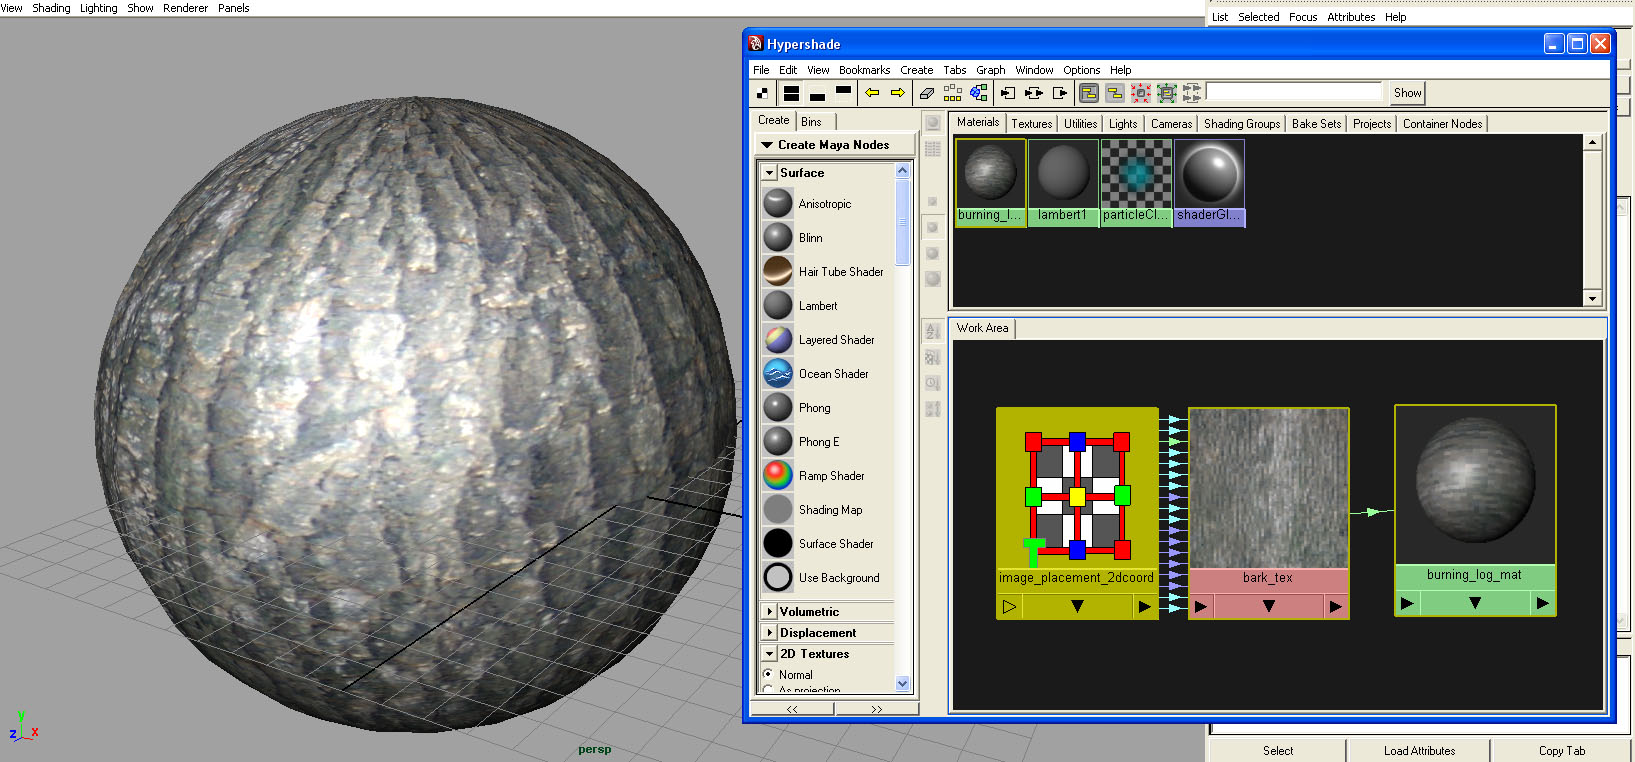
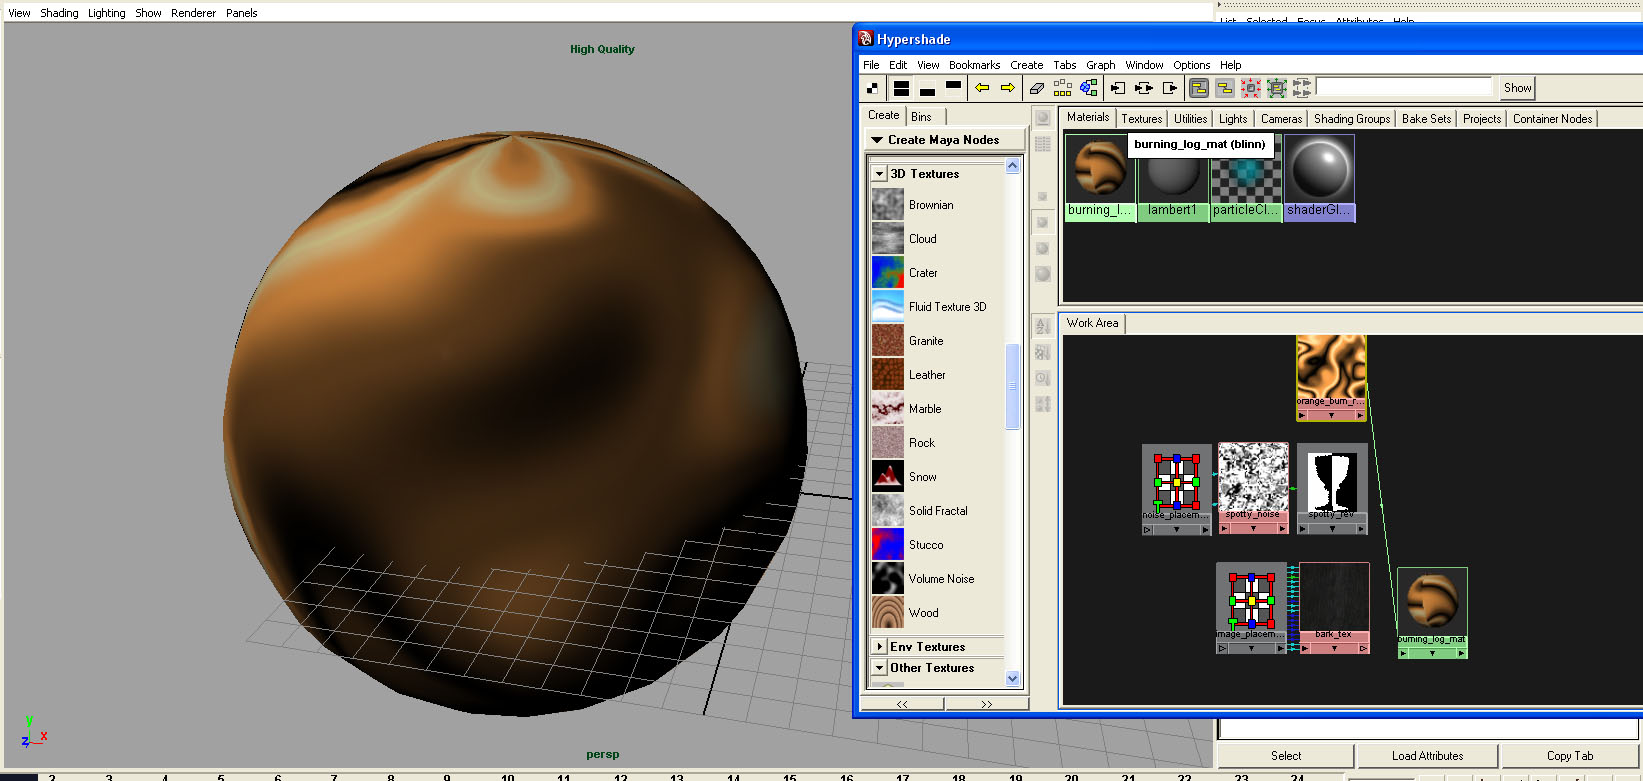
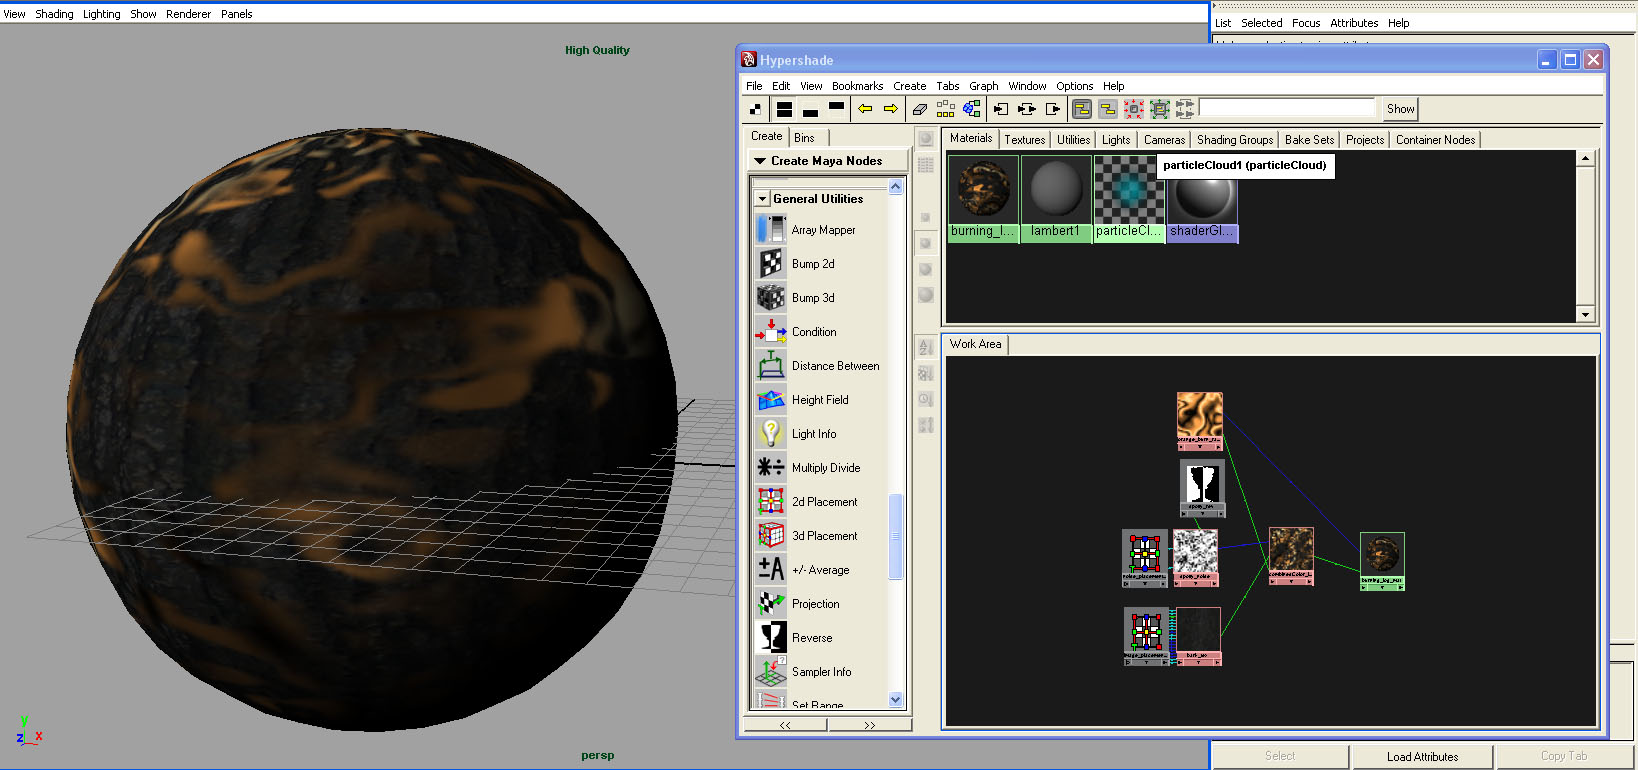
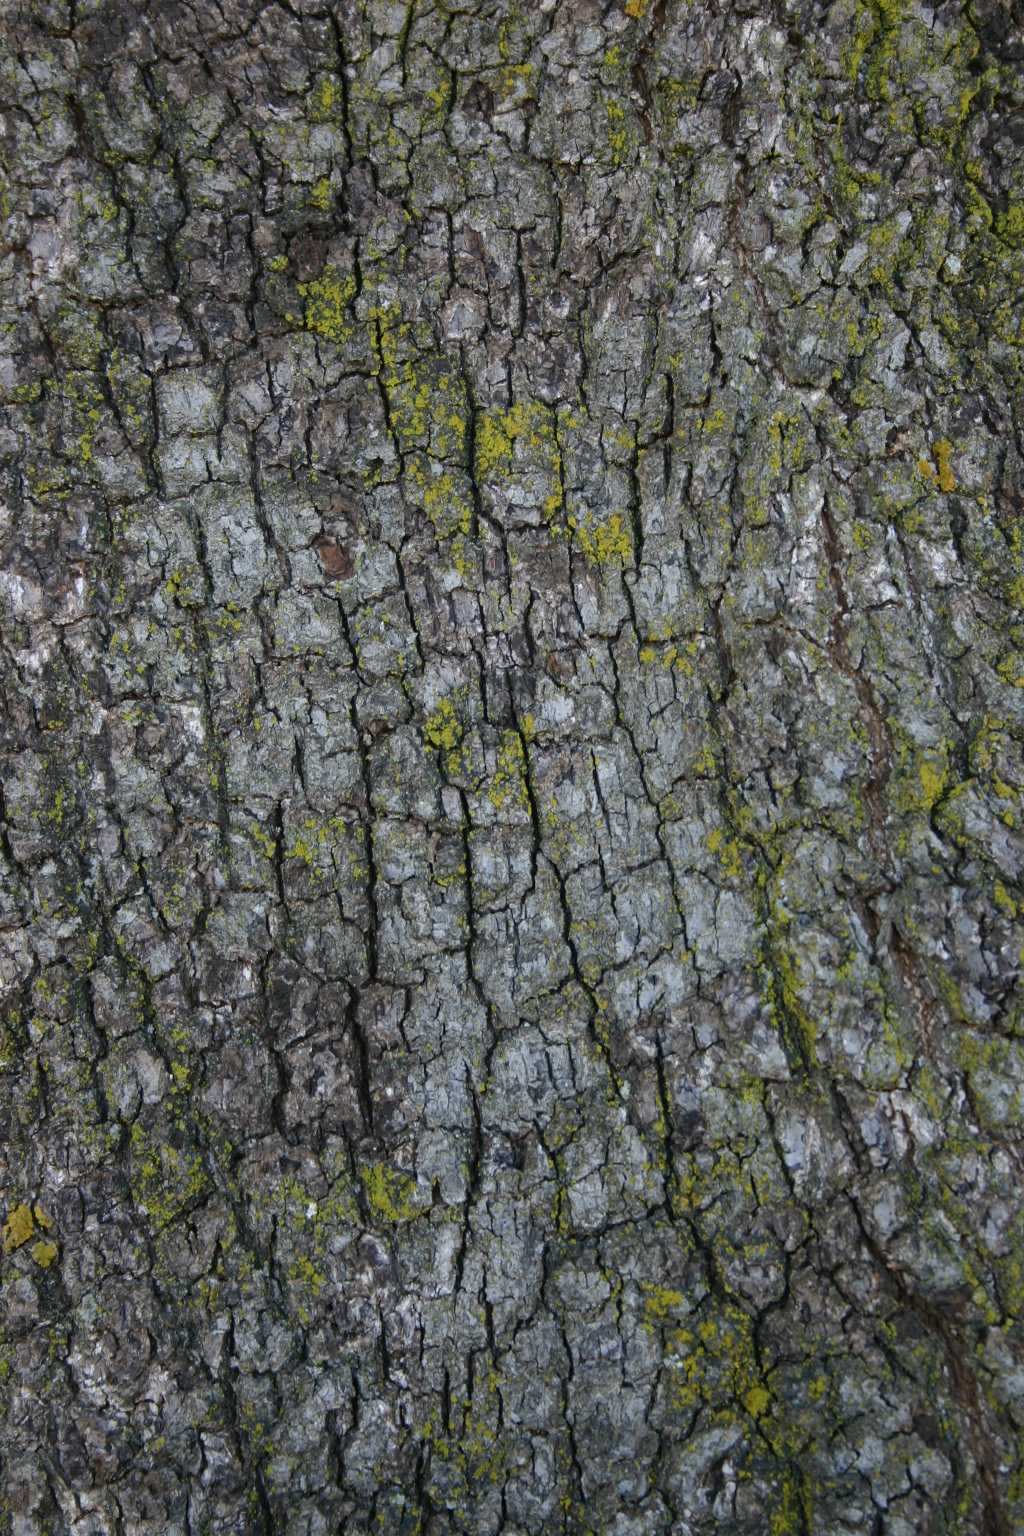
Let's start. First we need to create a material and apply to a log. Open the hypershade, and create a new blinn material in your work area. Rename the blinn material "burning_log_mat". I always try to keep the last part of node name to let the viewer know which type of node it is. Ok now I am going to apply a basic texture to material's color. This is all that I am going to do for the first step. In the attribute editor click the input button(looks like an arrow). A pop up window opens. Make sure the normal is checked and select file. You can download the file here. By creating the texture through the menu we get the added bonus of a 2d placement node and having the texture already hooked up to the node. Rename the texture node "bark_tex". rename the placement node "image_placement_2dCoord". Apply the material to a polygon sphere. Now we have the bare minimus for a material.
If you ever loose your network you can simply click on the material and press the "input output connections" button in the hypershade toolbar.
It is always helpful to have a solid naming convention when creating shading networks so you know what each node does and if you ever have to make changes later.
-
Step 2: Material Attributes
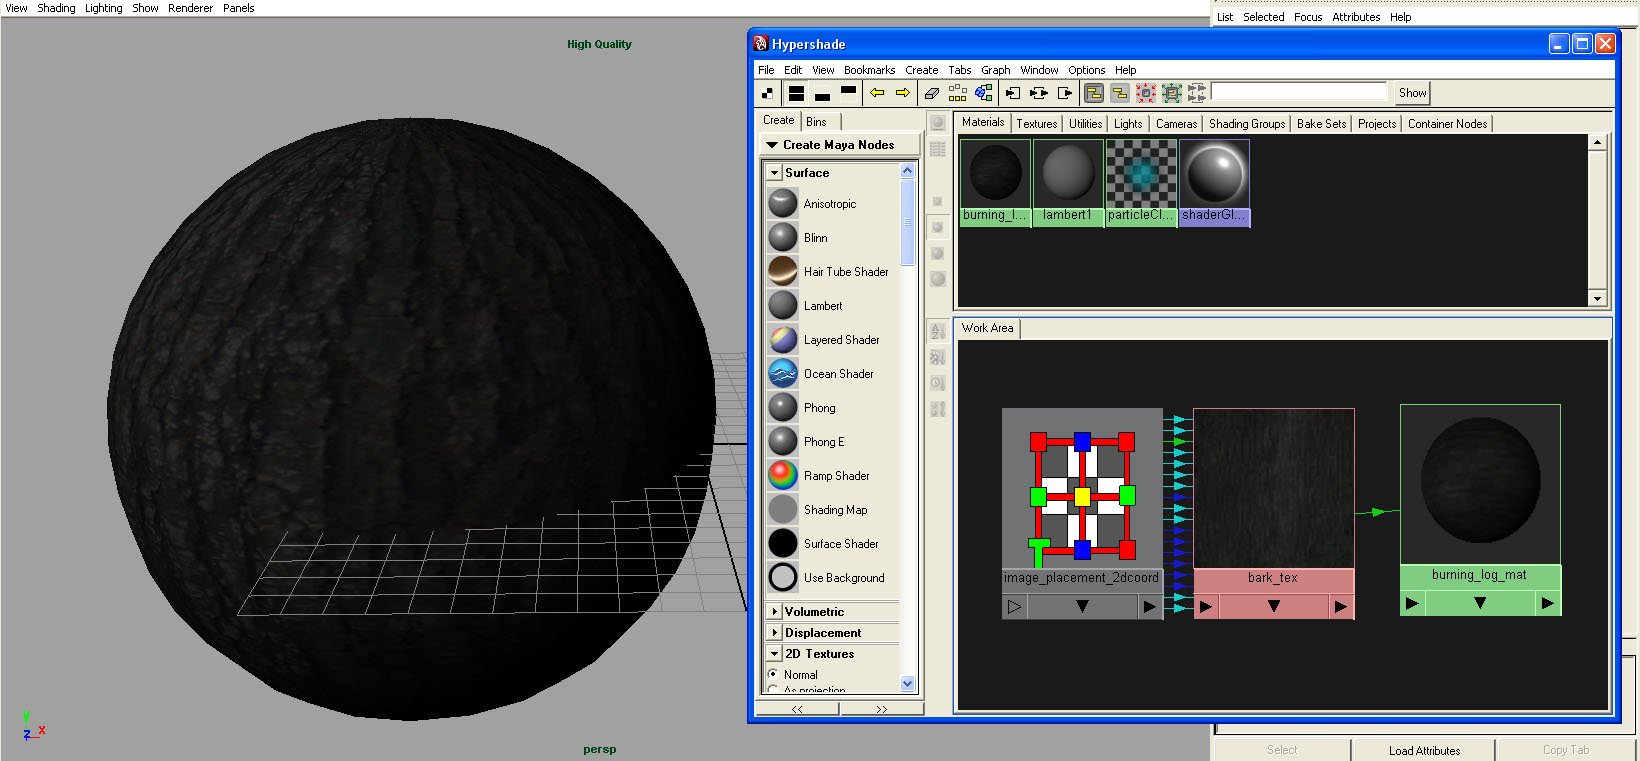
Well if we look at what we have so far, we can tell it is wrong. First of all it isn't burning yet, but beofre we get into that. That material so far is a bad base. This is because our material is too shiny and doesn't look like wood. To fix this lets change some material attributes. This is suppose to be burnt wood but we have a huge specular highlight. If we lower the eccentricity and specular roll off, we will get a better looking wood. Eccentricity is the size of the highlight and specular roll off is how the light rolls across the surface. I am also going to be lowering the reflected color. This is because we want this wood to be almost coal. The last problem we are going to tackle in this step is the color. This wood doesn;t look like it has been burnt. If we go to the attributes of bark_tex and open the color balance tab, there is an option called color gain. lower this color to a dark grey. Color gain is the same idea as the addition node. We are just adding a constant color throughout the texture. Now we should have a better looking burnt wood texture.
You can turn on higher quality rendering when viewing in a perspective camera. In the view's menu under render section turn on "high quality rendering". The words High quality will display over the pane. This is almost needed for complex networks.
-
Step 3: Network Start
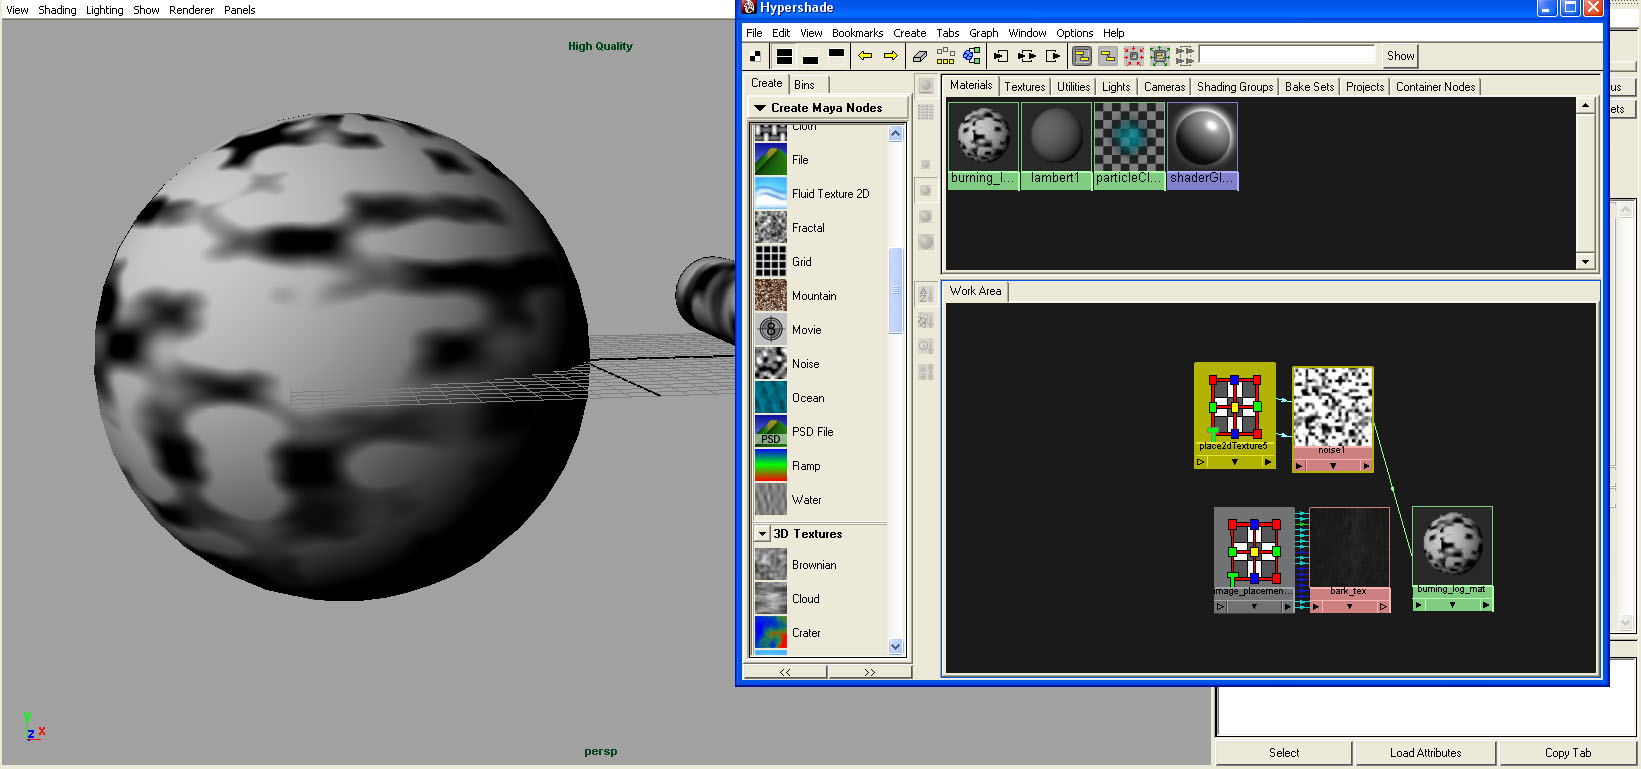
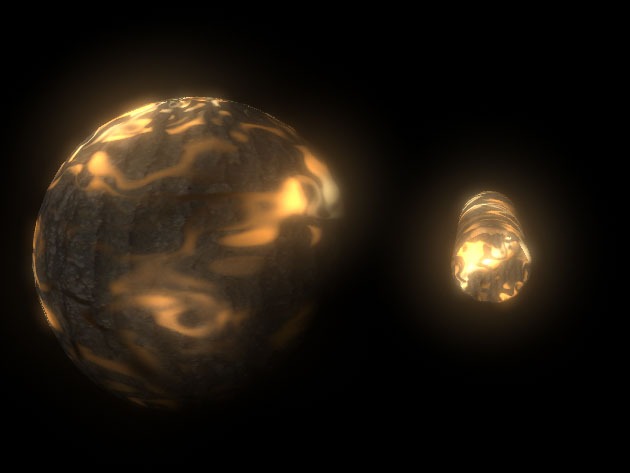
Now we can start to create the network. First we have to thing of what we want. Here is some reference that I used. If you notice, the flame or burning is stationary, and forms lines inbetween dark spots. Lets start by creating some dark spots that the flame can go inbetween. Ok to make this texture I am using a 2D noise node. I want a blochy texture so I know that I need some attributes I need to change. I incresed Density and spottyness. Density on mine is 7! Then I just adjusted some of the attributes enough by trial and error. I did notice that I was going to get white spots and dark lines, the opposite of what I wanted but I can change this latter. I also applies the output of the noise node to the color of the material so I could see the updates on the object. I also connected a 2D placement node to the noise and increased the repeat U and V to 3. so it would look more dense. Rename the noise node "spots_noise". Rename the 2D placement node "spots_placement_2dCoord". When you are done connect the color of the texture back to the material.
Always try to find reference when making textures it really does help!!!
-
Step 4: Inverse Spots
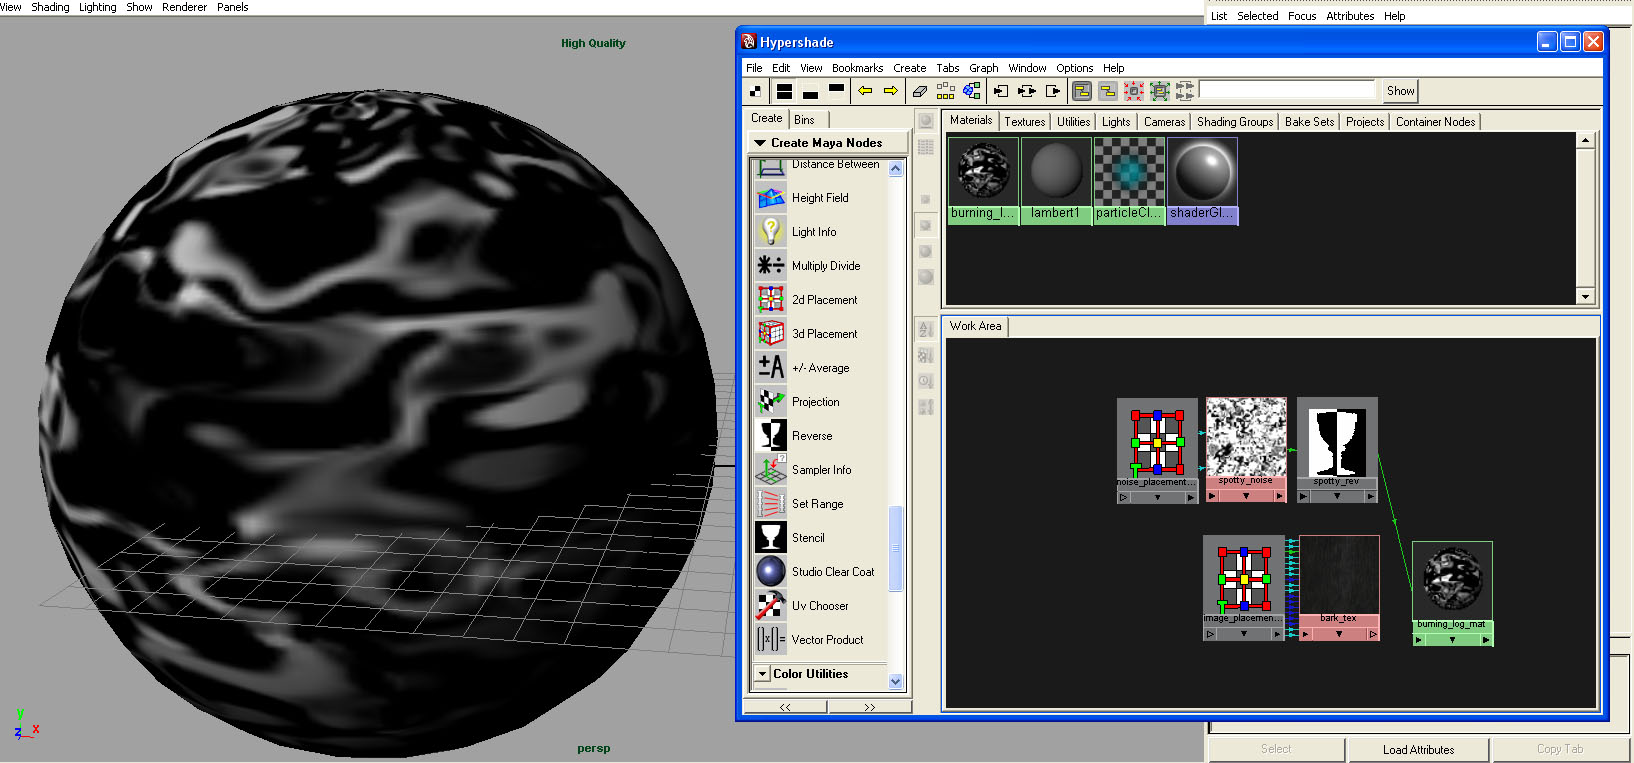
Now we are going to make the spots reversed. As mentioned my spots are white and the lines are black. We need to inverse the colors to match our reference. This is pretty simple create a reverse node. rename this node "spot_reverse". Connect the outColor of the noise to the input of the reverse node. Now connect the output of the reverse node to the color of the shader. You can see that now spots are black and the lines are white. Much better :)
If you accidently loose track in the hypershade and can't find a texture you created you can find it in the upper tab called texture.
-
Step 5: Orange Burn
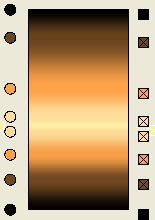
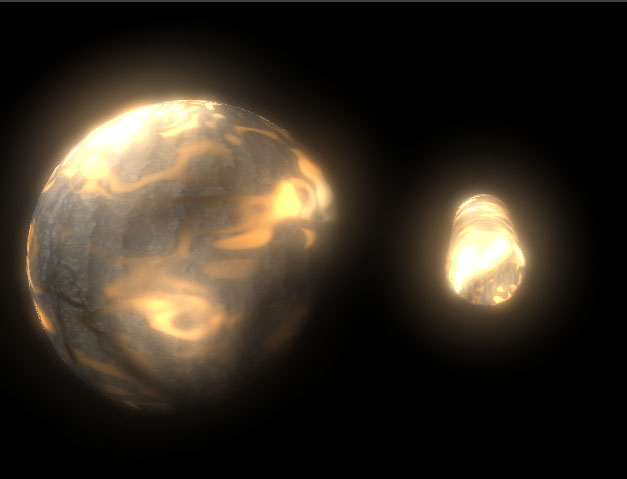
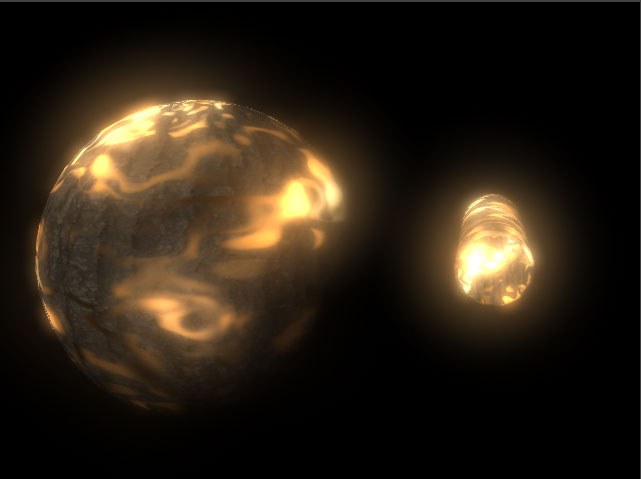
Now that we have the wood texture, the black spots we should create one more texture before we combine them. The burning wood. If you look at the reference, the burn is orange, you should also notice that it is not constant. To create this texture I am going to use a ramp. Once I created the ramp, I added values that went from black(no burn), to a high orange(burn), back to black. This will be the main burn.
Ramps are great for many simple things get to know them well.
-
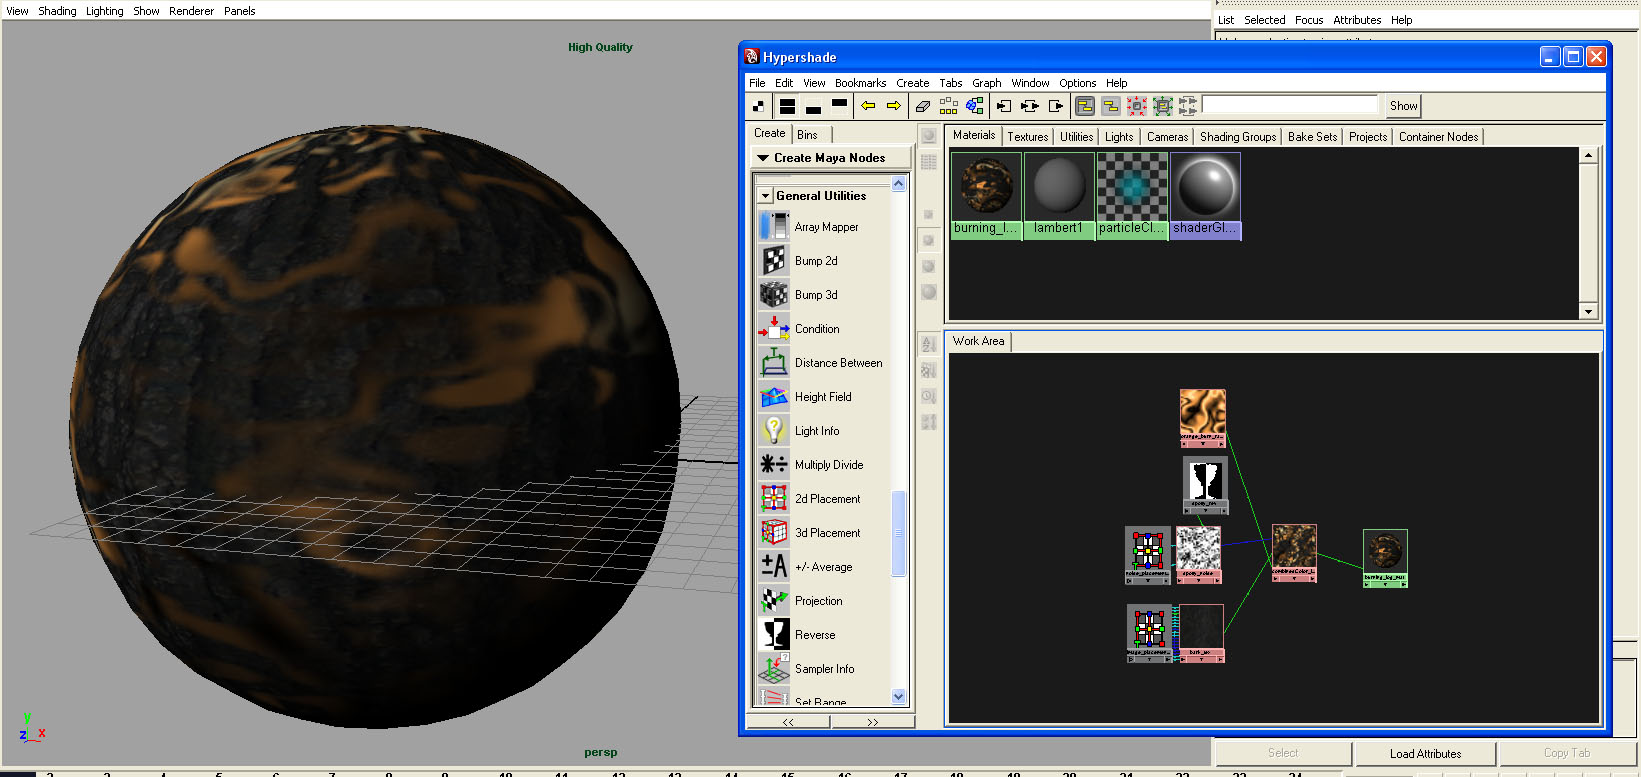
Step 6: Texture Combination
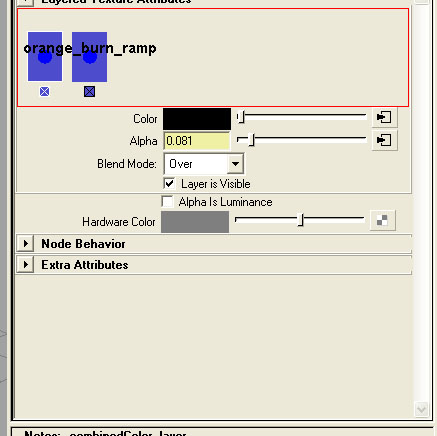
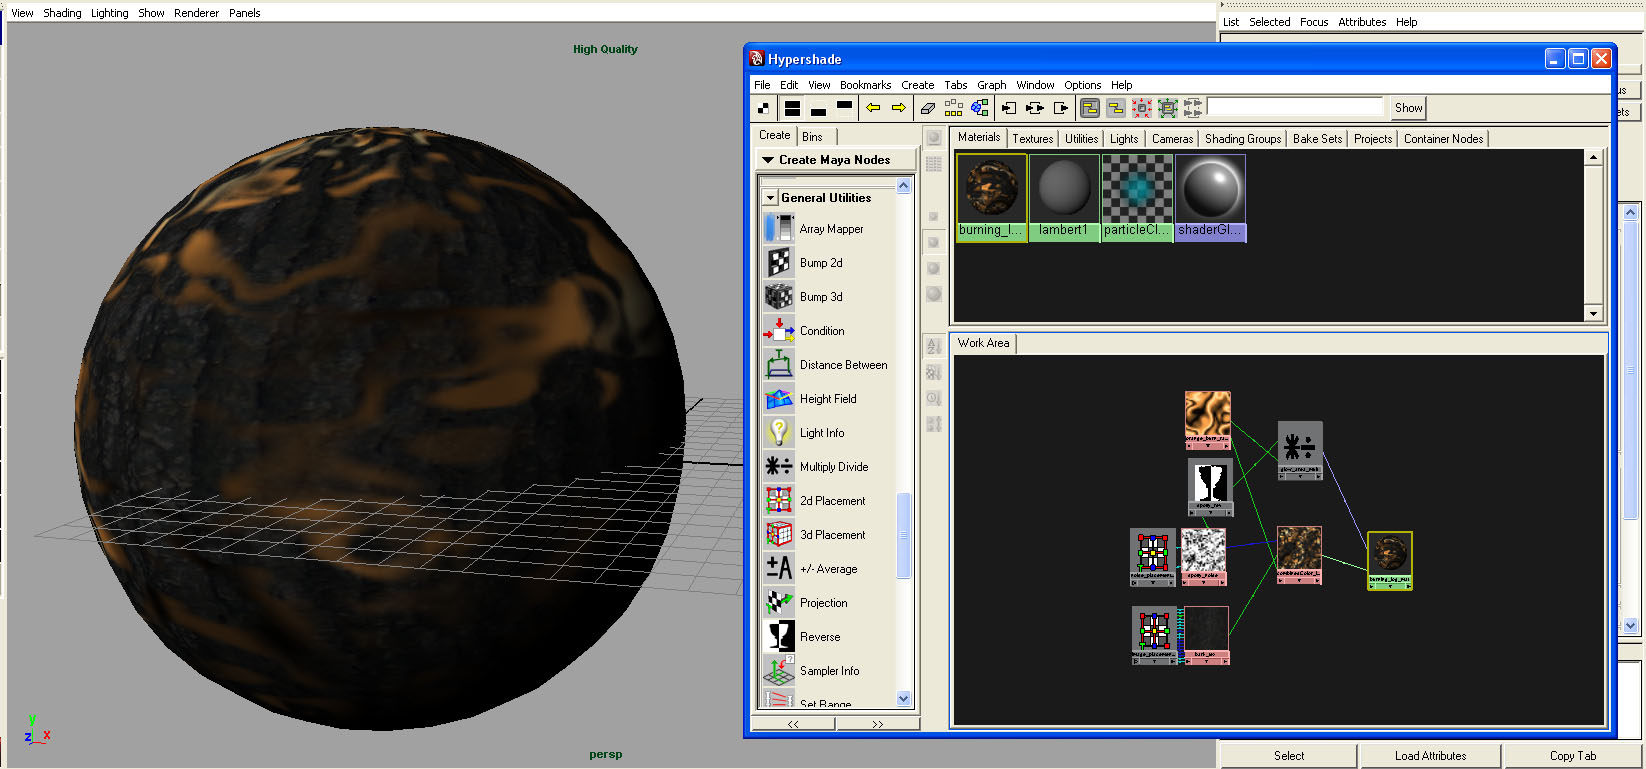
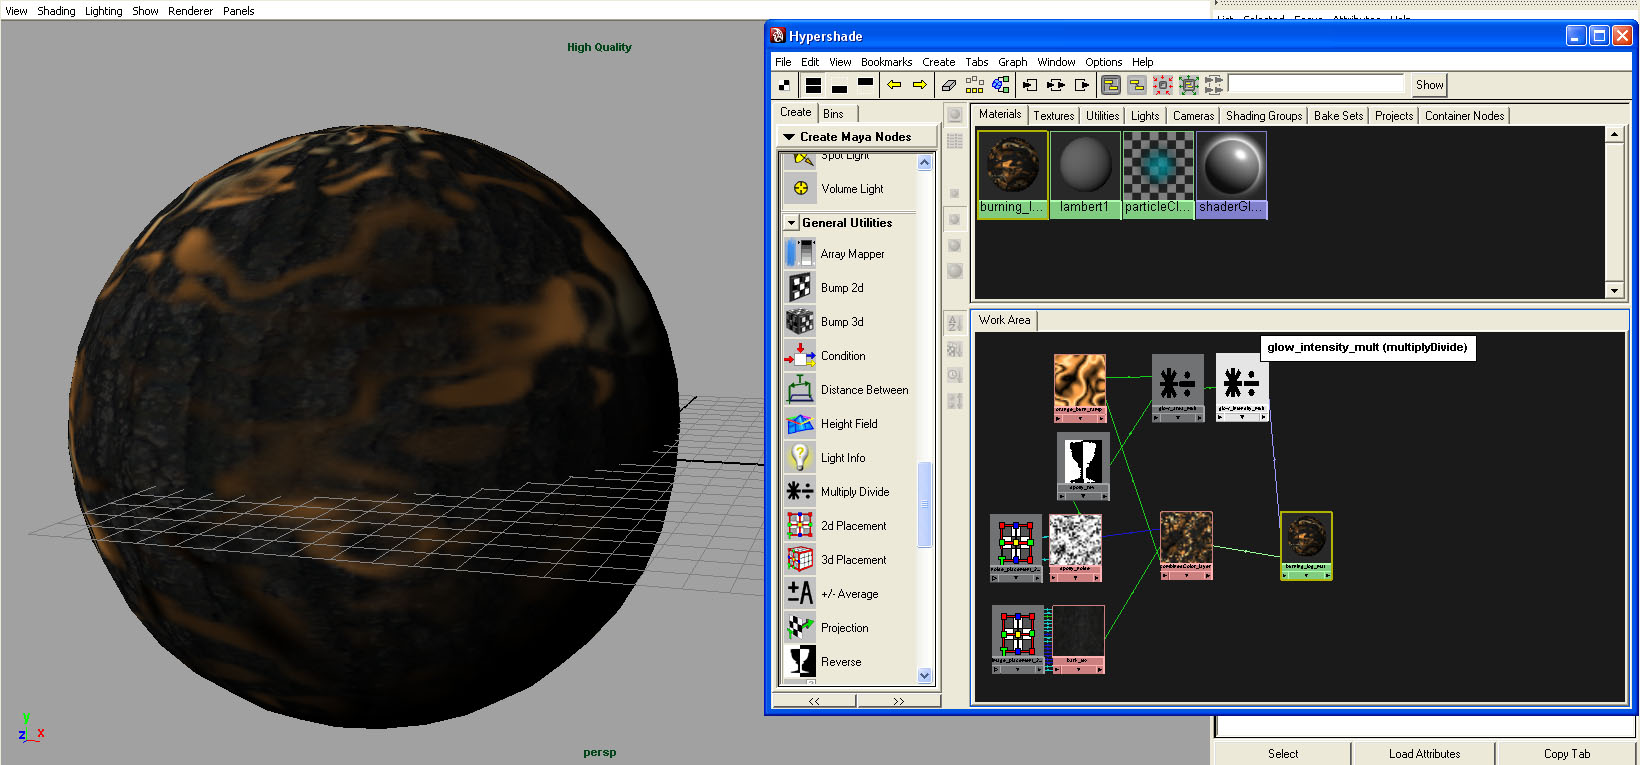
Now we need to combine our three textures. If we think as the textures as layers it may become easier. We know the bar is on top and the burning orange is underneath. The way the wood is cut out is by the spots. Ok because we are thinking of it as layers, this tells me that we should use a layered texture node. This node is like layering textures in photoshop. After creating the layered textures node middle mouse drag both textures into the red box in the attribute editor. Delete the default green texture. The order here is very important. Make sure the bark texture is first and the burn is second. Connect the layered texture into the color of the material. If you notice that there is a alpha channel for blending between the two textures. In alphas black is see through, white is solid. After thinking about it this is the noise texture we created, not the reverse. Connect the noise.outalpha to the layered textures.inputs[1].alpha (assuming that inputs[1] is your bark texture). The reverse node is pointless at this point but I am going to keep it because I think I might use it later. Rename the layered texture "combined_color_layer".
Be careful that you use layered textures and not layered shader. Layers shader is the same as layered textures but works on materials instead.
-
Step 7: adding glow
if we look at the reference again, we will notice that the wood is glowing. To get this correct we need to figure out where the glow is happening. If you remember our ramp, this was the purpose of it, to display the glow(burn). Lets connect the ramp to the glowIntensity of the material. connect orange_burn_ramp.outColorG to burning_log_mat.glowIntensity. If you do a render, you should notice that the glow is not taking into account that the wood should block some of the glow. We will fix this problem in the next step.
I use the green color for glow because Maya's calculation for highlights and brightness is taken mostly from the green instead of red or blue.
-
Step 8: Glow Area Created
We need to reduce our glow area. The glow should not be going through the wood. We need to combine the spot color and the burn color. White is glow and black is not glow. So we need to make the spots black. This can be done with a multiply node. If input1 is the orange_burn_ramp and input2 is the black spots or the spotty_rev. I knew it would come in hand. The output from the multiply node should be the wanted glow area. rename the multiply node "glow_area_mult".
I used a multiply node instead of add because It would add black to the areas as wanted but it would also make the other area too bright by adding the white. The multiply makes the black areas black and doesn't change the white area.
-
Step 9: Glow Intensity Change
If you look at the reference again you should notice the glow isn't as powerful as the one we have. We need to reduce our glow. To do this we need to change our input. You can use a add/subtract node for this and subtract a number as needed, but I prefer a multiply node. Create another multiply node, rename it "glow_intensity_mult". connect glow_area_mult to input1 and make input2 (.65 .65 .65) in the attribute editor. Now the glow should be much less. If yours is not right adjust the input2 until you get the desired result.
you can see how some networks can get very complex. Make sure you have a good naming convention.
-
Step 10: animating the texture.
If you look at the reference again, you will notice the burn layer isn't static, but so far our material is. Lets change this. If we were to pan the whole texture it would look funny, only the burn layer moves. Furthermore it moves side to side. We can copy this action by using a 2d placement node on our burn ramp. Create a 2d placement node. rename it "burn_placement_2dCoord". We can pan a texture by changing the offset U and V values. If we animate them we can get the illusion that the coal burn is moving like in the video. Make sure the animation doesn't go too fast or slow or it might look fake. I also animated the rotate so the movement wasn't completely linear. animating the glow multiply would help as well.

-
Step 11: Final Adjustments.
You are finished congrats!!!!! The last thing you need to do is make sure that it plays well. Play the animation over until you are satisfies with the results. I lowered my glow, changed the panning pace, let the glow_intensity_mult also go into incadensence and some other small tweaks.